RESOURCES / ARTICLES
How to Connect your Industrial Assets to Google Cloud using N3uron’s MQTT Module
Connecting Google Cloud and N3uron platforms via the MQTT module: Overview
MQTT has become the leading standard in IoT messaging, as it is ideal for connecting to remote devices and of course, it is supported by the Google Cloud Platform IoT. In one of our previous articles, MQTT: The Universal Messaging Protocol for Cloud Providers and IIoT Systems, we explain exactly what MQTT is, as well as everything you need to know about its functionalities, advantages, disadvantages, and how to use it.
OT infrastructures can be connected to GCP via MQTT, allowing access to the entire ecosystem of services and message exchanges between the N3uron application and Google IoT Core. Simply put, GCP IoT Core is the service that receives and routes MQTT messages from edge devices and applications such as N3uron.
This guide explains in detail how to bi-directionally communicate your industrial assets with the Google Cloud Platform’s IoT Core in a secure way using N3uron’s MQTT Client module and thus bridge the gap between OT and IT.
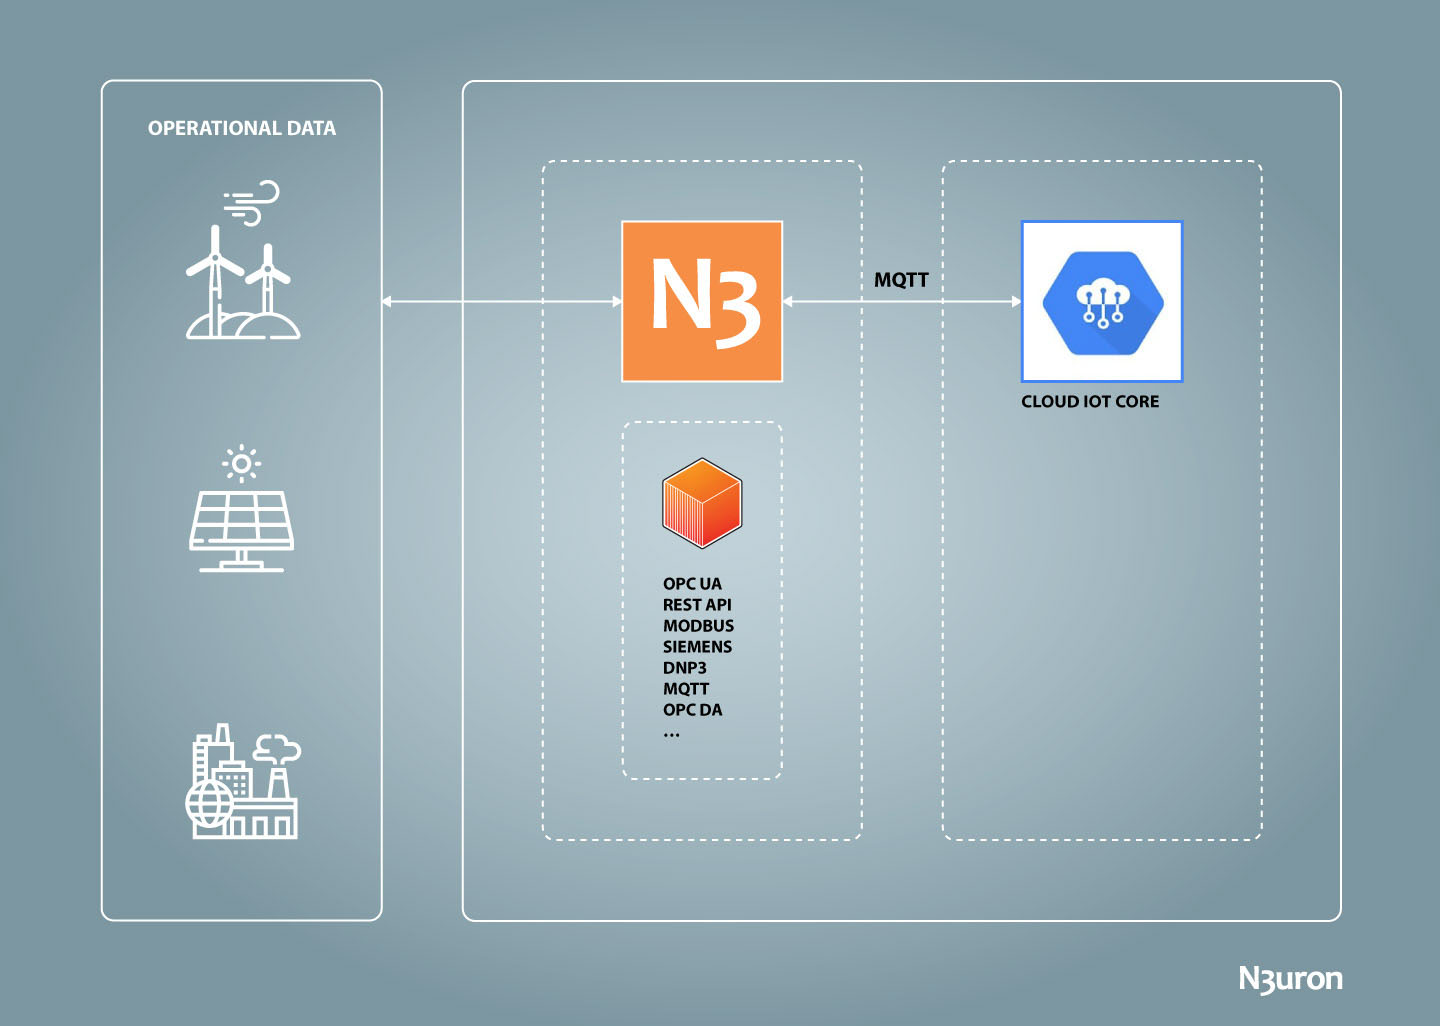
Diagram demonstrating operational data exchange between OT assets, N3uron’s MQTT module, and the Google Cloud platform.
Google Cloud and N3uron Platform IoT Requirements
A Google Cloud Platform account is required. If you don’t already have one, you can register and create one here: GCP Registry.
You should have also pre-installed N3uron on your system. If not, you can download it from https://n3uron.com/downloads/. If this is your first time using N3uron, you should take a look at our Quick User Guide. This guide will introduce you to a basic overview of N3uron, demonstrating its key functionalities and how to use the main modules and characteristics.
Google IoT Core Configuration: First Steps.
First, log in to Google IoT Core and open the Google Cloud Console. Once you have logged in, you’ll need to create all the resources required for establishing a connection and exchanging messages.
Log into Google IoT Core Platform and Create a Registry
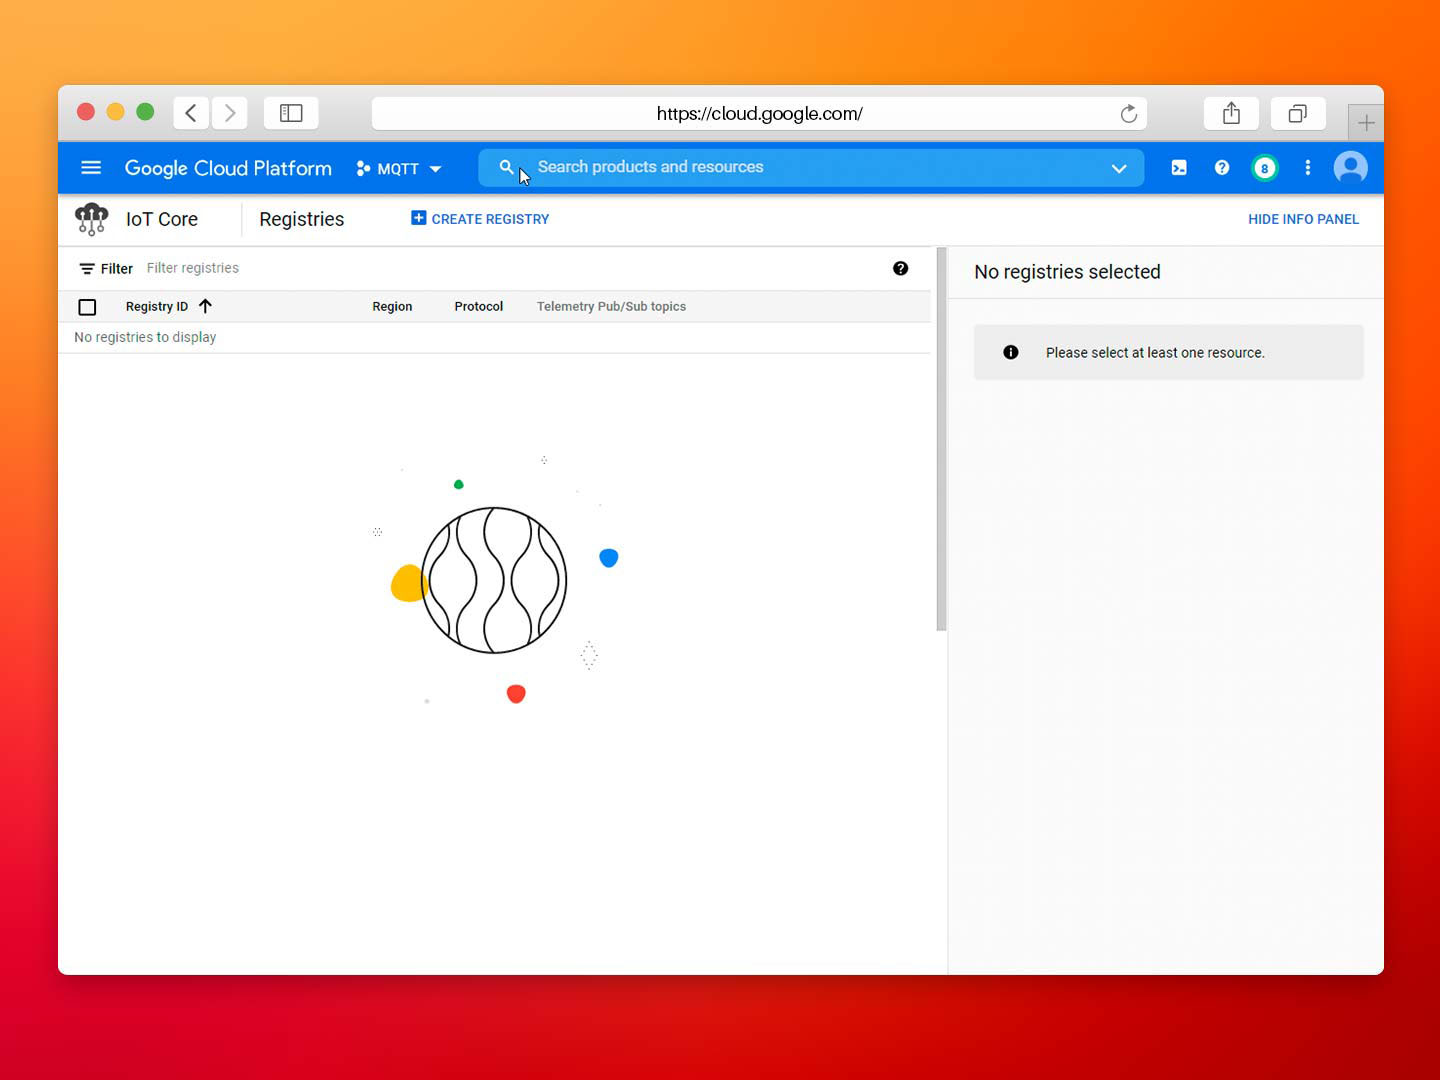
- Step 01: First, create a new registry, as shown in the below image.
Screenshot displaying the Google Cloud platform IoT Core panel.
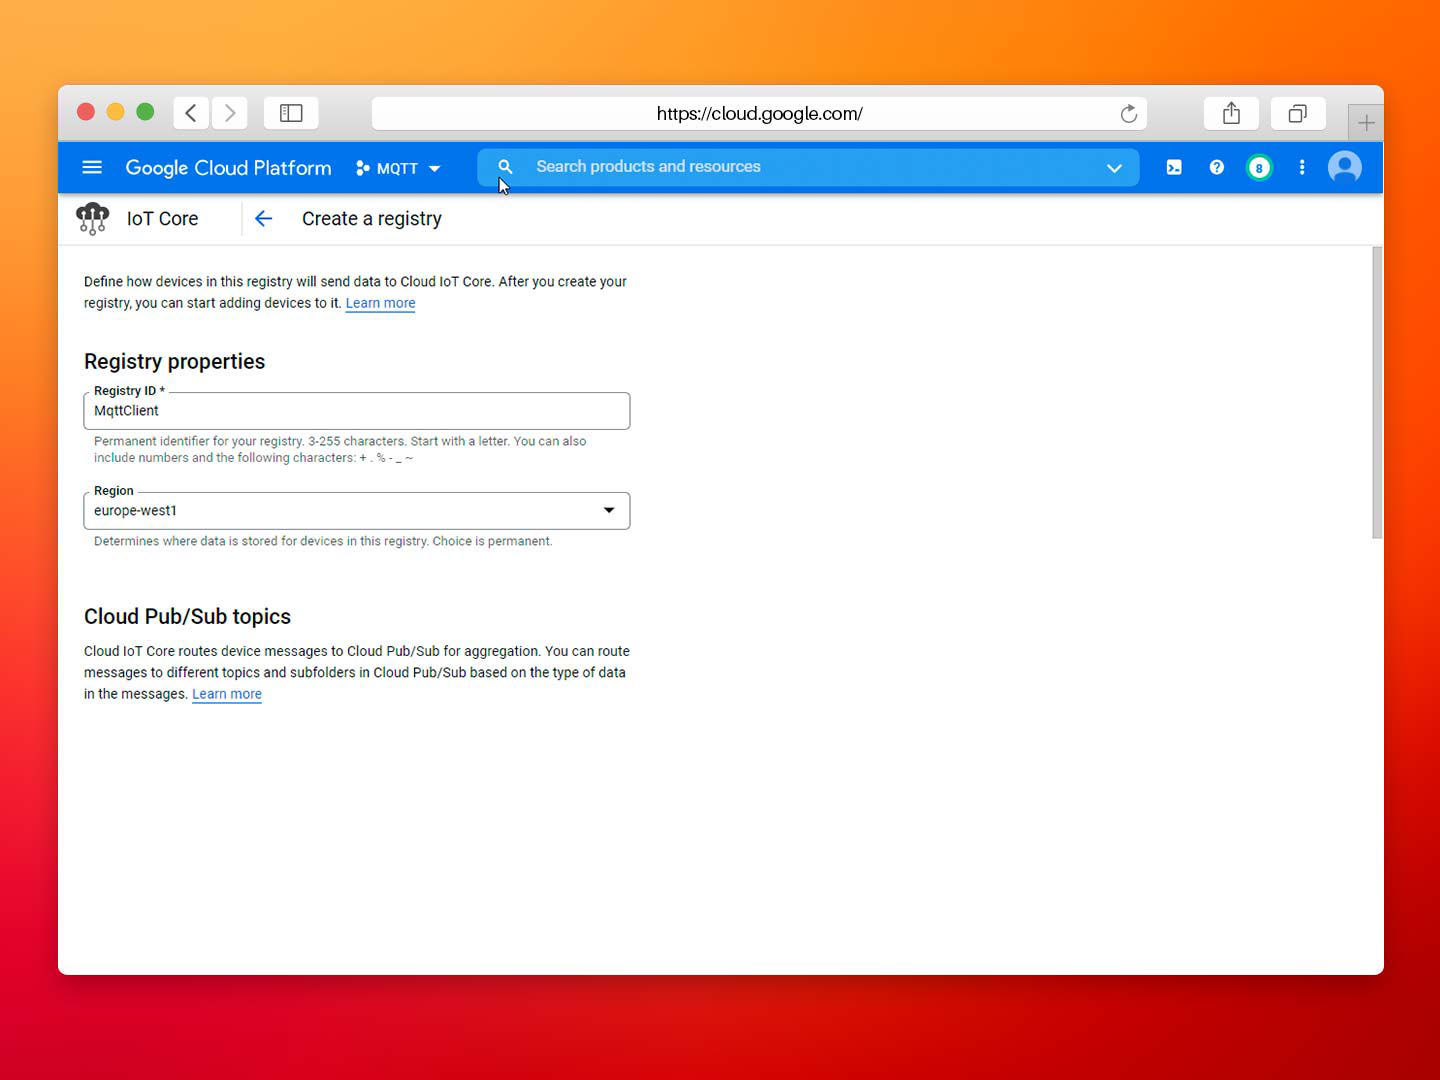
- Step 02: Next, fill in the required fields with the relevant characteristics from your registry:
– Registry ID: name of the registry associated with your connection. In this case, MQTT Client.
– Region: determines the location where data will be stored. This can’t be modified once the registry has been created. In this example, the location is europe-west1.
Screenshot displaying the Google Cloud platform’s Registry Creation panel.
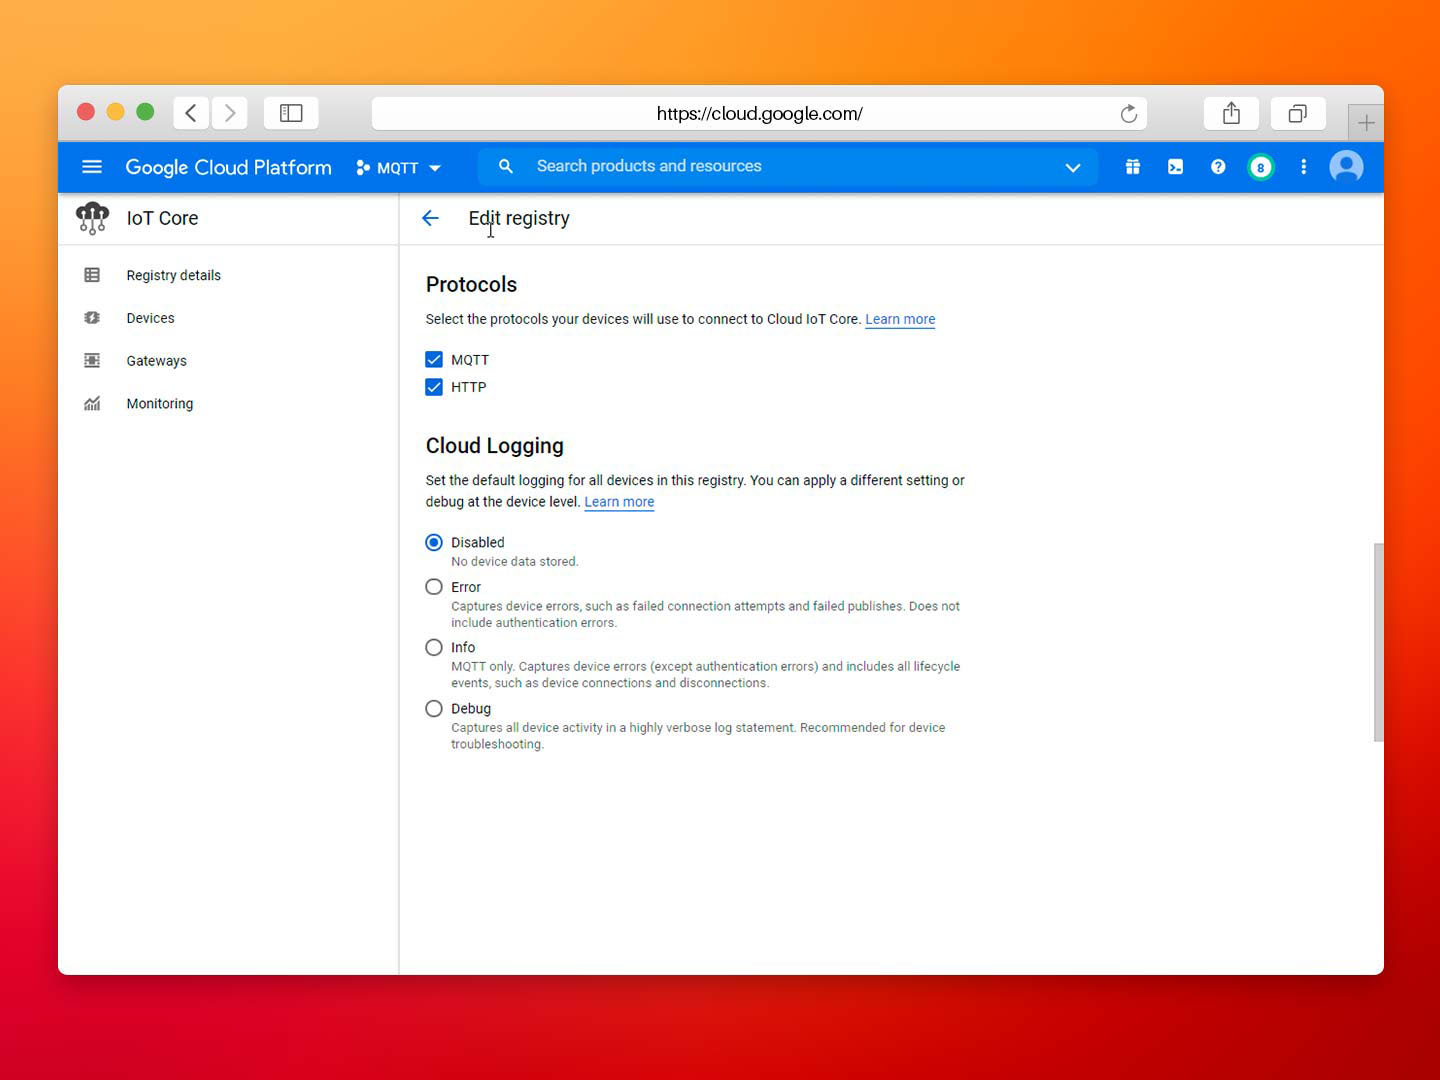
– Protocol: allows users to choose which protocol the connection will use. In order to create a MQTT Client, select the MQTT option.
– Stackdriver Logging: sets the default logging parameter for the registry.
Screenshot displaying the Google Cloud Platform’s Registry configuration panel.
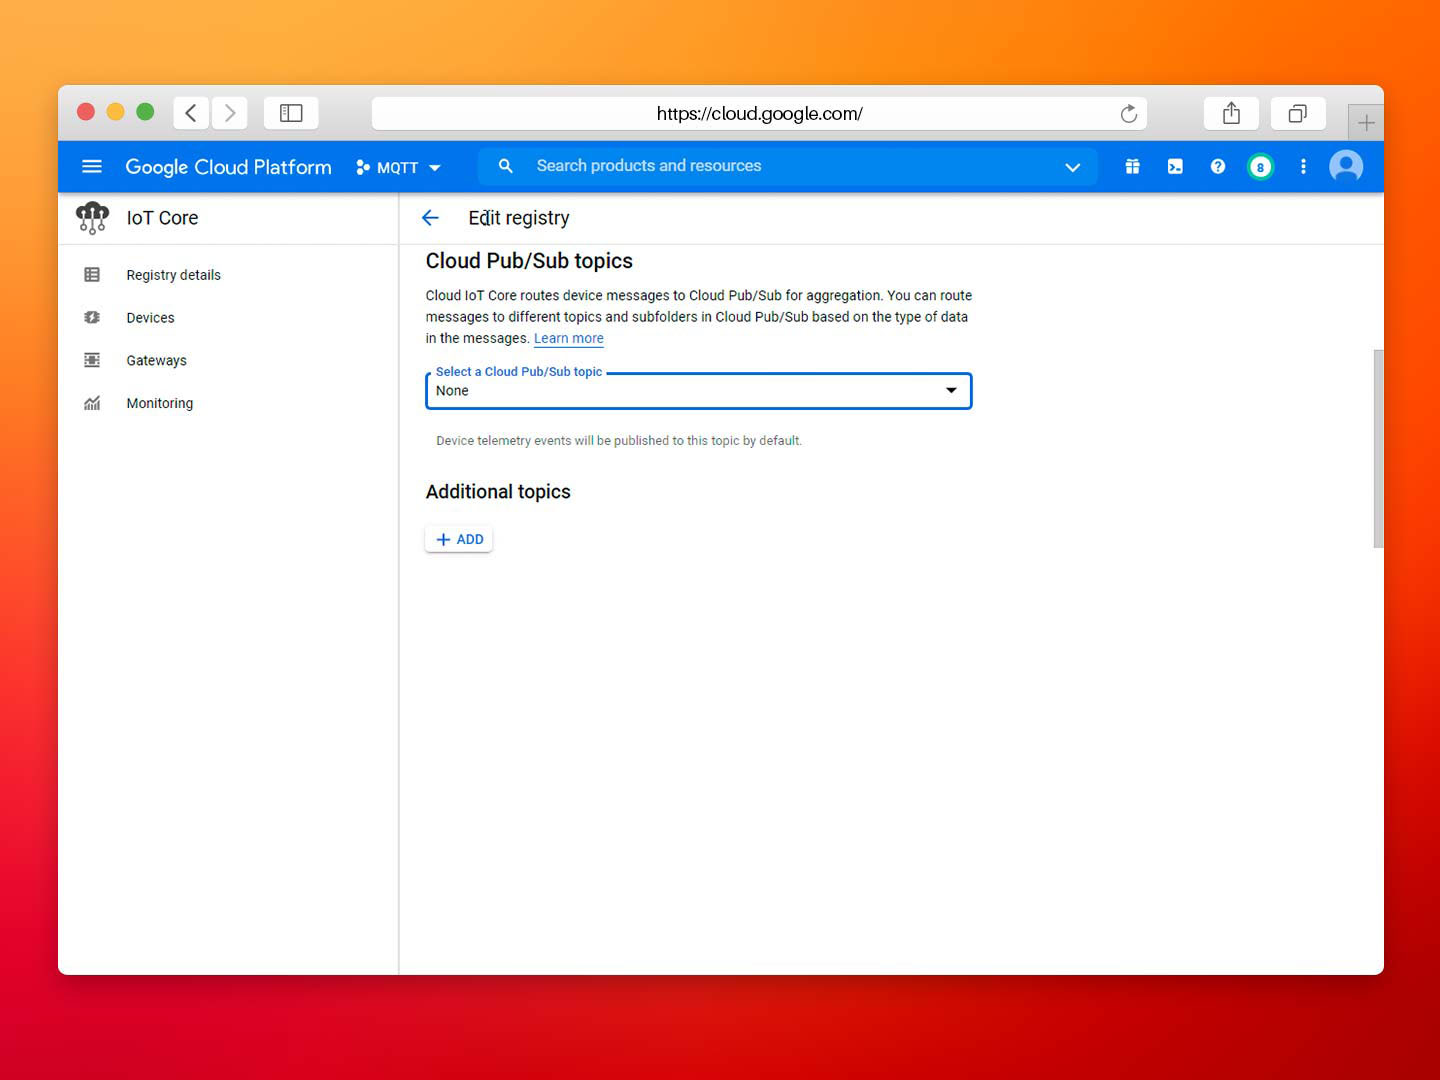
- Client Pub/Sub Topics: establishes the topic to publish/subscribe for telemetry and state events. This section can be updated and changed at any time after creation of the registry.
Screenshot displaying the “Edit Registry” panel in the Google Cloud Platform.
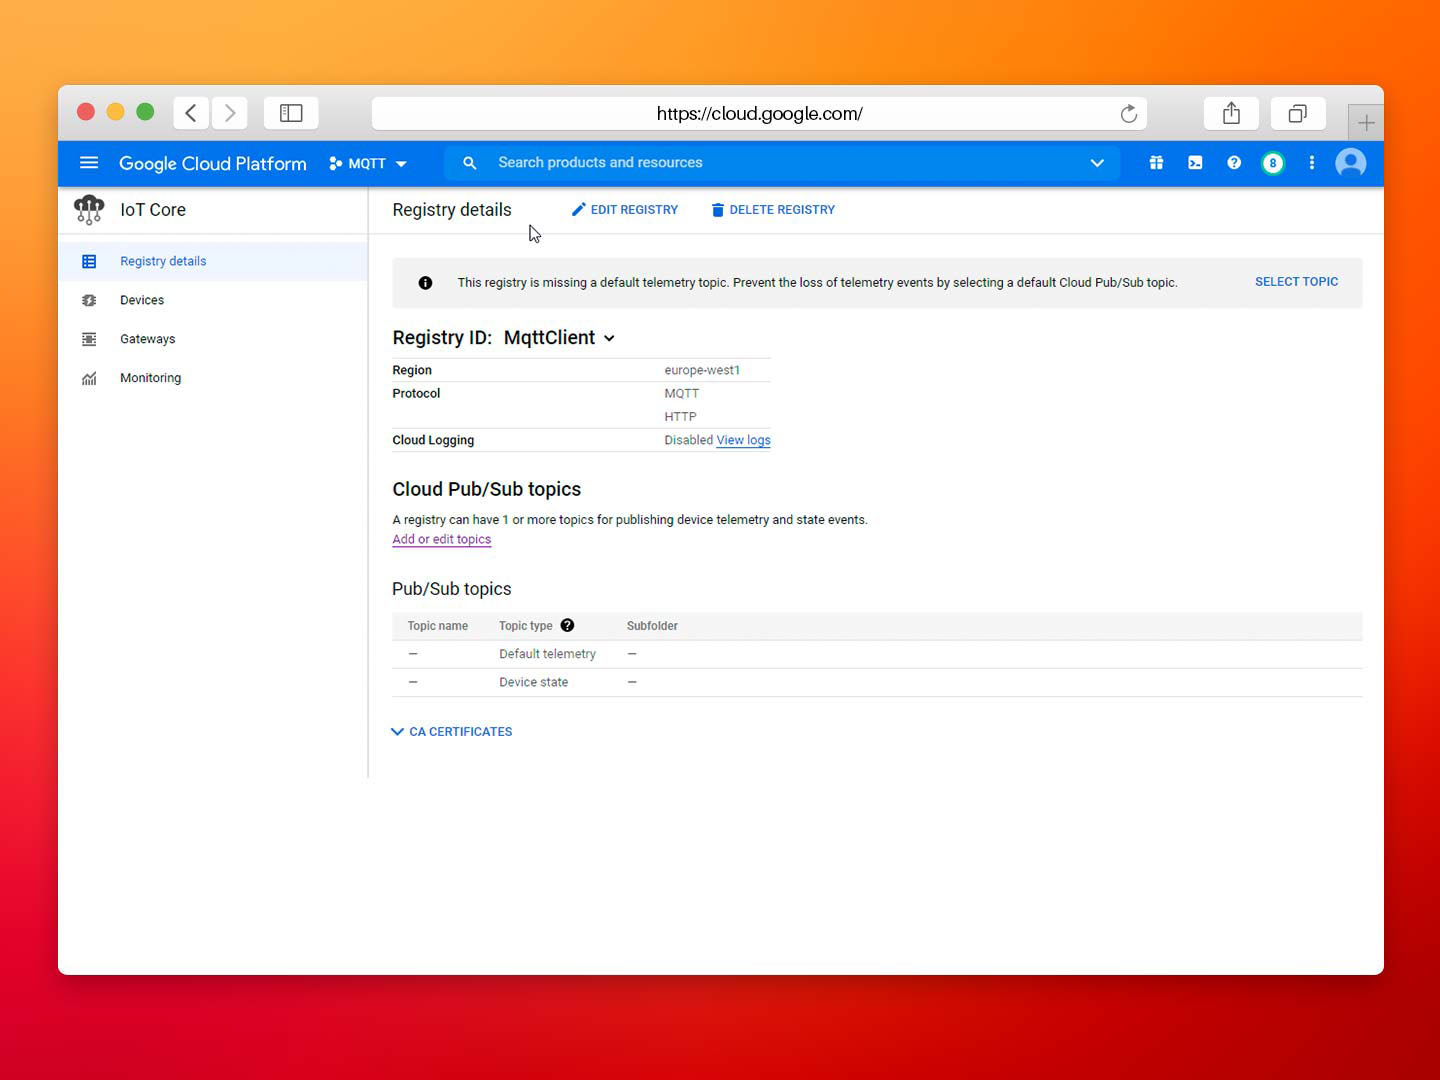
The following screenshot shows the defined characteristics:
Screenshot displaying the “Registry details” panel in the Google Cloud Platform.
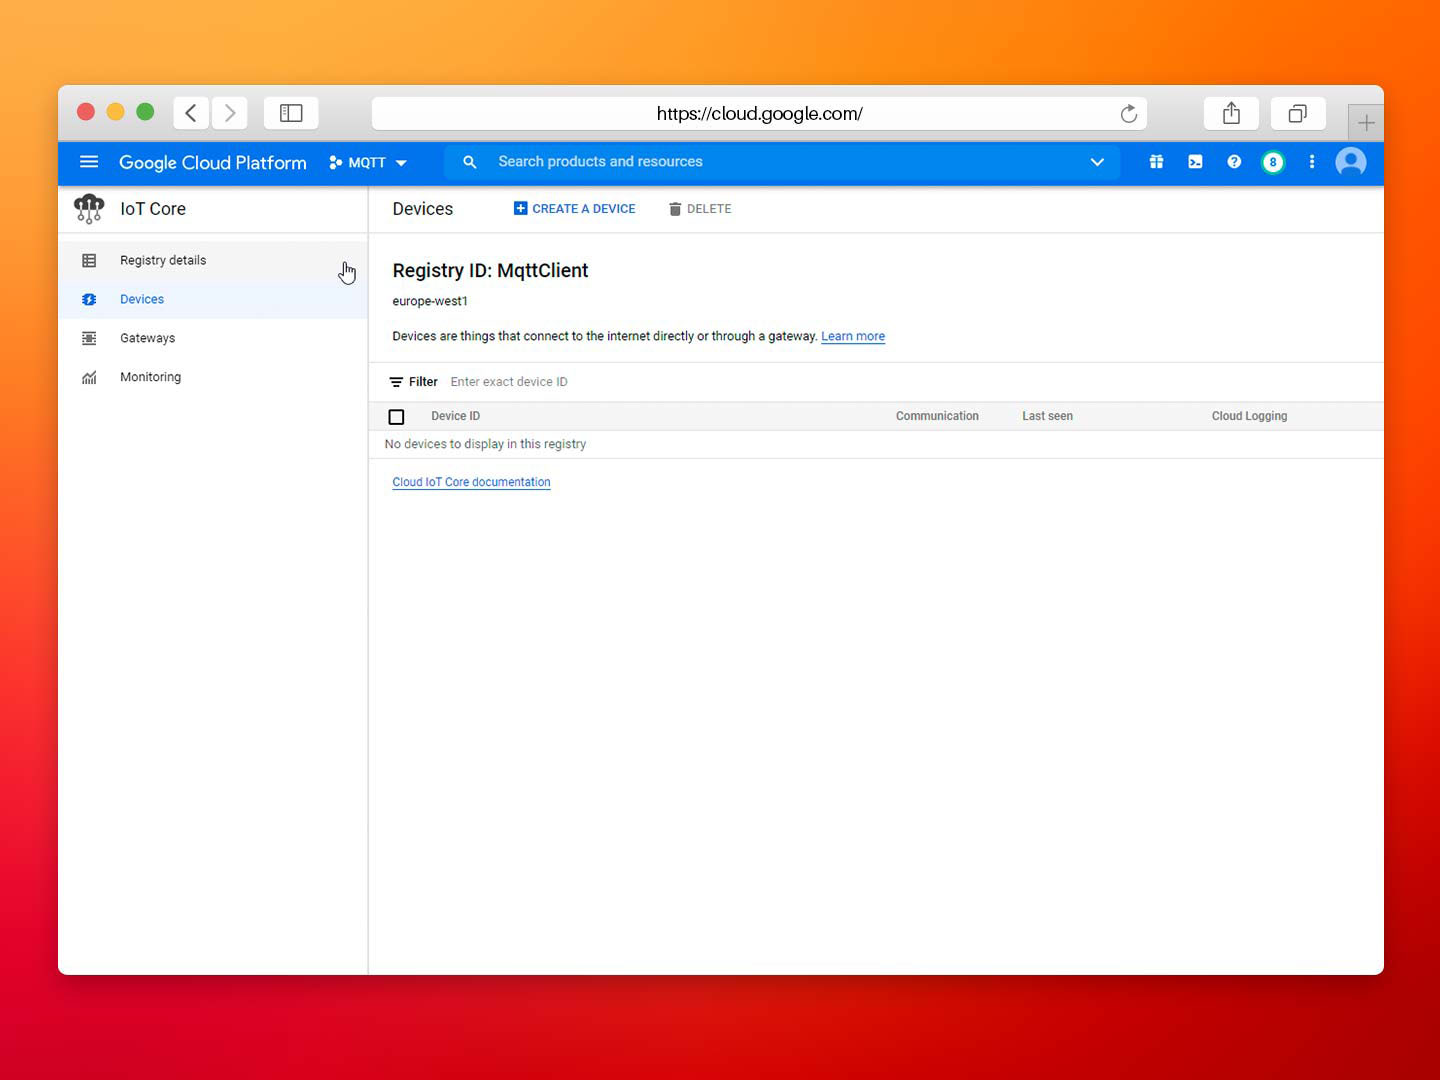
At this point, the registry has already been created, so the next step is to establish one or more devices to connect to the N3uron module and exchange messages.
Creating a device in the Google Cloud Platform
Each device requires a private-public key to authenticate with IoT Core, which can be defined using the following OpenSSL commands:
Openssl genpkey -algorithm RSA -out rsa_private.pem -pkeyopt rsa_keygen_bits: 2048
Openssl rsa -in rsa_private.pem -pubout -out rsa_public.pem
This will create two files: rsa_private.pem, which contains the private key and rsa_public.pem, which contains the public key. These keys are very important when creating an MQTT Client in N3uron, so make sure they are stored in a secured area.
The following screenshot demonstrates how to create a new device.
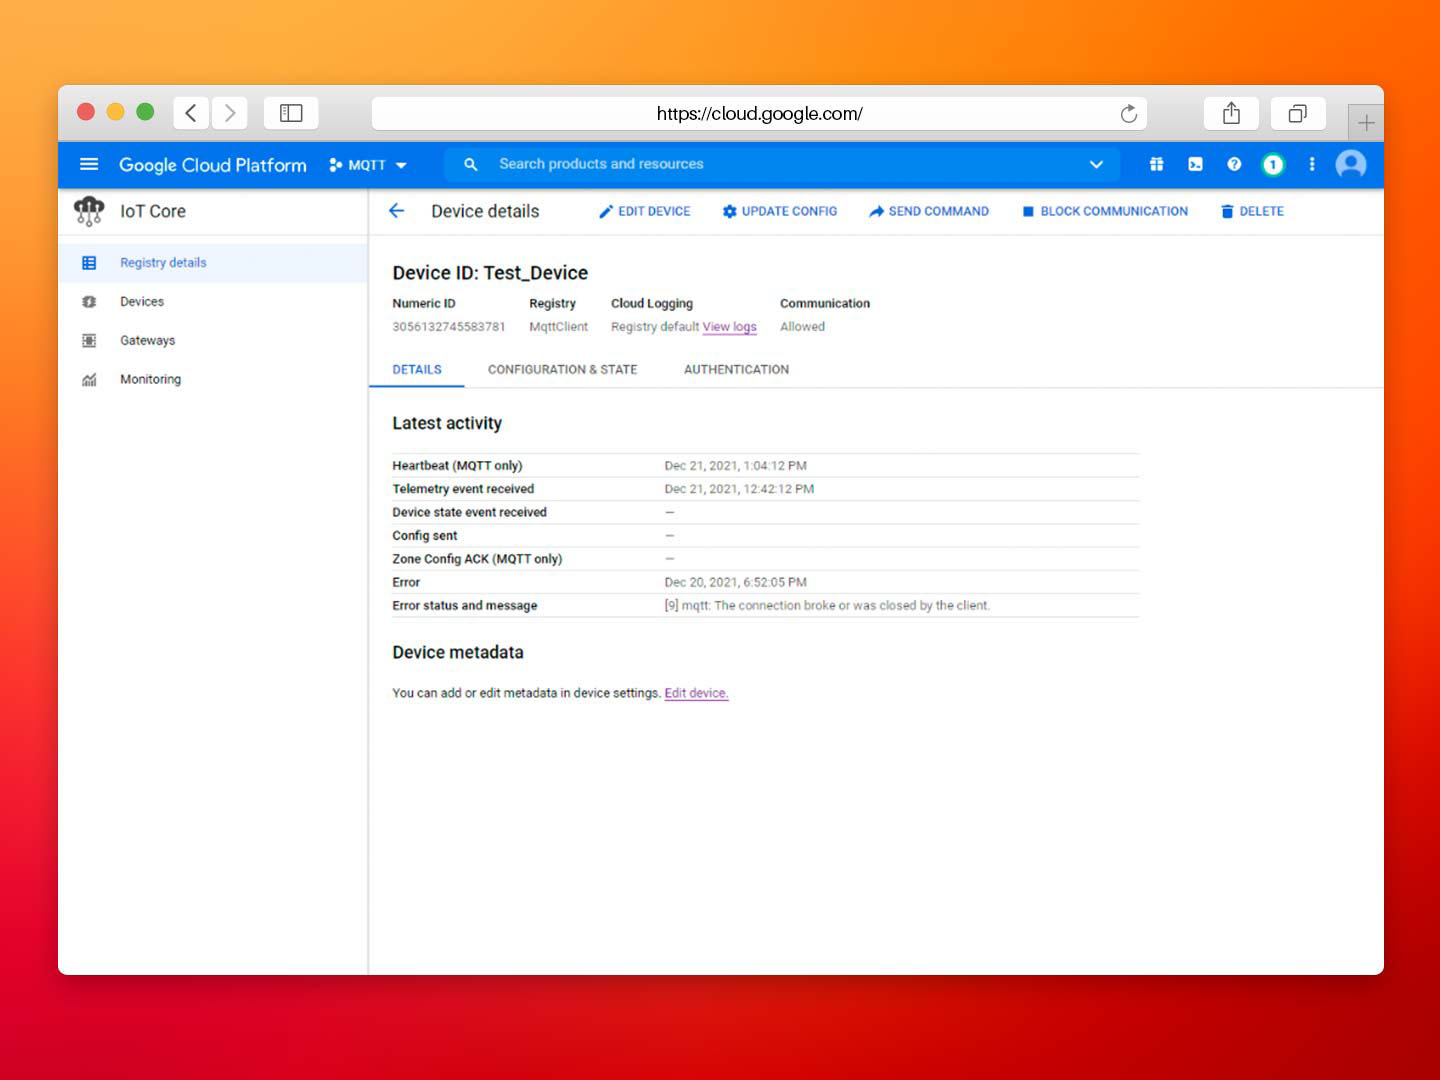
Screenshot displaying the “Create a Device” panel in the Google Cloud platform.
- Step 01: Click on Create New Device. This will take you to a configuration tab.
- Step 02: During device creation, the public key must be applied in the configuration. The parameters applied in this configuration can be observed below:
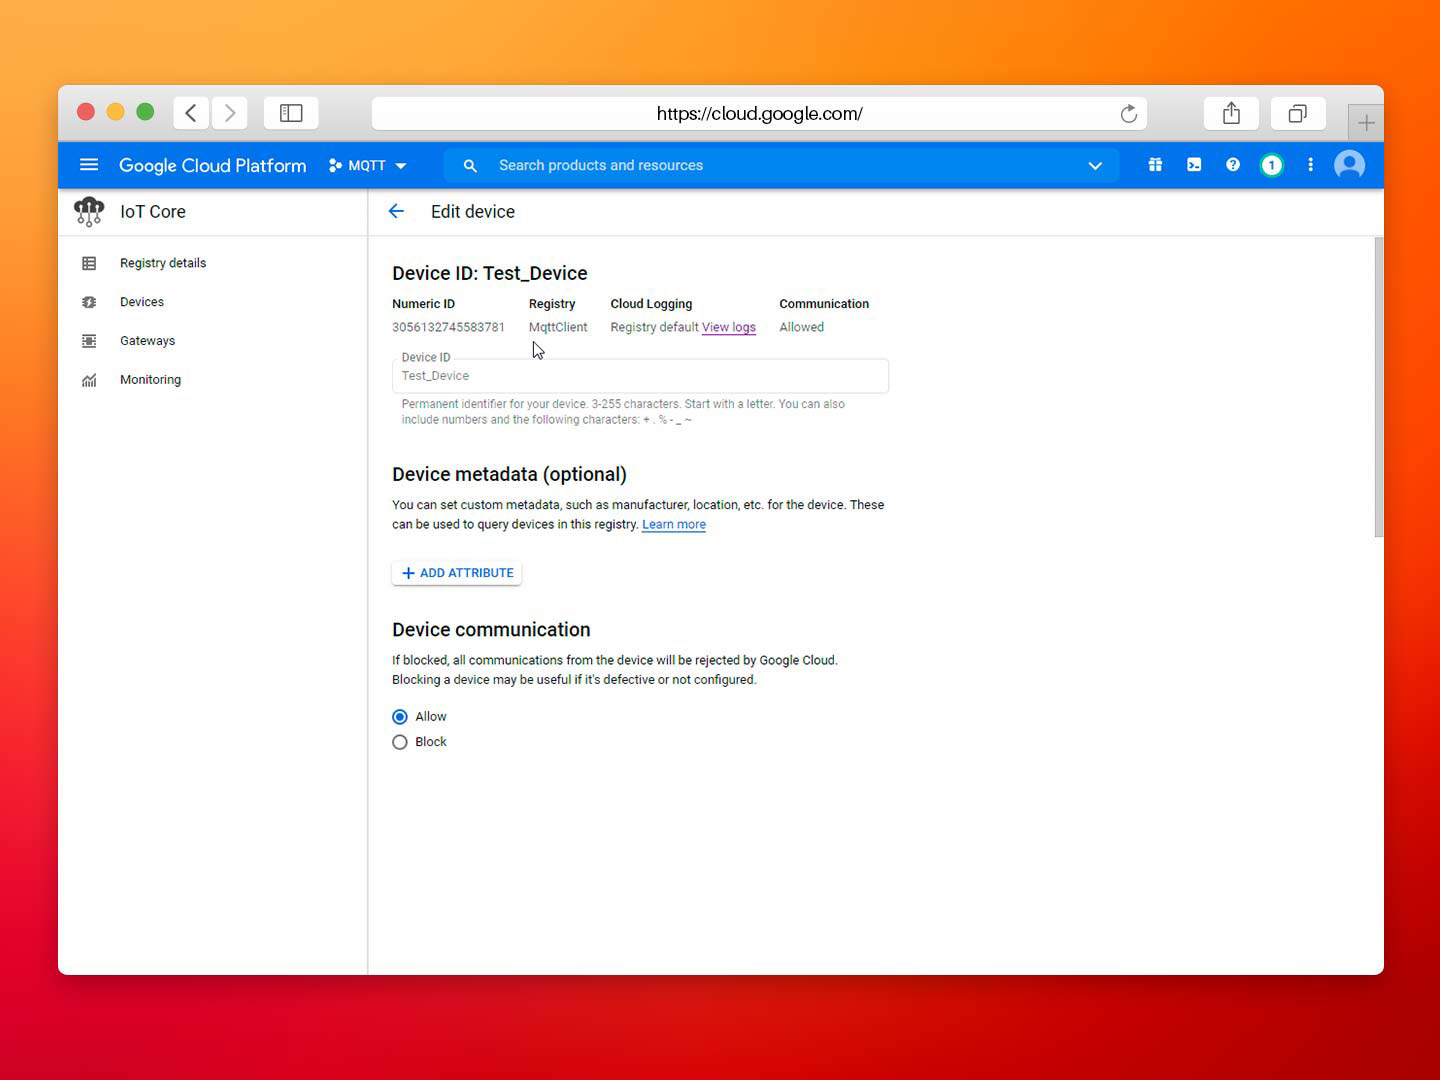
- Device ID: This is unique and must be equal to the MQTT Client ID and the topic used for this device. Communication must also be enabled with the device, so there are some optional sections too. In this example, the name of the device is, Test_Device.
Screenshot displaying the “Edit Device” panel in the Google Cloud platform.
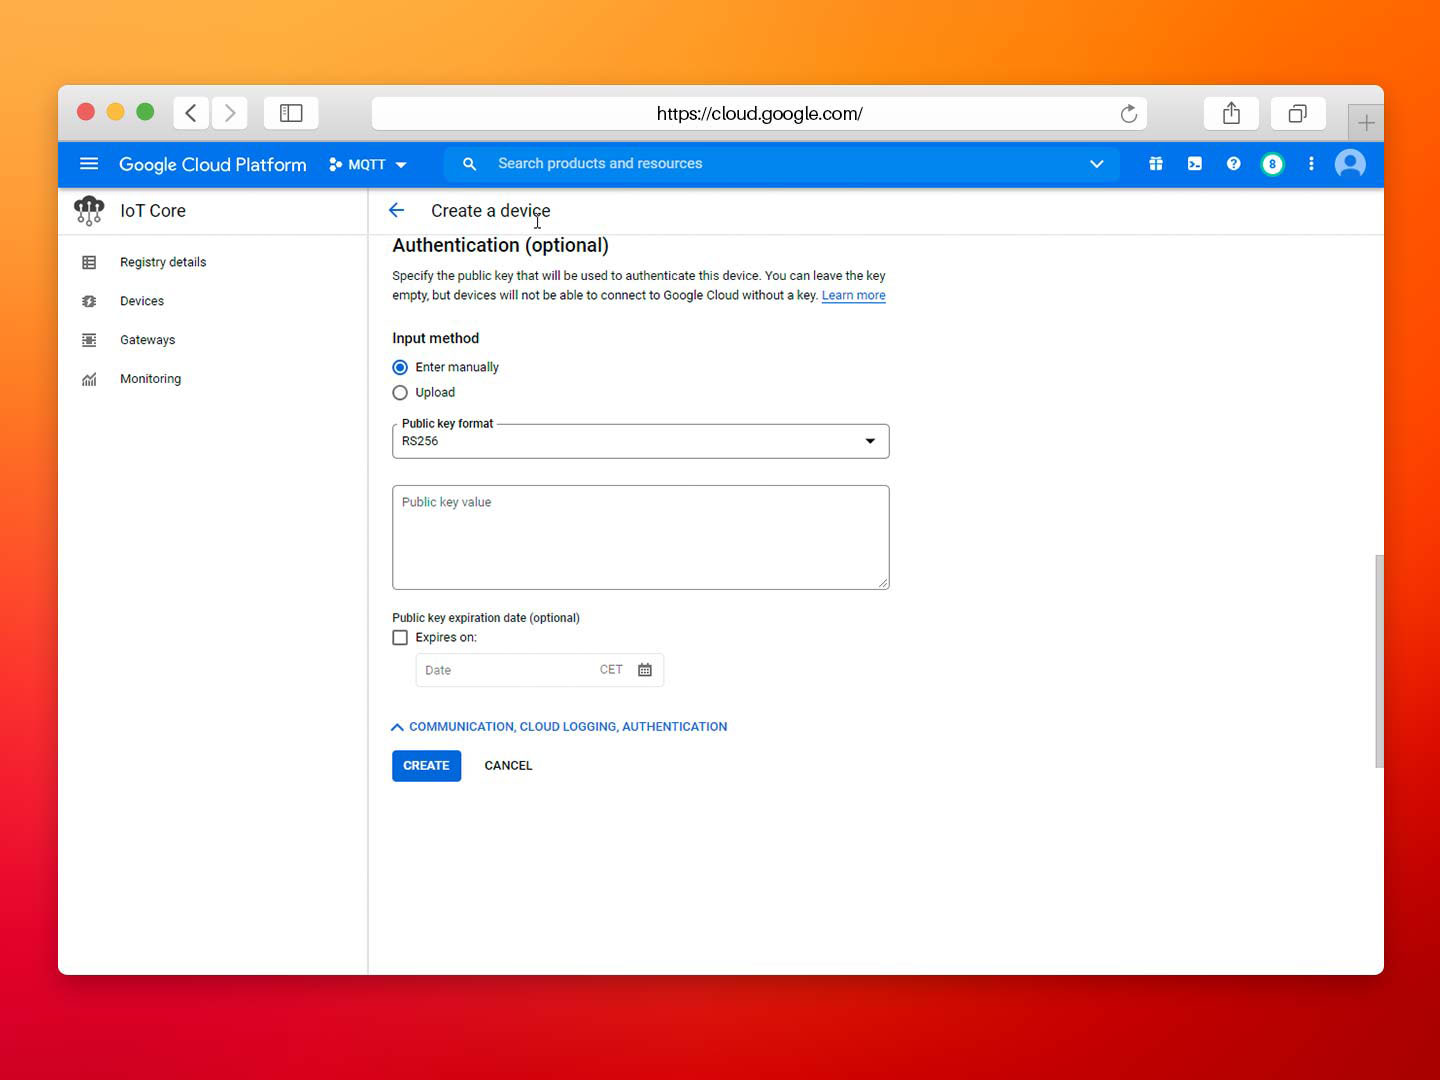
- Authentication: determines how the key should be entered. There are 2 available options: manually enter the key name, or upload the file containing the public key. Here you should introduce the previously generated key. The easiest way to do this is to upload it.
Screenshot displaying device configuration within the “Create a Device” panel in the Google Cloud Platform.
- Step 03: Once configuration is finished, click on Create, and the device will be created.
Configuring the N3uron IIoT Platform
Open your browser and log into N3uron’s WebUI
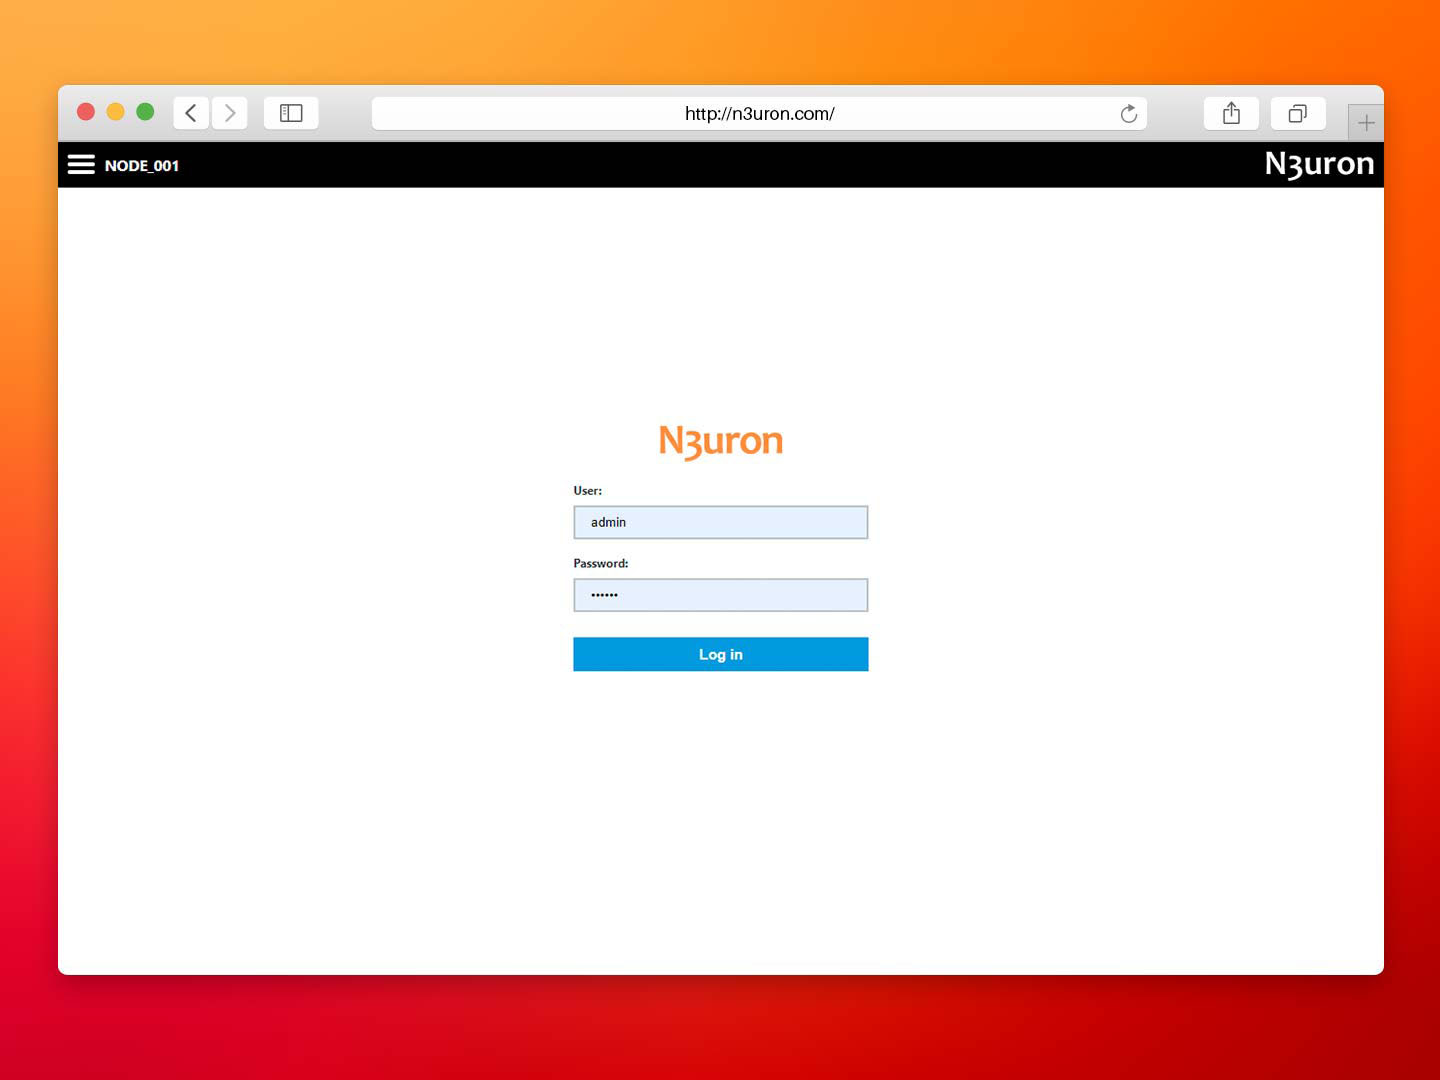
Once N3uron is installed, users should open the user interface, which will take you to the below panel.
Screenshot displaying the log-in interface for N3uron’s IIoT platform WebUI
If this is your first time accessing the platform, the following credentials should be entered: User=admin, Password=n3uron. You should now have gained access to the WebUI developed by N3uron and can start practicing with it.
Create an MQTT module instance
First, users must create a module for establishing the connection with Google Cloud. In this example, for the MQTT Client module, the following steps should be taken:
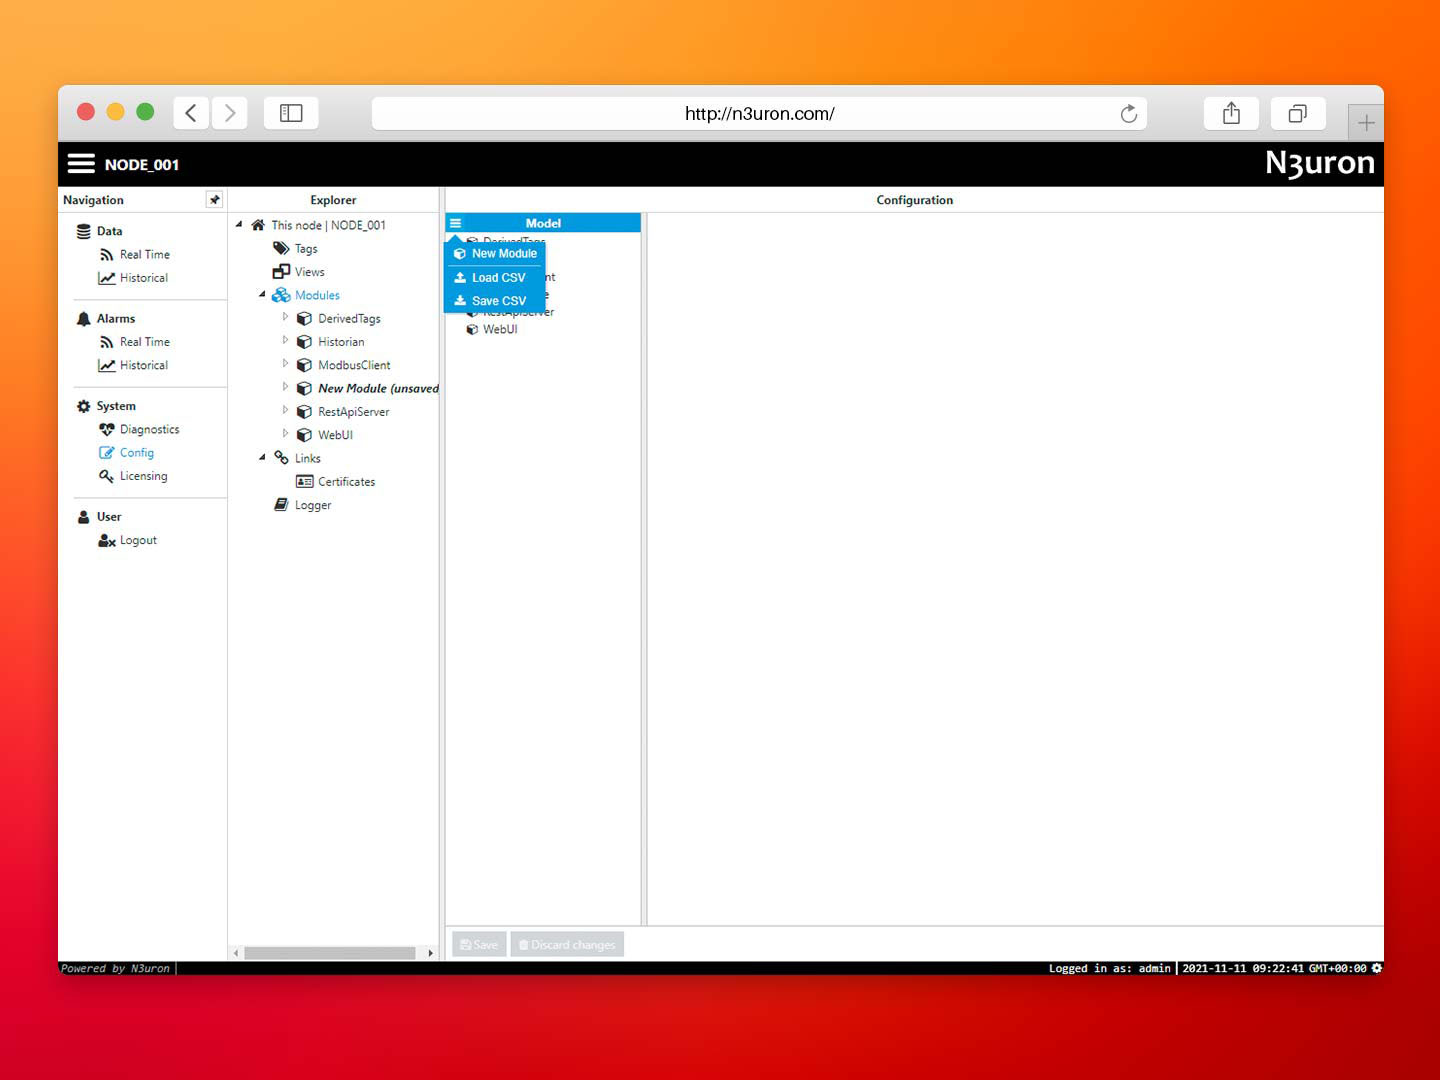
- Step 01: Follow this route; System>Config>Modules>Model>New Module.
Screenshot displaying how to create an instance using N3uron’s MQTT Module panel.
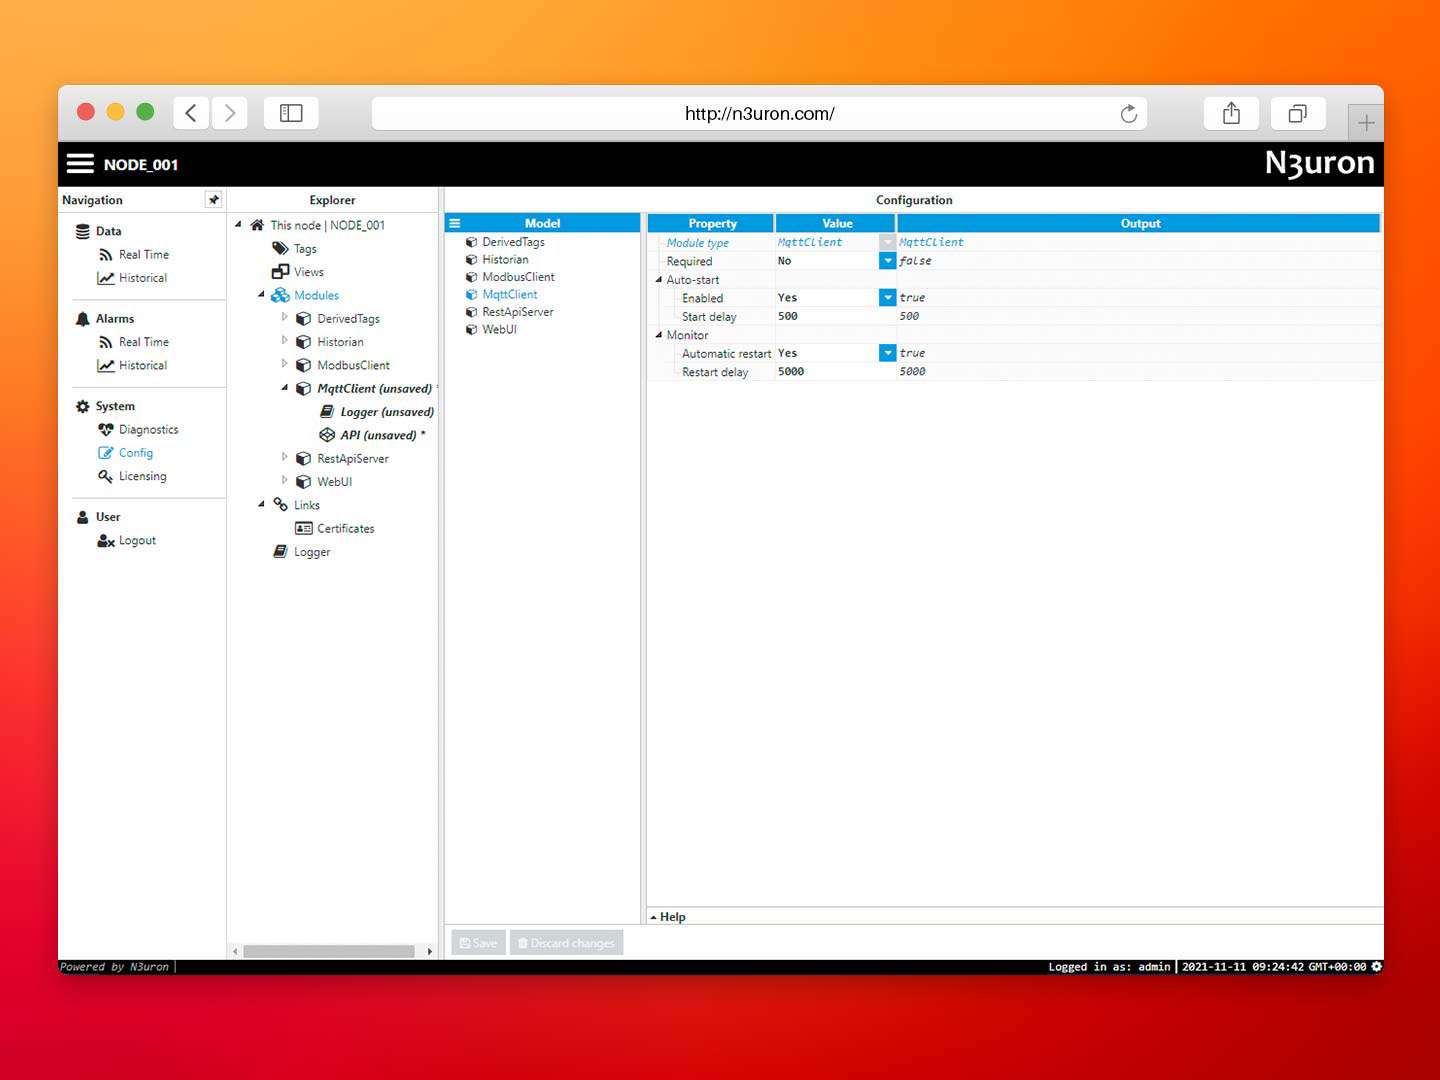
- Step 02: Configure the basic parameters of the module. Name=MqttClient, Module type= MqttClient.
Screenshot displaying module configuration within the N3uron MQTT module panel.
Before moving onto the next step, it is mandatory to save the default Logger and API settings. At this point, all other parameters on the main screen will be set to default.
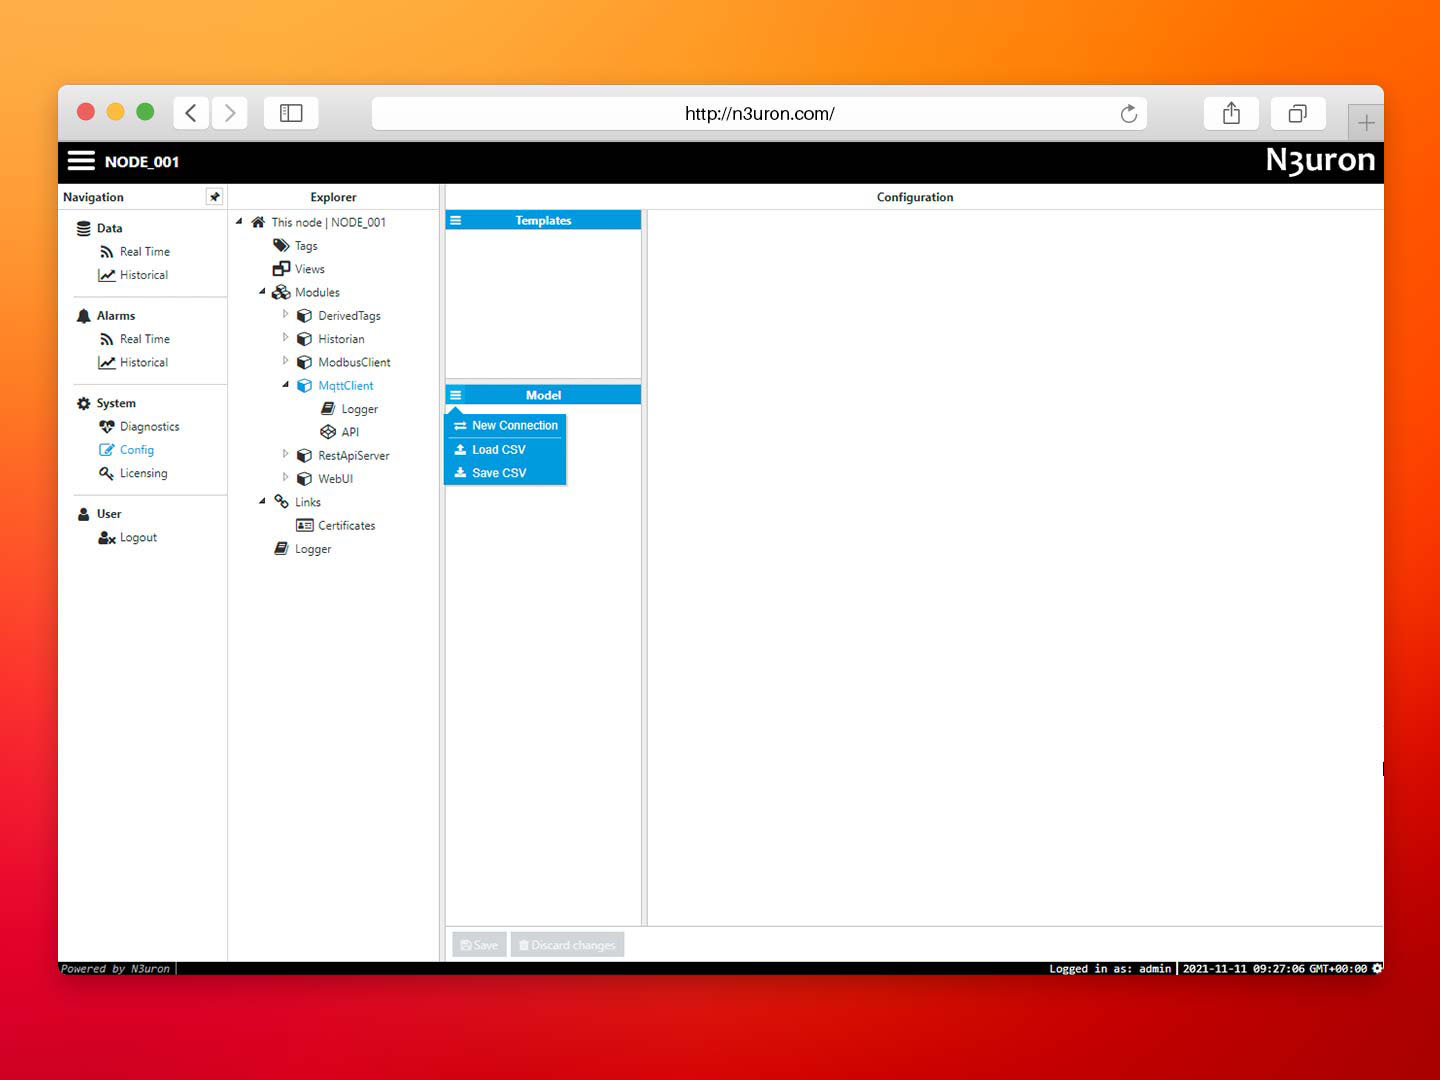
- Step 03: Click on the MQTT Module and create a new connection(client) by following Module name>Model>New connection.
Screenshot demonstrating new connection creation via N3uron’s MQTT module panel.
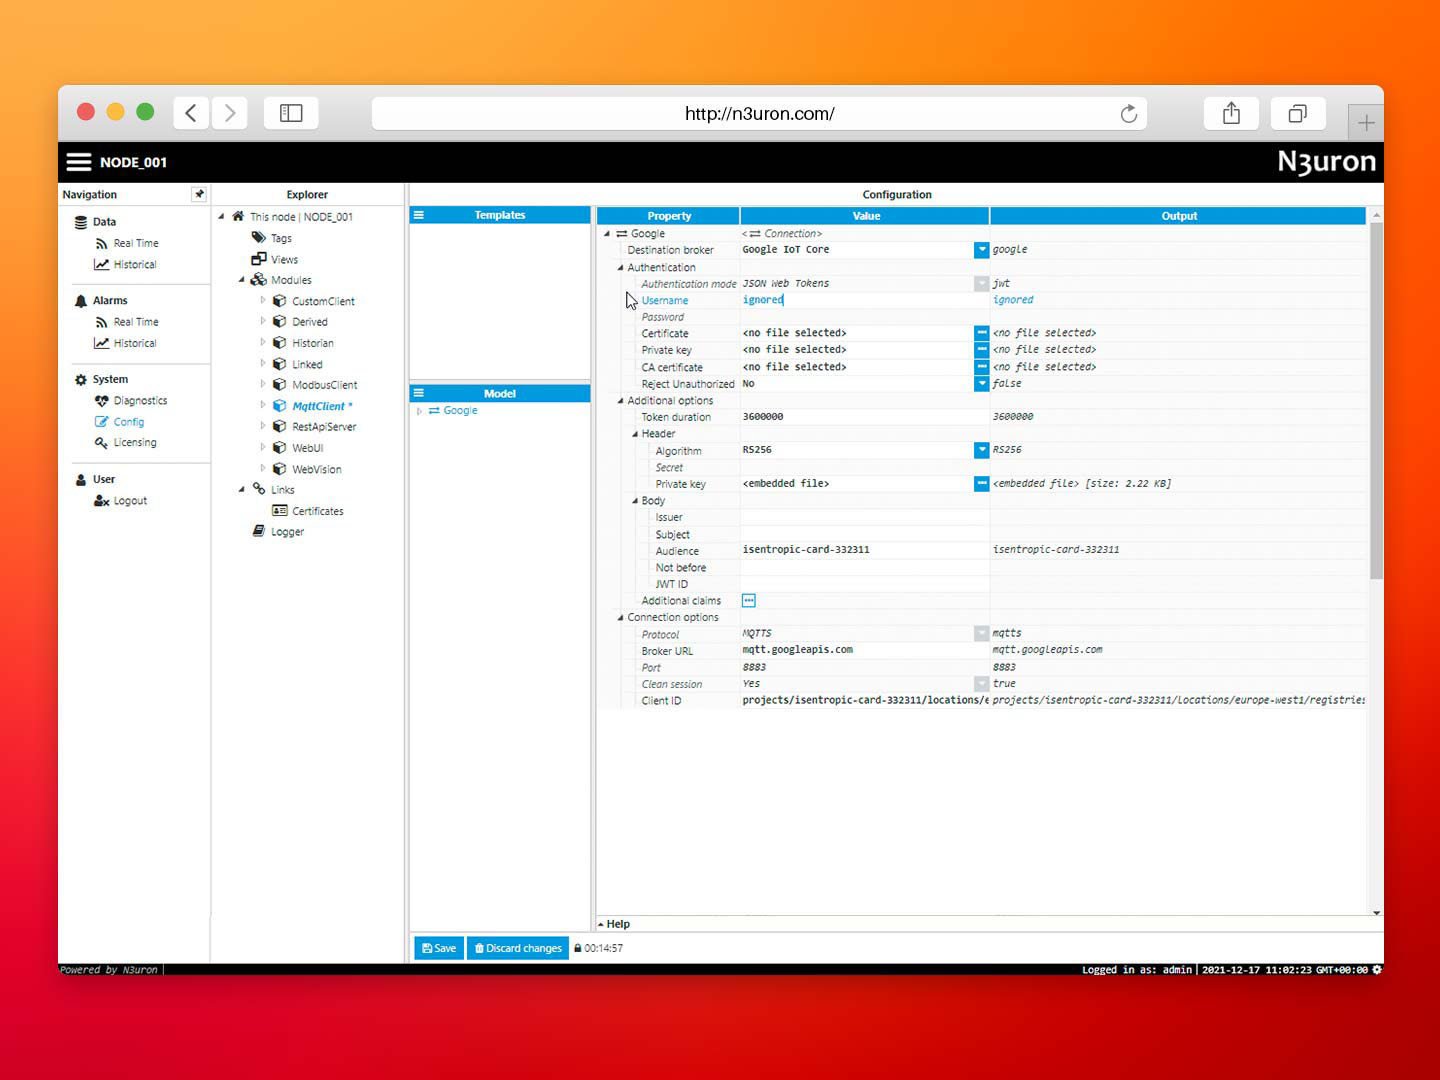
- Step 04: Establish a name for the connection and continue configuring the basic parameters for the connection. In this case, the name of the connection is Google.
Screenshot demonstrating how to configure connections within N3uron’s MQTT module panel.
You should define each parameter of the client step by step, which includes:
- Destination broker: this setting specifies the type of connection to be established. There are 4 possible options; Microsoft Azure, Amazon Web Services, Google IoT Core, and a custom one. In this case, we should select Google IoT Core.
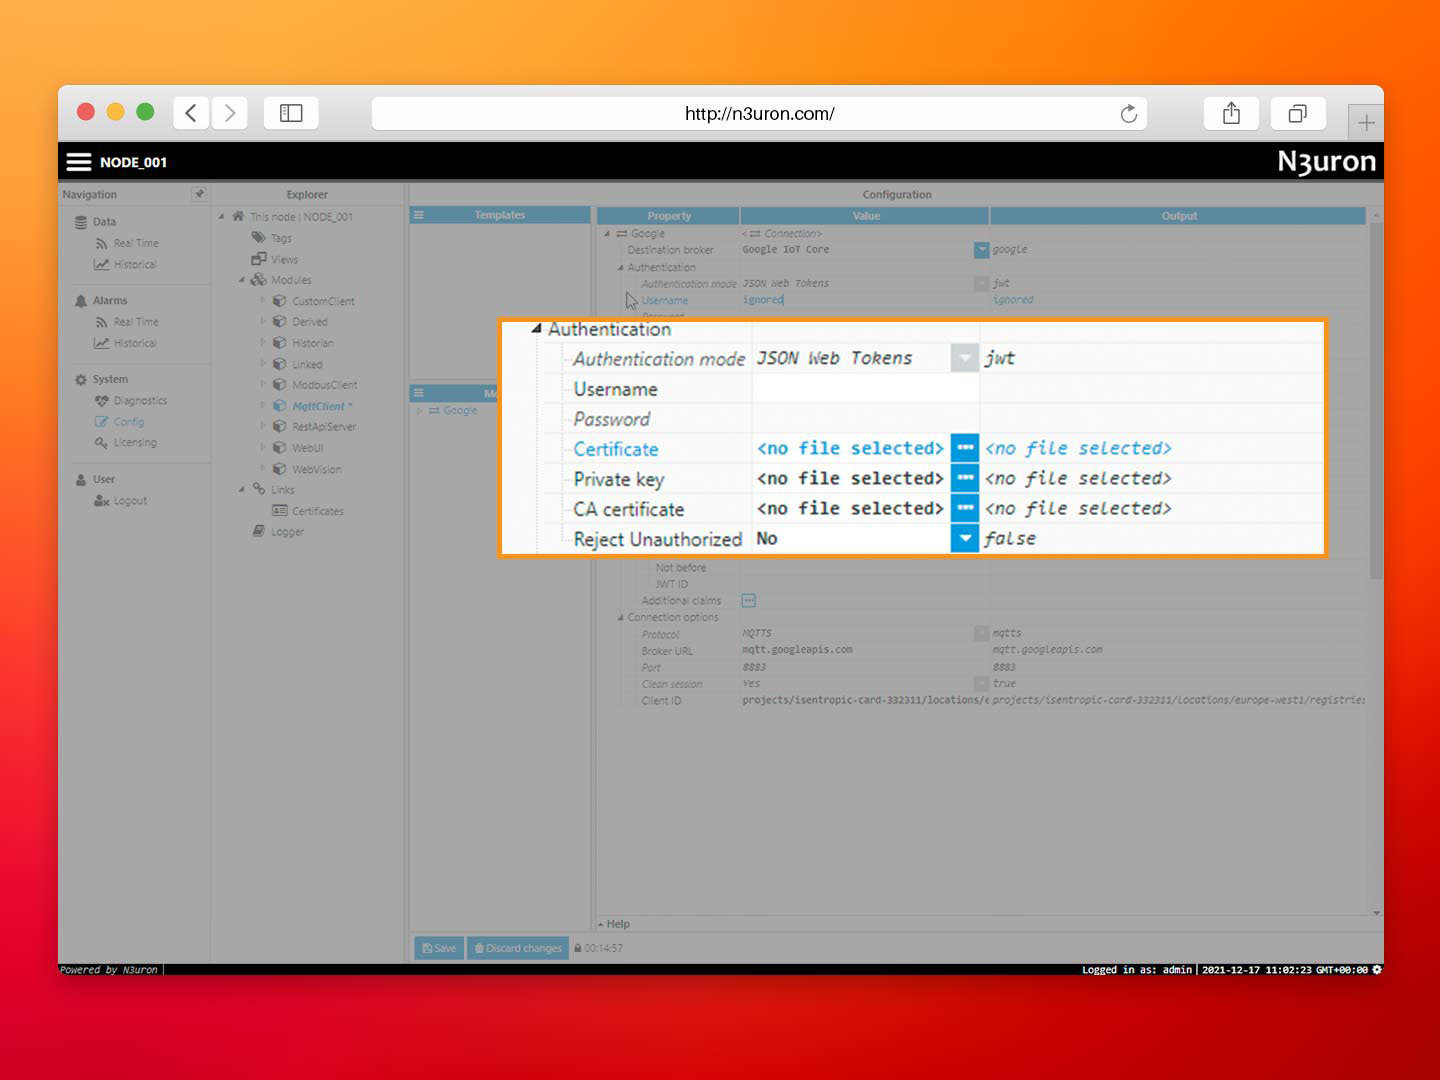
- Authentication: there are five different types of authentication available. The first option is no authentication, which is useful when there is no private or important data. The password option authenticates with the broker using a password. The certificate option is the same as Password, but uses a certificate instead. The Password + Certificate option is more secure and requires a password and a certificate to authenticate. Finally, the last option is JSON Web Tokens, which authenticates using automatically generated Web Tokens.
In this case, Google IoT Core only uses the JSON Web Tokens option to authenticate.
Screenshot displaying the “Authentication” section within the N3uron MQTT module panel.
- In connection options, users are required to define the type of broker, which can be either MQTT or MQTTS, the URL generated by our broker, and the port that will be used to connect to the broker. Finally, a unique ClientID must be provided for each connection defined in this section.
- Last will and testament: allows users to set a last will and testament for each connection, which will be sent to the broker when the session is disconnected and will be the last message sent.
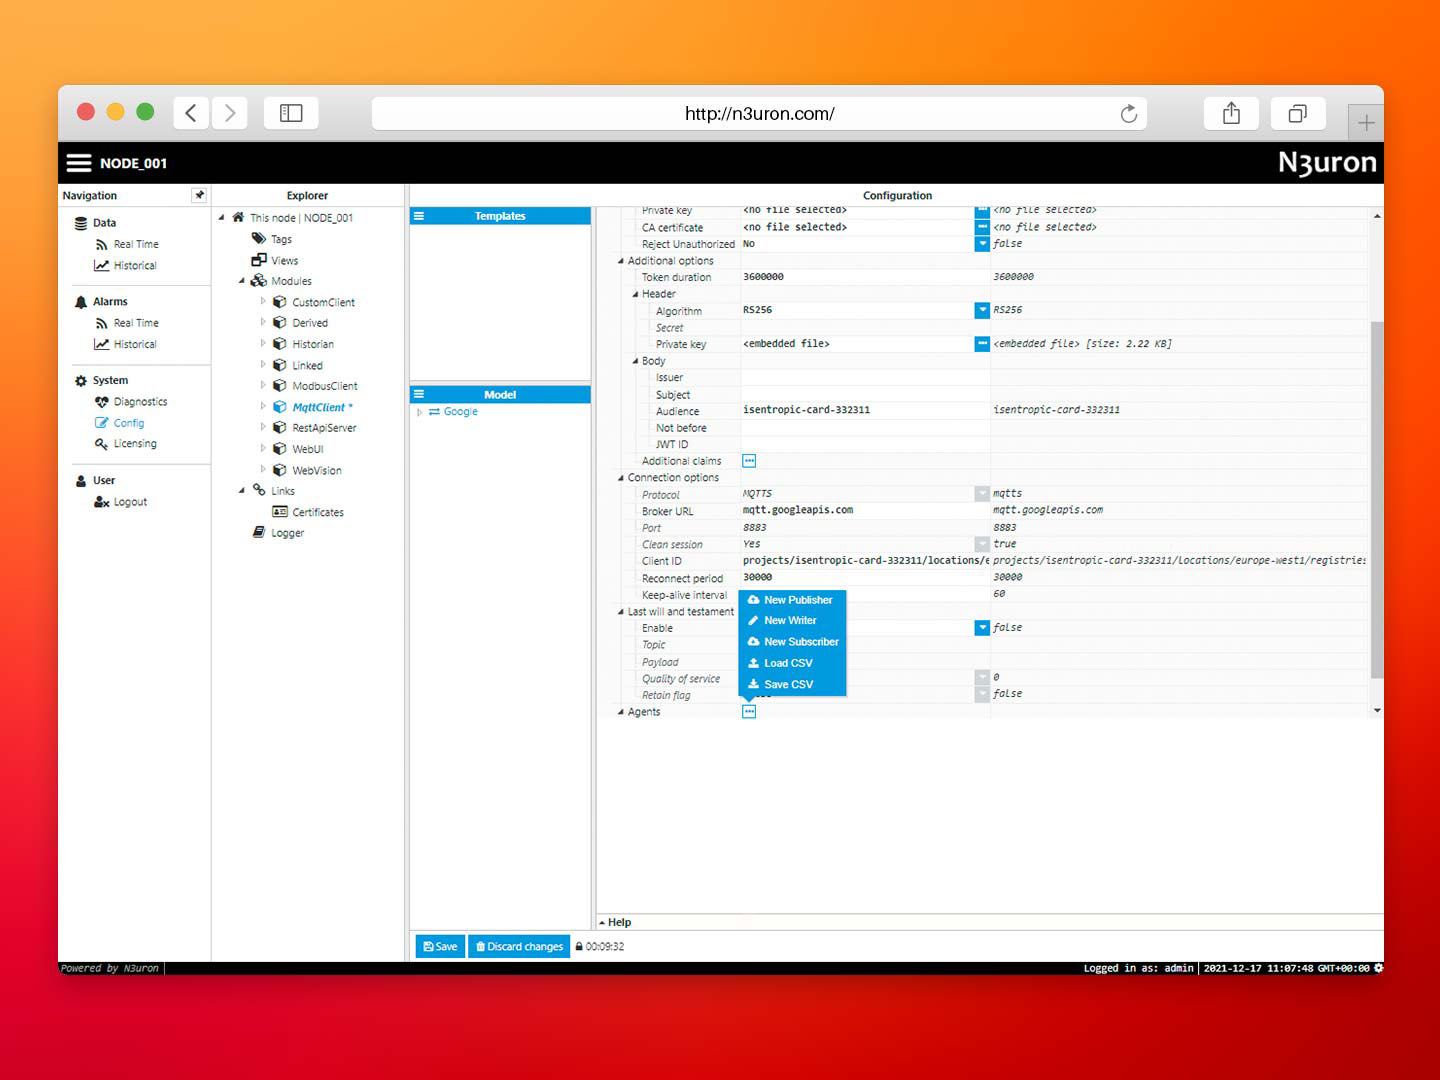
- Agents: users can define an agent, which can be a publisher, writer, or subscriber, depending on whether you want to export or import data.
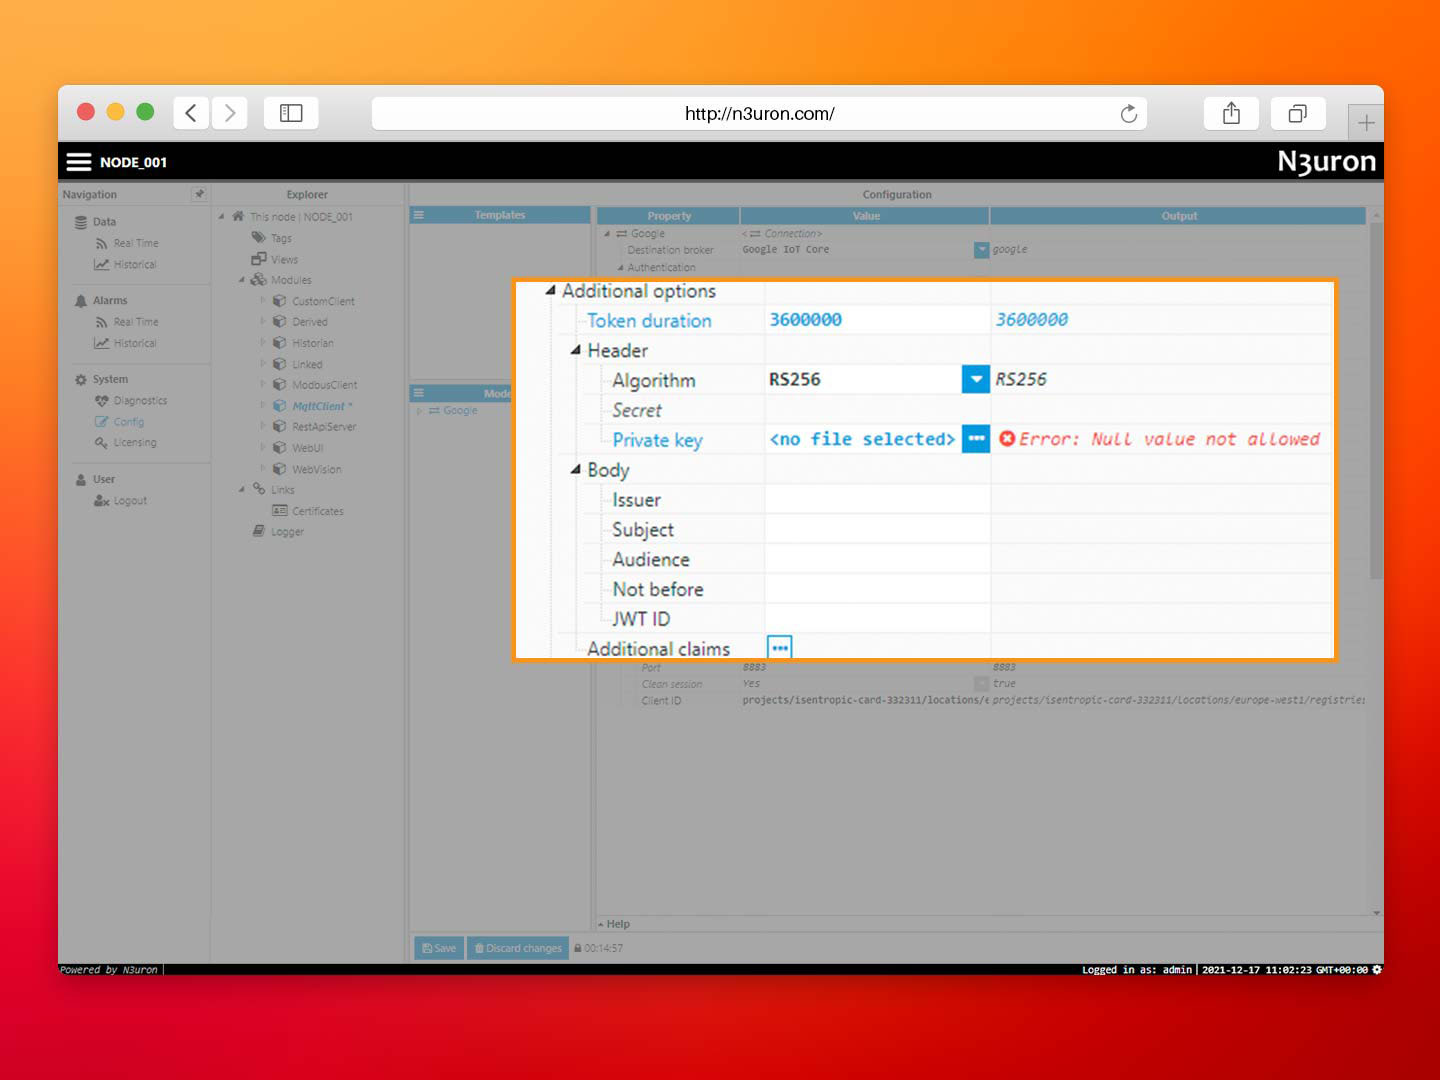
The Google Case offers one further option: additional options.
Screenshot displaying the “Additional Options” section within N3uron’s MQTT module panel.
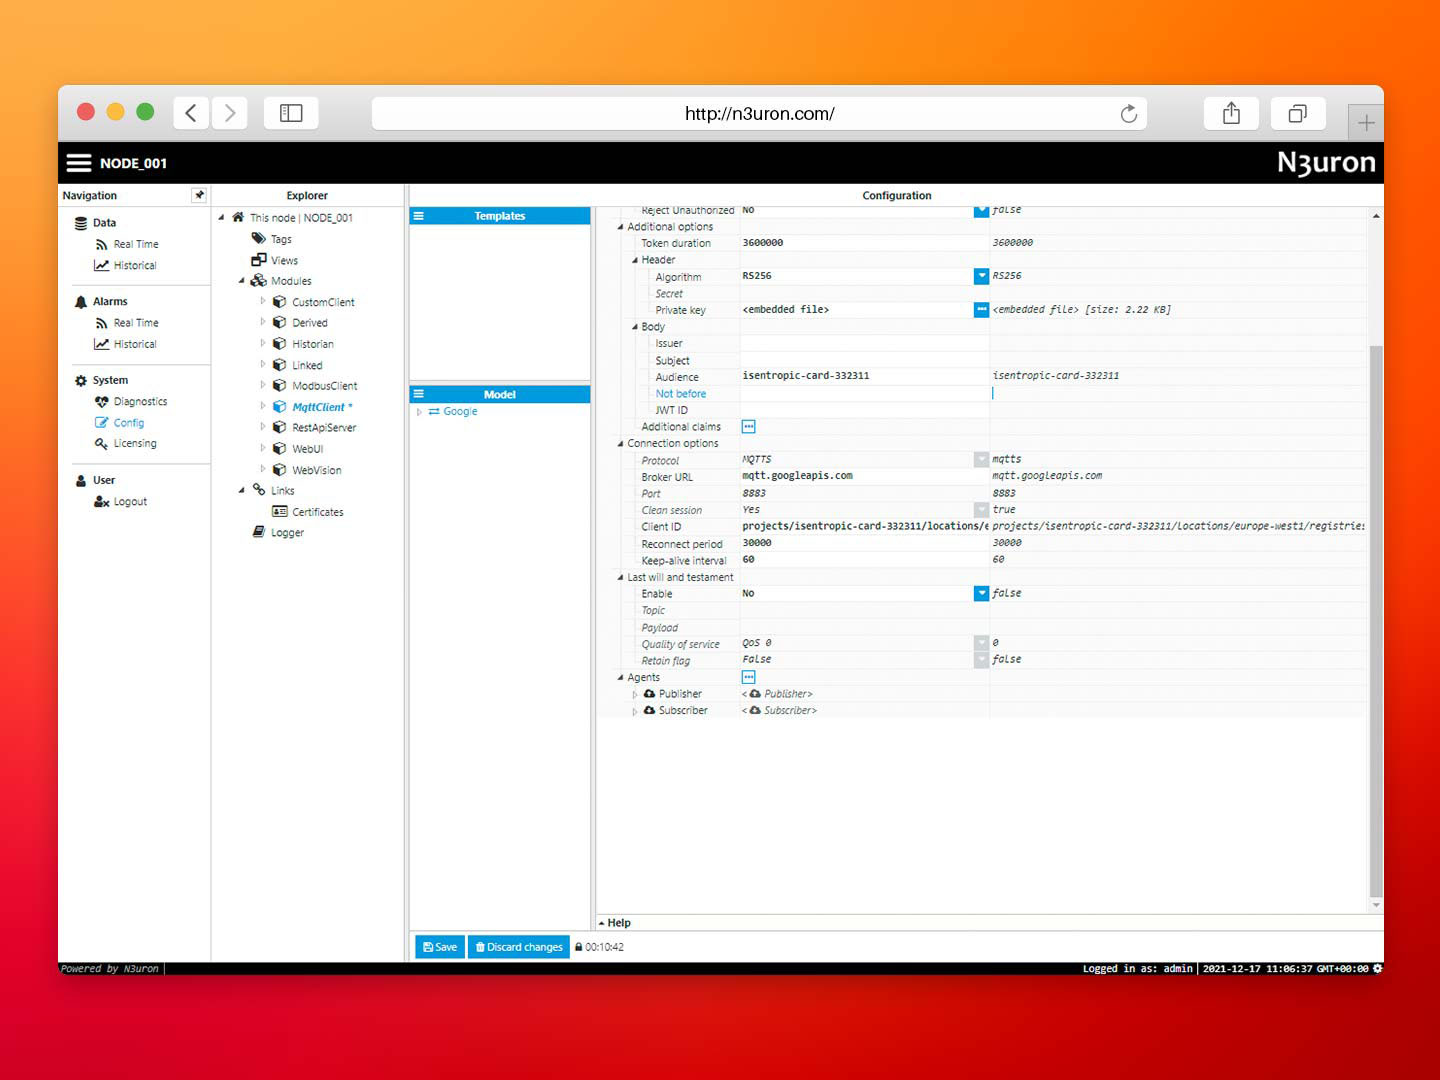
In summary, the MQTT Client module defined in N3uron can connect with Google Cloud using these configuration settings:
- Destination broker: Google IoT Core.
- Authentication mode: JSON Web Tokens.
- Token duration: the maximum value is a full day, so any value equal to or less than this is valid.
- Algorithm: RS256 to sign the JWT (there are a wide variety of options to choose from).
- Private key: the generated key in .pem format stored in the device.
- Audience: sets the project_id generated in GCP. In this case, isentropic-card-332311.
- Protocol: MQTTS (MQTT can also be used).
- Host: specifies the URL for the MQTT broker, in this case, mqtt.googleapis.com.
- Port: the port is 8883.
- ClientID: specifies the MQTT client for this connection. This is unique for each connection. The Client ID must follow this pattern: projects/PROJECT ID/locations/CLOUD REGION/registries/REGISTRY ID/devices/DEVICE ID.
- QoS: with the exception of QoS 2, users can select 0 or 1 for a stable connection.
The below screenshot demonstrates this example:
Screenshot displaying an example of the MQTT Client panel.
Screenshot displaying a different example of the MQTT Client panel.
The MQTT module has now been created and is ready to use. Therefore, it is now time to generate a publication and subscription.
Publishing & Subscribing Data via N3uron and Google Cloud Platforms
Publishing Data Using N3uron’s MQTT Module Within the WebUI Explorer Panel
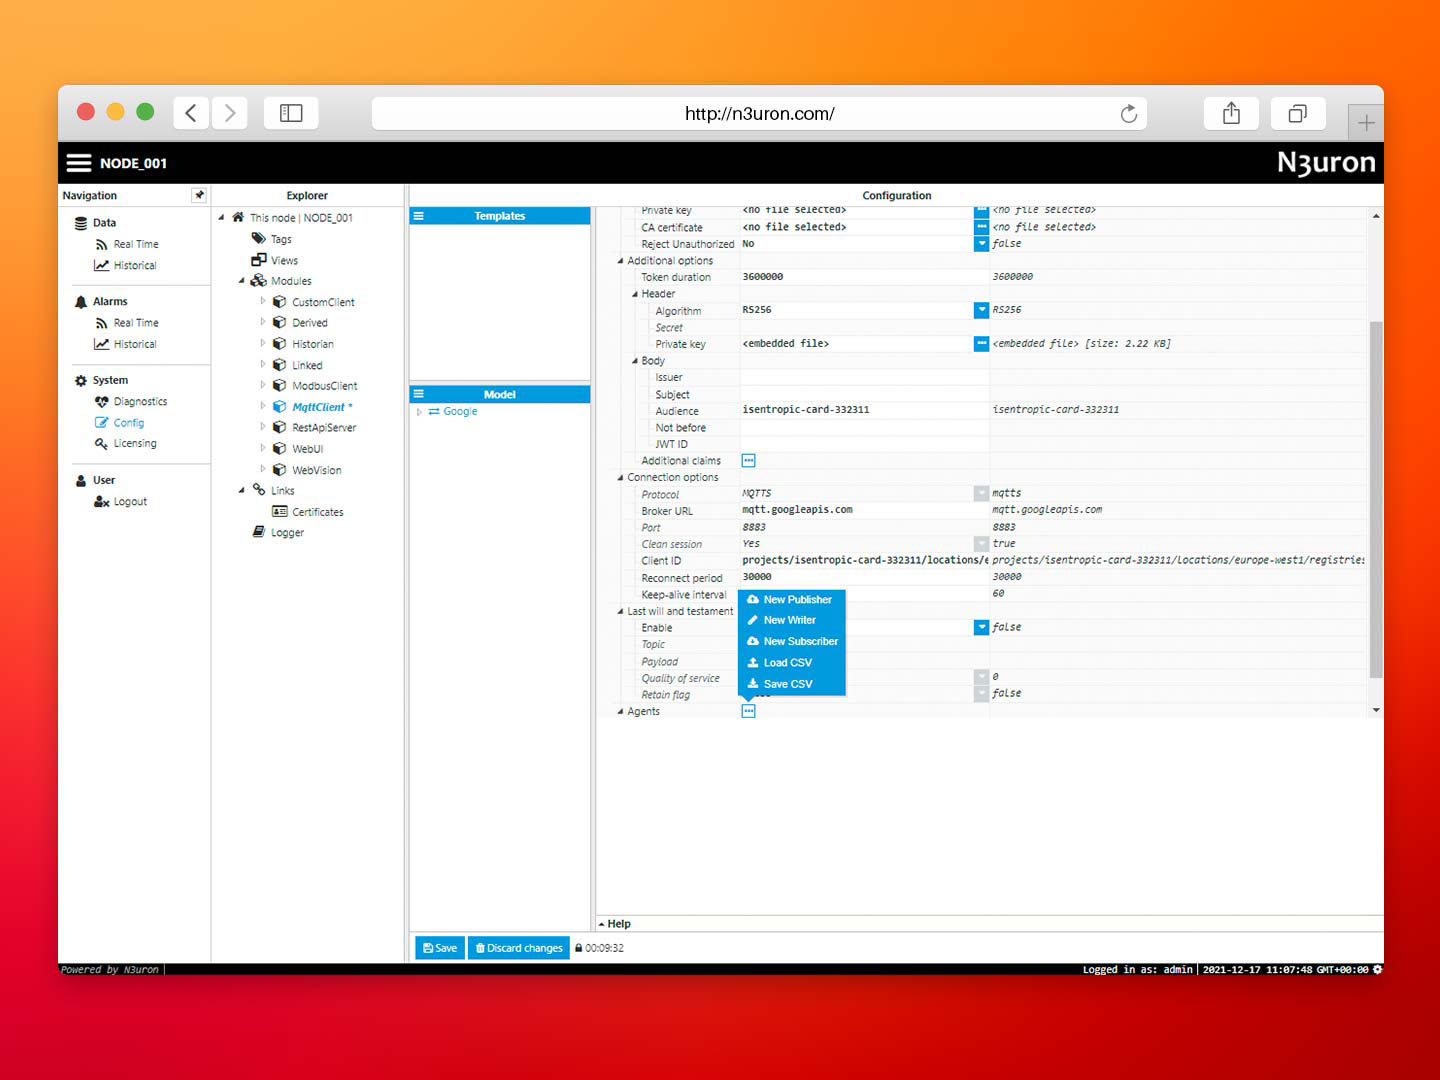
- Step 01: Generating a publication is very easy. Simply click on new publisher in the agents section of the MQTT module, as shown in the screenshot.
Screenshot displaying the “New Publisher” option within the N3uron MQTT module panel.
- Step 02: Provide a name. In this case, a very simple name has been used: Publisher.
Screenshot displaying the publisher configuration settings within the N3uron MQTT module panel.
The device is created with an MQTT client and is connected to the MQTT bridge. You can now publish telemetry events to a topic with the following format: /devices/Device_ID/events.
Messages sent to this topic are redirected to the topic that has been set for telemetry by default in the registry. The default telemetry topic is the Cloud Pub/Sub topic defined in the eventNotificationConfigs[i].pubsubTopicName field of the registry. If no default topic is defined, the data will be lost. To publish messages to other Cloud Pub/Sub topics, see Publishing telemetry events to additional Cloud Pub/Sub topics.
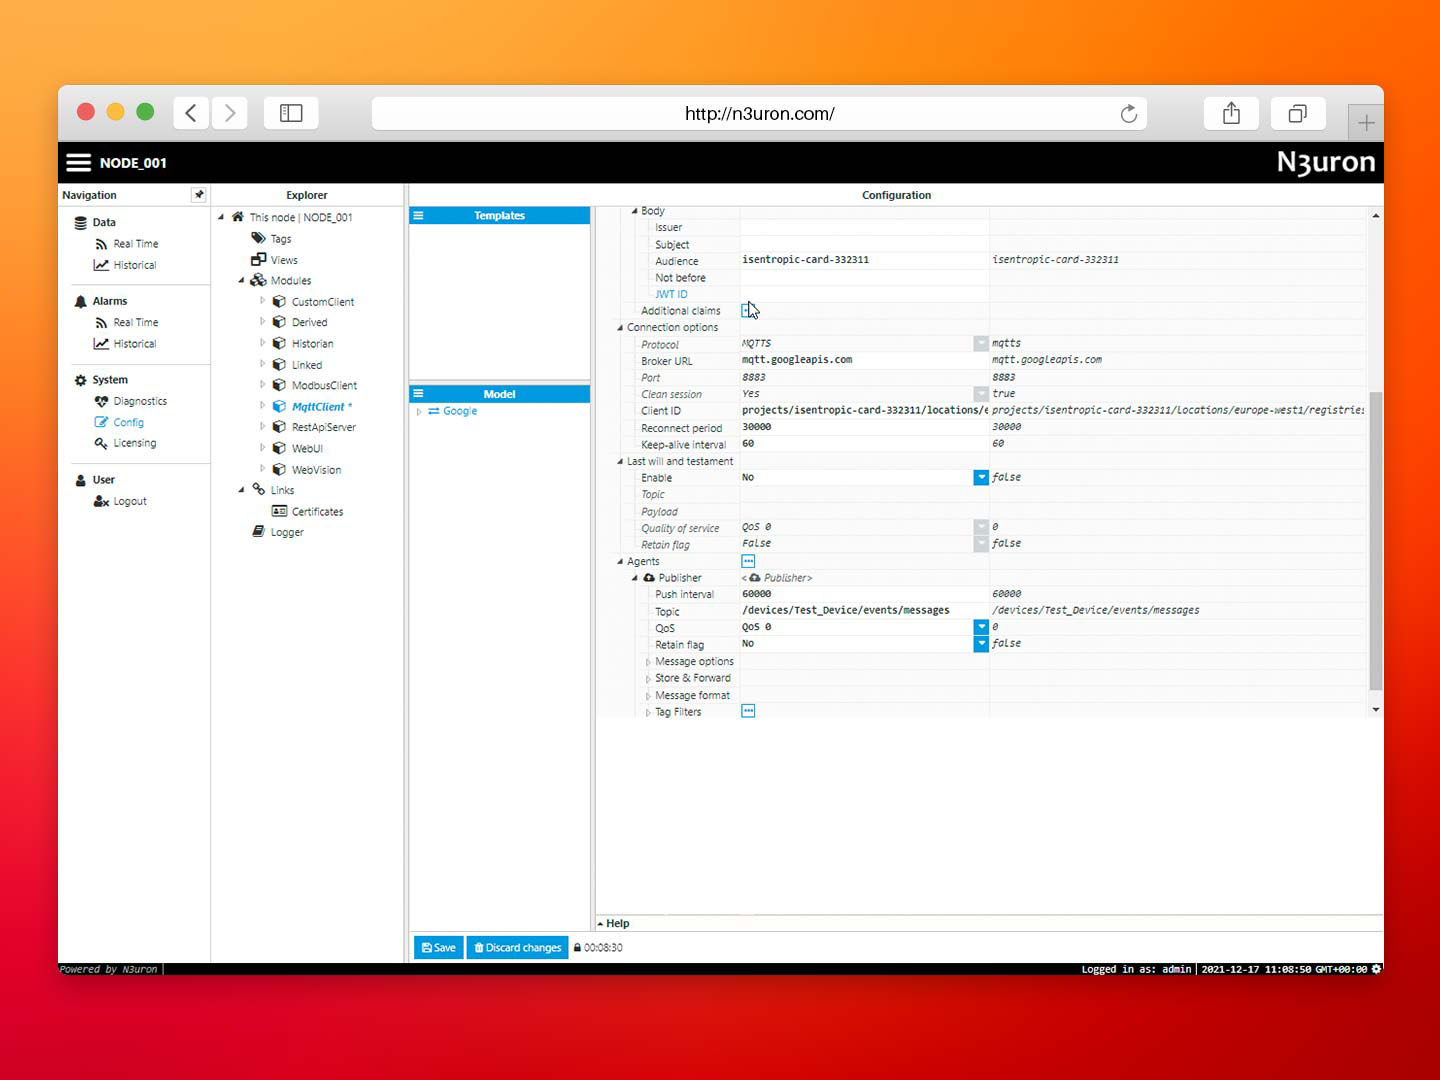
- Step 03: To finish configuration, users should define the name of the topic within which they want to publish and create a tag filter without constraints. This allows all tags to publish their data in the topic. In this case, the topic used is /devices/Test_Device/events/messages.
Screenshot displaying the publisher configuration icon within the Model area of the MQTT module panel.
From now on, all data will be continuously published to the cloud. In order to display this data, users must enter the GCP console, go to the subscriptions section, and create a subscription for the previously generated default topic. Failure to complete this step will result in published data being lost. To do so, users should follow the below steps:
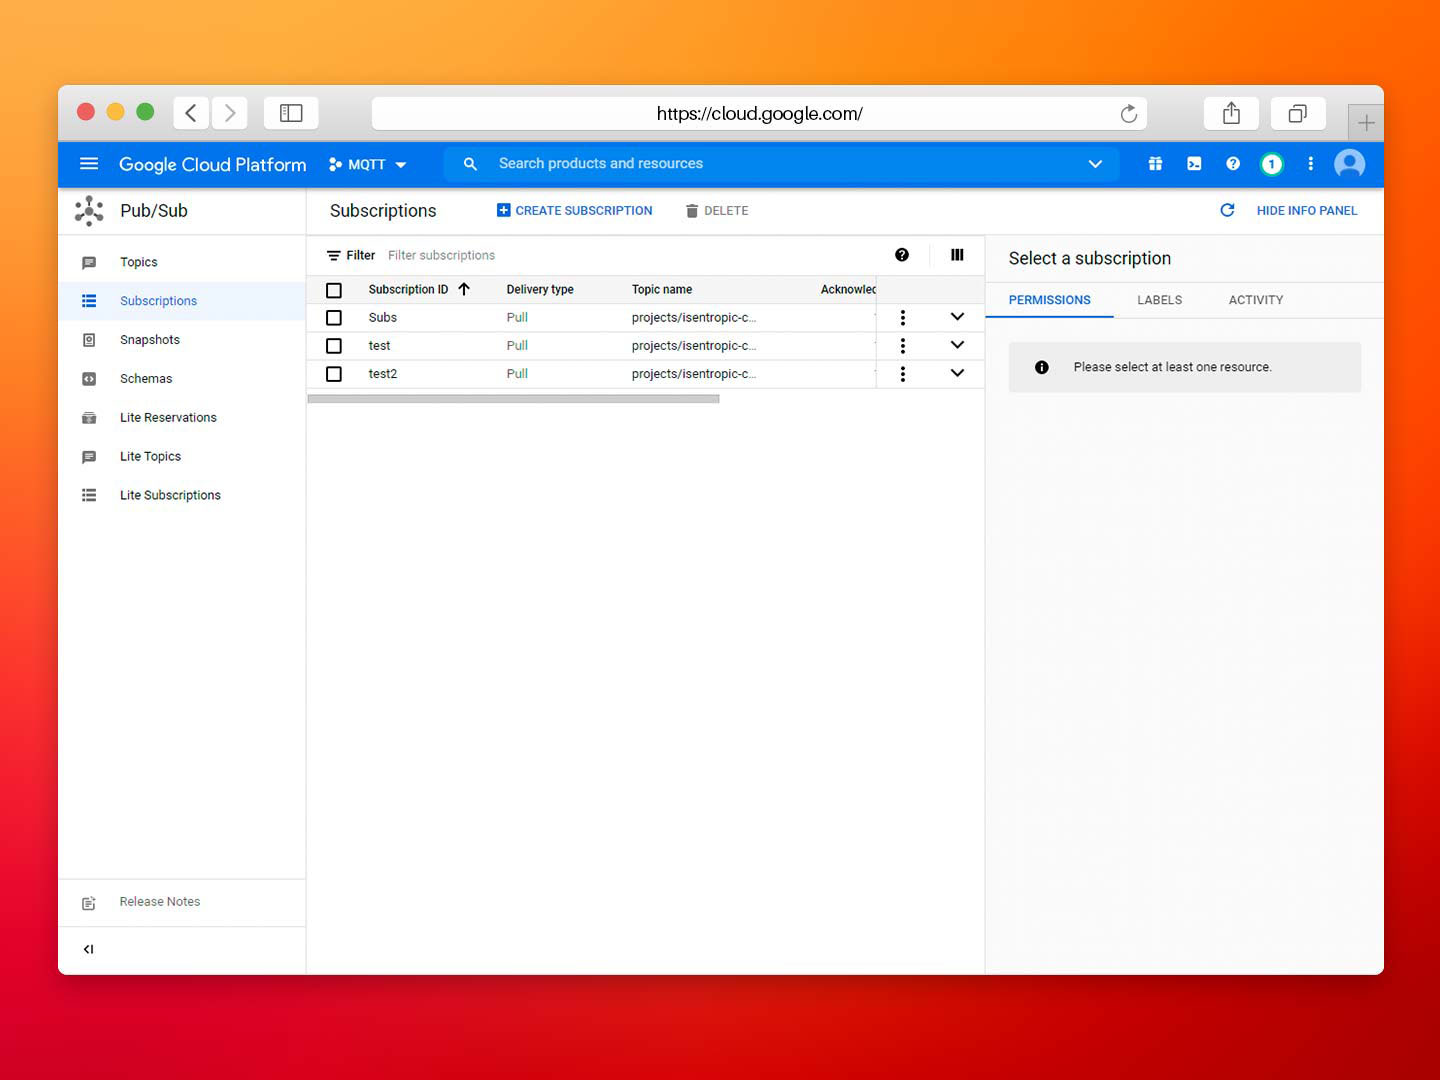
- Step 01: Click on the Subscription section and select Create Subscription.
Screenshot displaying the “Subscription” panel in the Google Cloud Platform.
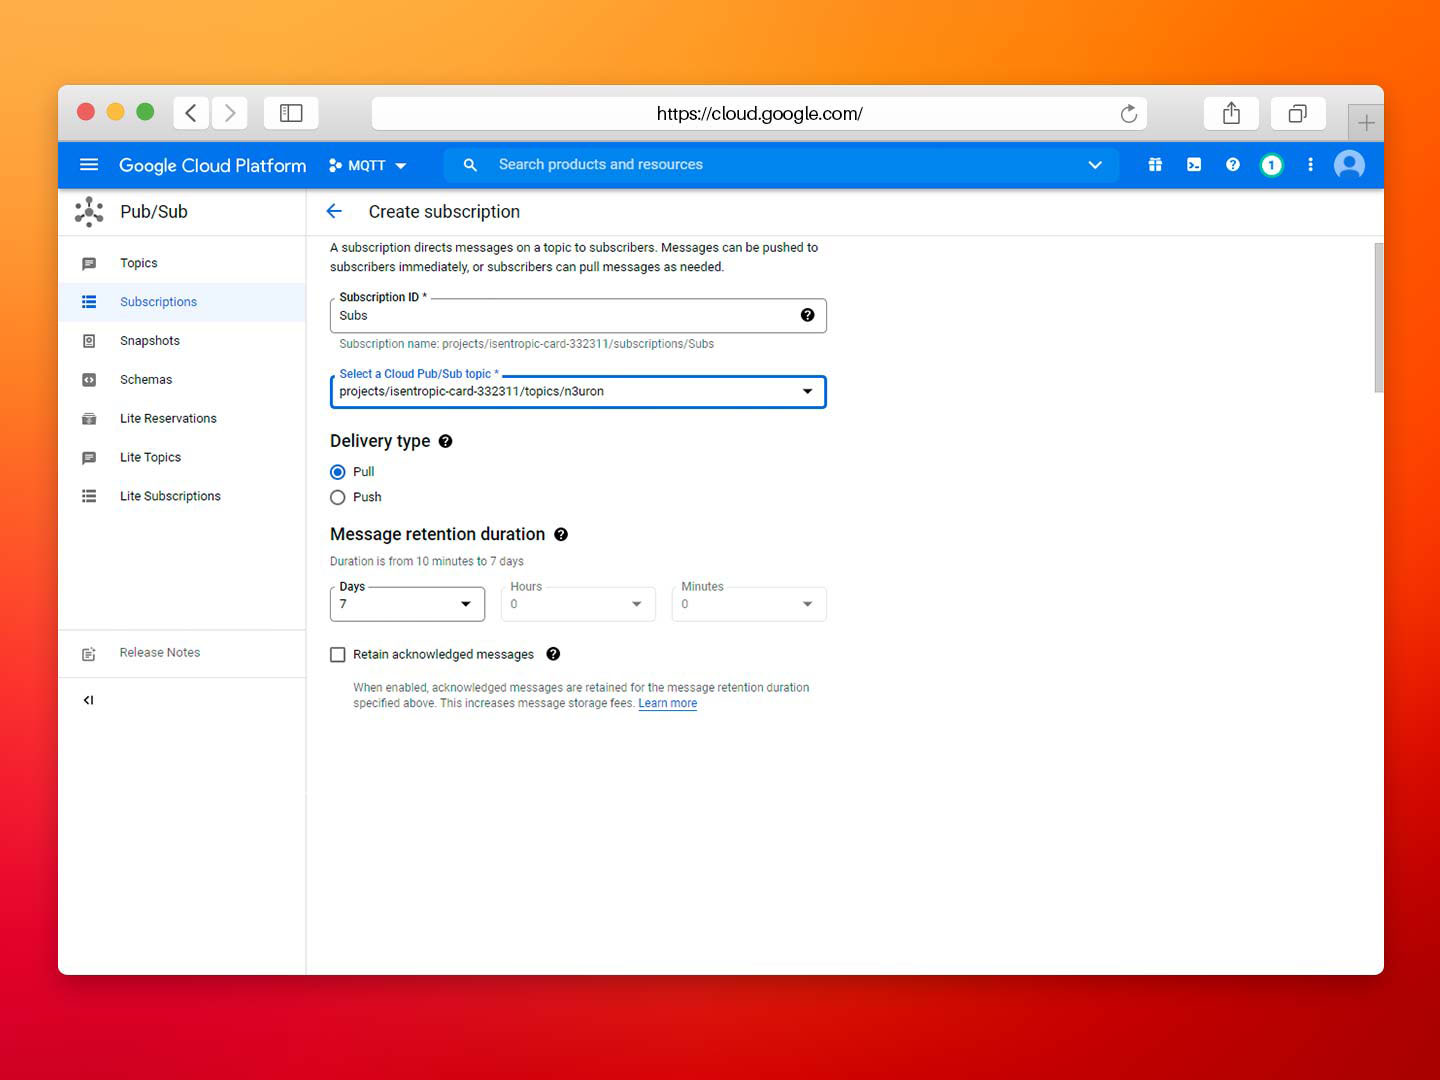
- Step 02: Give a name to the subscription and select the topic you want to subscribe to. In this case, the name of the subscription is subs (although this is not relevant) and the name of the topic subscribed is projects/isentropic-card-332311/topics/n3uron.
Screenshot displaying the “Create Subscription” panel in the Google Cloud Platform.
- Step 03: Click on create to finish configuration.
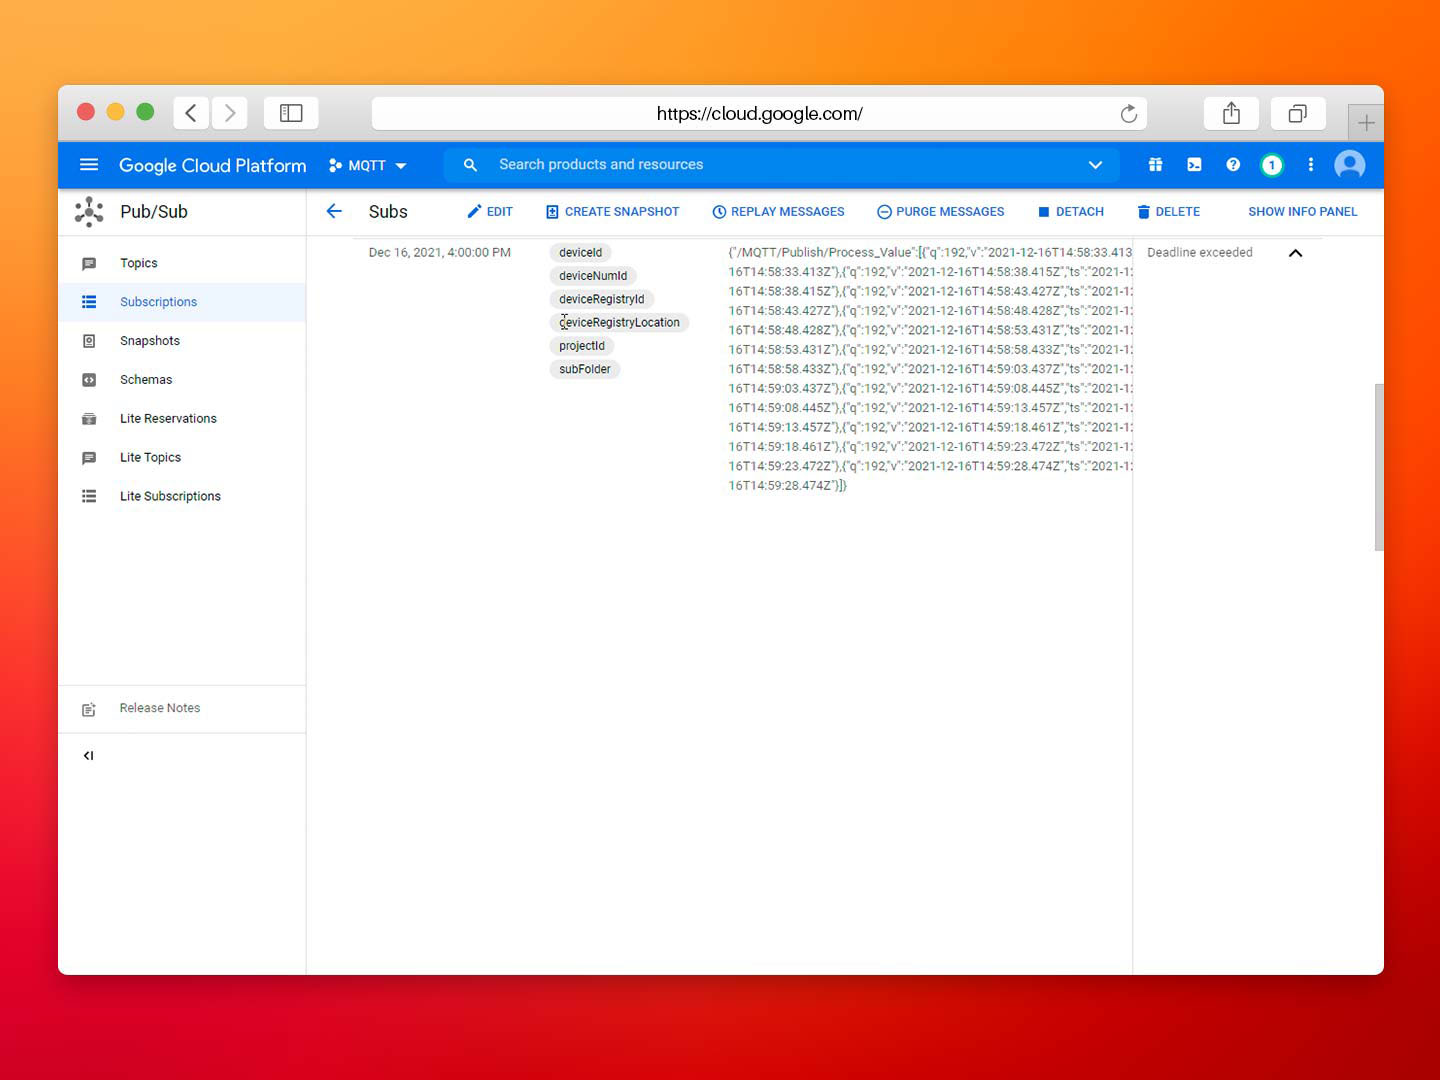
You should now enter the created subscription and select pull in the messages section to obtain the published messages. The result should be similar to the screenshot below:
Screenshot displaying published messages once subscribed to the topic in the Google Cloud Platform.
Subscribing Data within the Google Cloud Platform
The process for generating subscriptions is similar to the publication process. The objective of the subscription is to receive tag events from remote devices via MQTT.
- Step 01: First, create a new subscriber, as previously done for the publisher.
Screenshot displaying the “New Publisher” option within N3uron’s MQTT module panel.
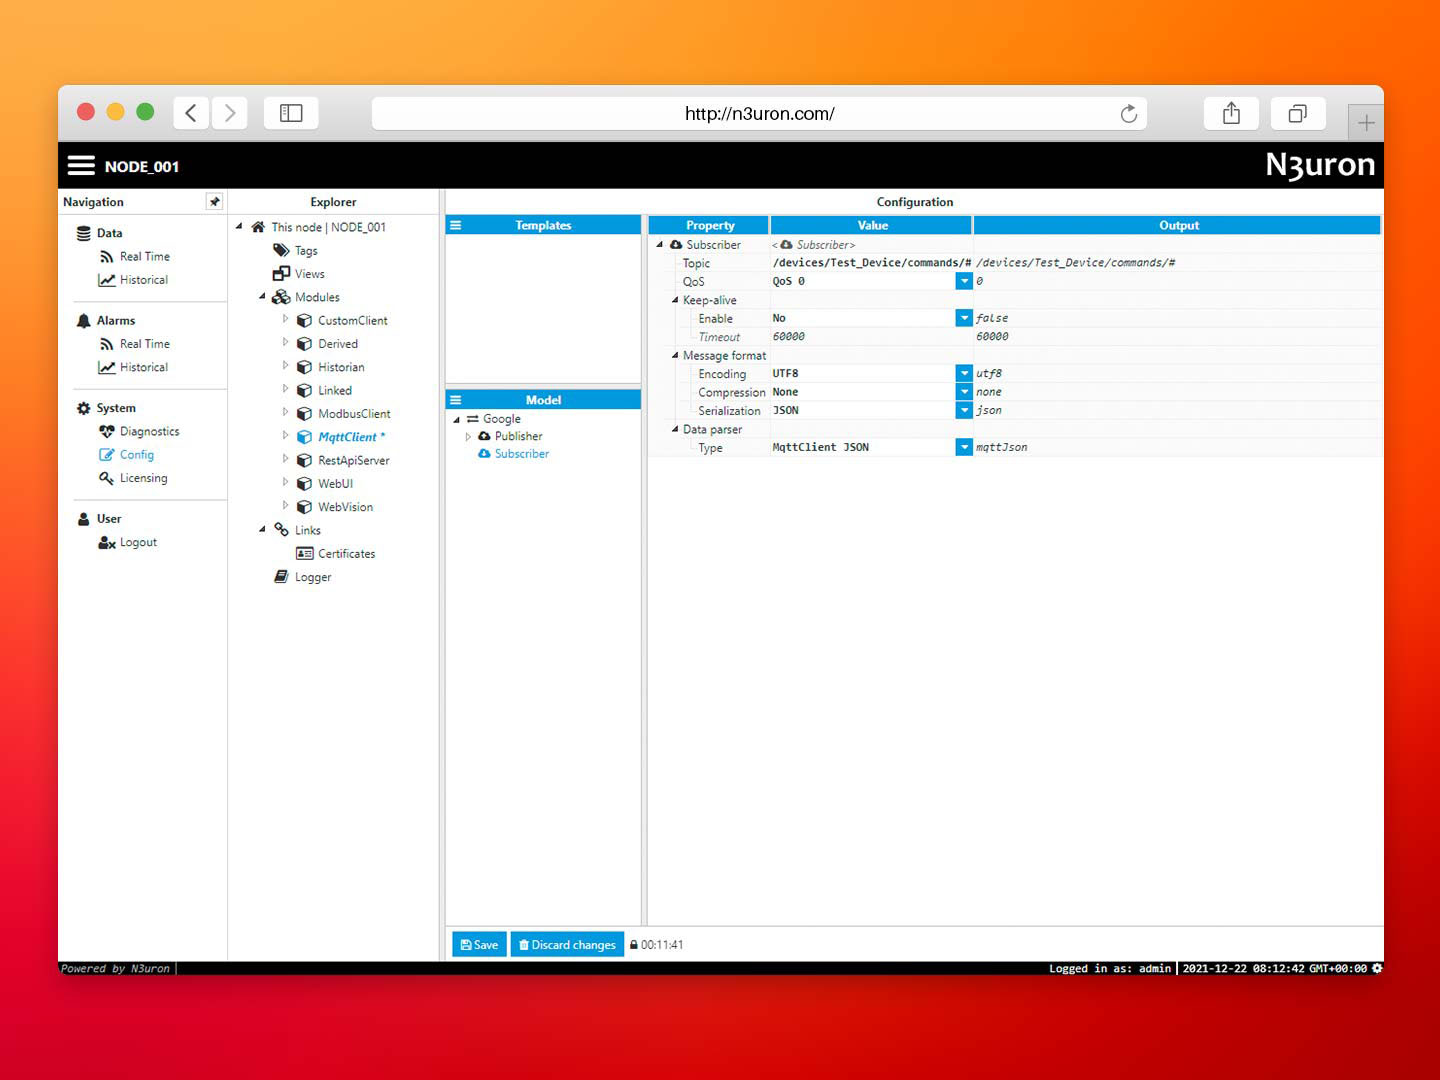
- Step 02: Name it as Subscriber in the subscriber name section.
Screenshot displaying subscriber configuration settings in the N3uron Tags panel.
In order to receive a command, the device must:
- Be connected to Google IoT Core using the MQTT protocol.
- Subscribe to the topic/devices/Device_ID/commands/# (the # wildcard is necessary) By subscribing to this topic, the device will be able to receive messages sent to /devices/Device_ID/commands/#, as well as those sent to subfolders, /devices/Device_ID/commands/#/{subfolder}. Subscriptions to a specific subfolder are not possible.
- Step 03: In this case, the unique compulsory configuration requires users to introduce the name of the topic from which the data will be obtained. In this case, the topic used is, /devices/Test_Device/commands/#.
A tag must now be created in N3uron, which will be updated according to the events received from the Google Core IoT. Follow the below steps to create this tag:
- Step 01: First click on Config>Tags>Model>New tag and label it with a specific name. In this example, Subscribed_Value is used.
- Step 02: Define the Source section and complete it using the previously defined MQTT Client module.
Screenshot displaying tag configuration within the N3uron Tags panel.
– In Module name, the name used must be exactly the same as the module name.
– In the subscriber section, users must introduce the established connection (in this case Google)/the defined subscriber (in this case Subscriber). In this case, it would be Google/Subscriber.
Once this has been configured, the defined tag will be able to receive events from the Google Cloud.
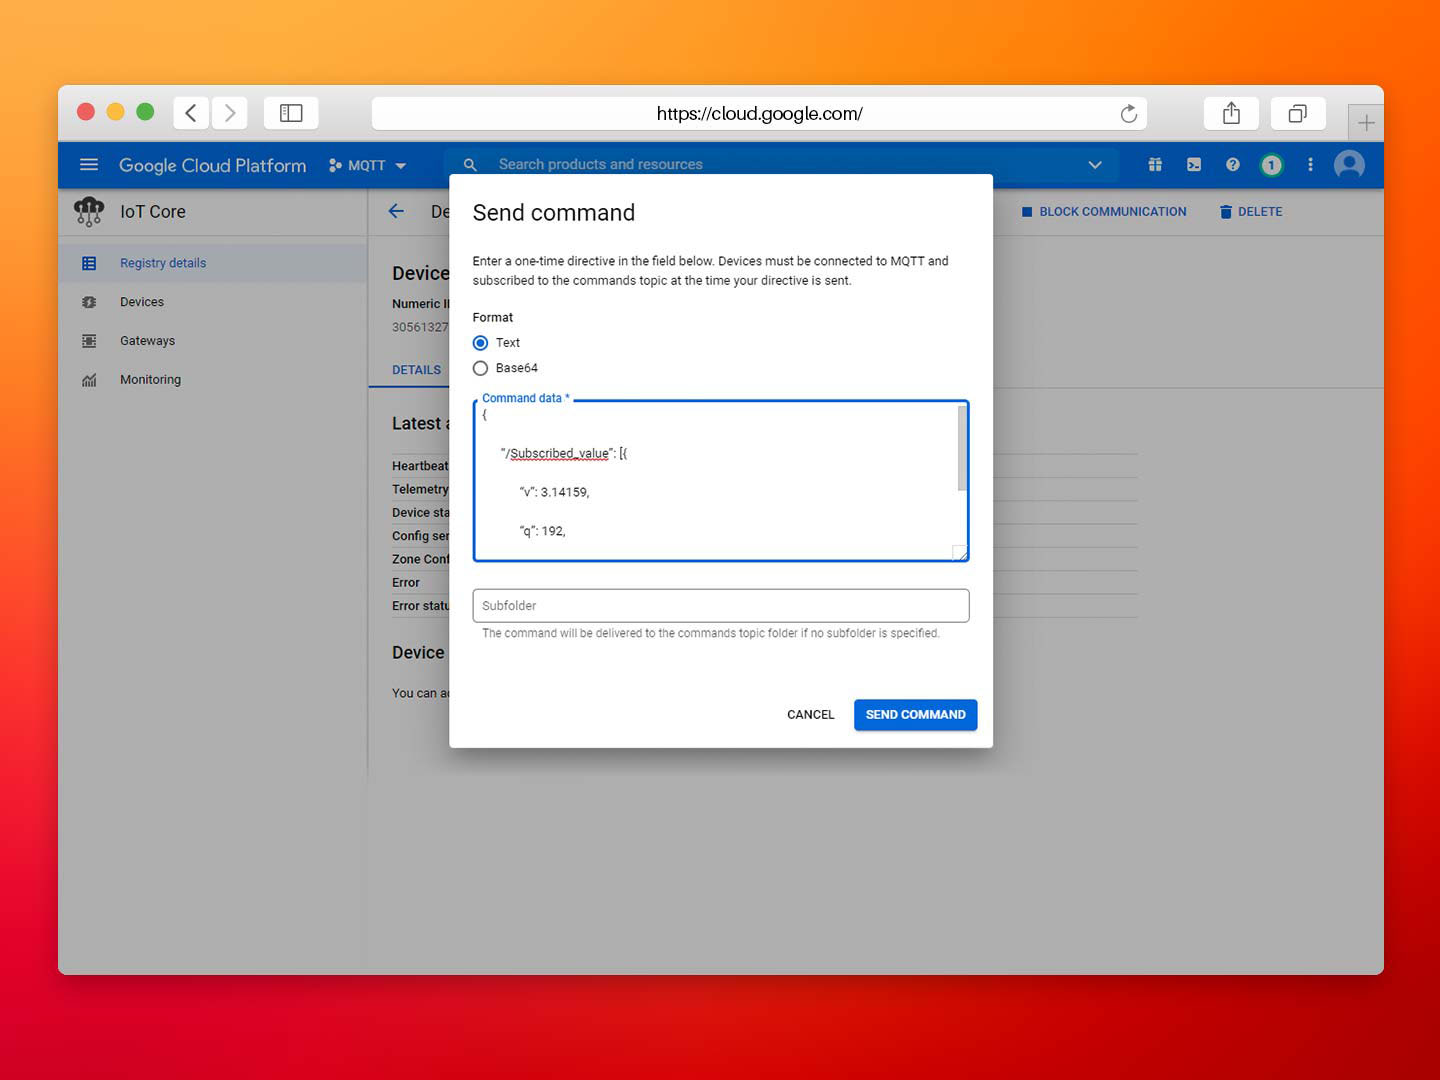
- Step 01: Go to the GCP console, click on devices, select the device you created and select the send command.
Screenshot displaying the publication configuration in the Google Cloud Platform.
- Step 02: Within the Message, Payload will introduce the following:
{
“/Subscribed_value”: [{
“v”: 3.14159,
“q”: 192,
“ts”: 1630668488618
}]
}
- Step 03: Click on the Send Command button.
Screenshot displaying the “Send Command” panel in the Google Cloud Platform.
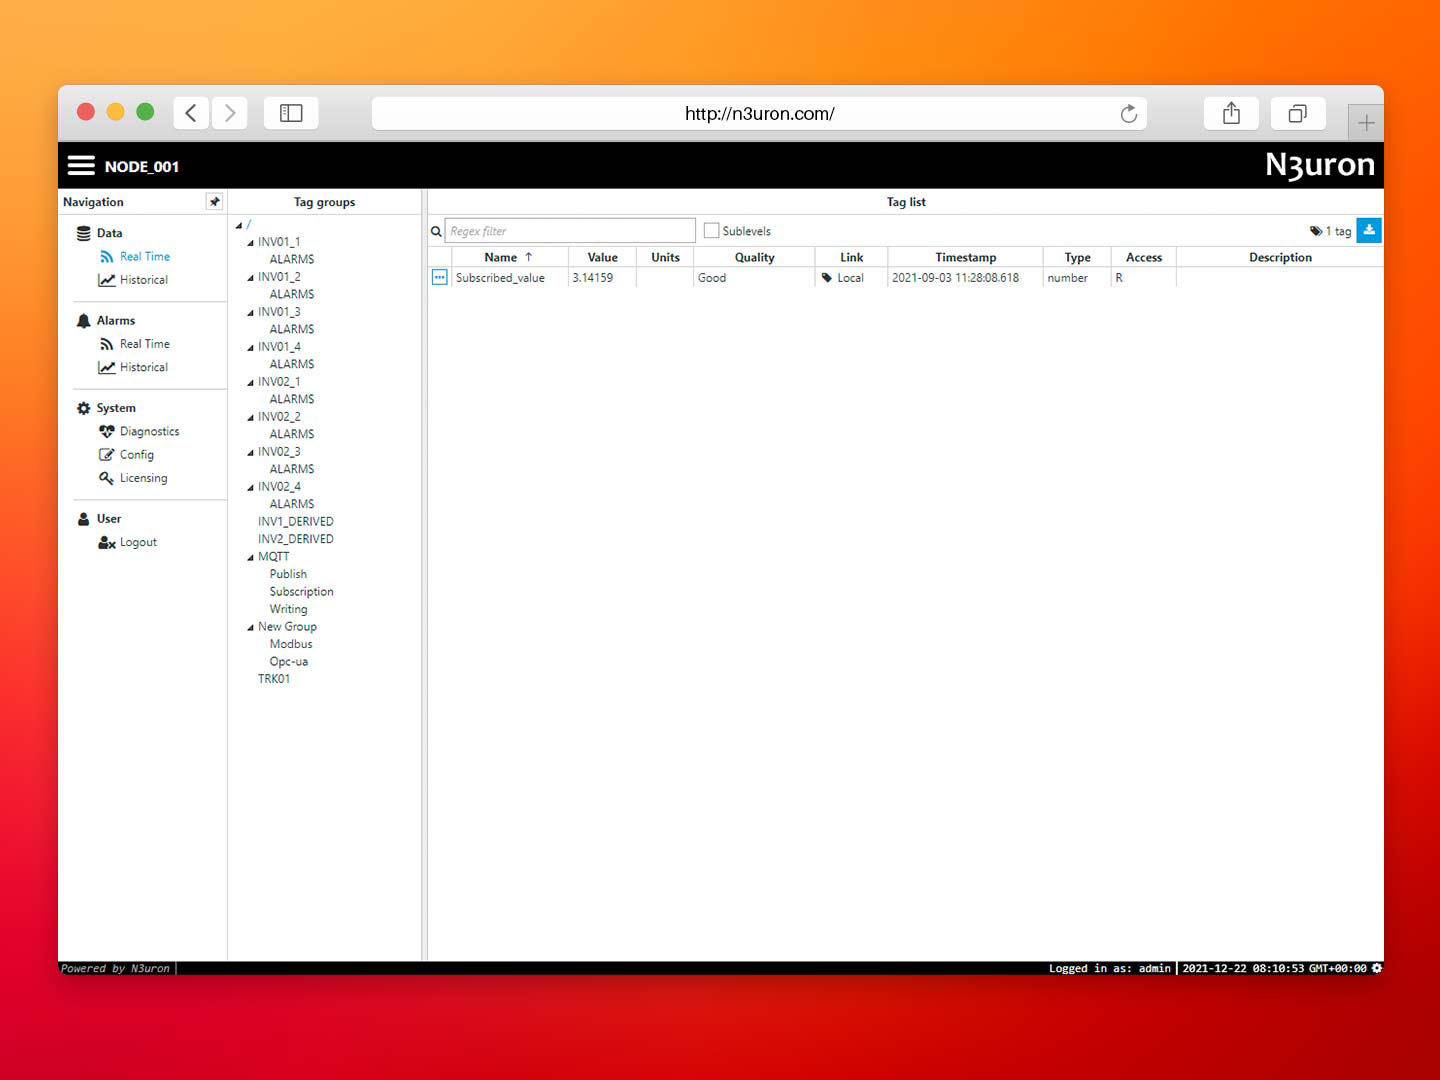
- Step04: Go back to the N3uron WebUI interface and select Data/Real-Time in the left-hand side panel. You should now see the Subscribed_Value tag you previously created with a value of 3.14159.
Screenshot displaying real-time values in the Real-Time section of the N3uron Navigation column panel.
Conclusion: How to connect industrial Assets to Google Cloud using N3uron’s MQTT Module
Connecting your assets to Google Cloud is extremely easy using N3uron’s MQTT Client module. If you are ready to start using the MQTT module, download the N3uron free trial version and read our MQTT Manual on how to implement and use N3uron’s MQTT module on our communication platform.
