

Azure Event Grid and N3uron
In one of our previous articles on the MQTT Protocol, titled “MQTT: The Universal Messaging Protocol for Cloud Providers and IIoT Systems,” we explored the significance of MQTT in the Industrial Internet of Things (IIoT) and its smooth integration with Azure IoT Hub. Now, let’s delve into a practical guide on setting up and connecting your Industrial assets to Azure Event Grid using N3uron’s MQTT Client module.
N3uron facilitates the seamless implementation of solutions for Industrial IoT and DataOps.When integrated with Azure Event Grid’s microservices, it significantly simplifies decision-making based on your operational data.
Some of the key features that make N3uron the optimal software platform for developing IIoT and DataOps solutions include:
- Edge driven: It is designed to be deployed on the plant floor to process data close to the source.
- Report by exception: Only relevant changes in data are transmitted.
- Open Architecture: It is built on modern technologies and uses open standards.
- Lightweight: N3uron not only supports lightweight data transmission protocols such as MQTT and Sparkplug but its Sparkplug module fully implements the Sparkplug compatible software specification.
- Accessibility: N3uron’s Data Model is 100% accessible by any other consumers.
- Interoperability: With nearly 50 modules which can be stacked as required to meet any project needs, N3uron provides complete interoperability.
- Scalability: N3uron is designed to seamlessly deploy distributed architectures with several hundred or thousand nodes and you can connect several nodes in a matter of minutes, using N3uron Links, scale architectures and consolidate namespaces very easily. A single node can seamlessly manage several hundred thousand tags and a link’s throughput surpasses 100k events/second.
Ranging from traditional industrial protocols such as Modbus, DNP3, OPC UA, or OPC DA to more conventional protocols like MQTT, Sparkplug or REST, N3uron provides a turnkey connectivity solution for the Industrial Internet of Things (IIoT). Nevertheless, N3uron is not only a connectivity platform, but it is mainly meant to build and deploy an enterprise Unified Namespace (UNS) by modelling, aggregating, standardizing, and contextualizing data on the plant floor from a multitude of sources whether that will be PLCs, databases, manufacturing execution systems, SCADAs or ERPs just to name a few, and make this data available to other third-party applications running either on-premise or in the cloud.

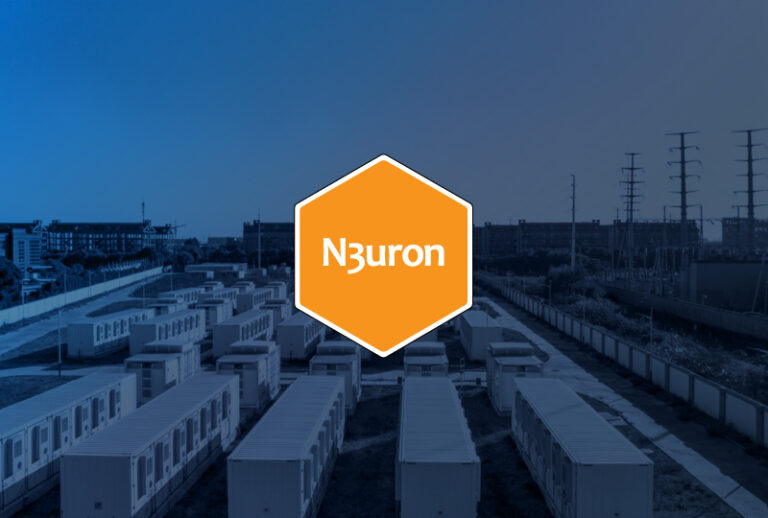
Infographic featuring the Microsoft Event Grid service with four industrial sites below, powered by the N3uron Platform with MQTT. Up top, you’ll find representations of six Event Grid services.
N3uron and Azure Event Grid Requirements
It is assumed that you already have an Azure subscription. If not, you can create one at the Microsoft Azure website.
- Familiarize yourself with Event Grid: If you’re new to Azure Event Grid, we recommend reading the Azure Event Grid overview before diving into this article to better understand the concepts.
- Check Firewall Settings: Ensure that port 8883 is open in your firewall. The MQTT protocol, which is used in this article, communicates over port 8883. Note that some corporate network environments might have this port blocked.
- Obtain an X.509 Client Certificate: You’ll need an X.509 client certificate to generate the thumbprint and authenticate the client connection. Ensure you have this certificate in place for a seamless experience. If you don’t have it, this article will show you how to create a self-signed X.509 Client certificate.
If you haven’t downloaded N3uron yet, you can do so at the N3uron download page. If this is the first time you are installing N3uron, our Quick User Guide will guide you through the entire installation process.
We highly recommend using an external MQTT client to test your configuration. For this article, we utilized MQTT Explorer, although you are free to use your preferred MQTT client application.
Setting up an Azure Event Grid
Creating a new Event Grid Namespace
- Step 1: Log into Microsoft Azure and go to the Azure Portal.
Click on the link to get to the Microsoft Azure Portal.

The screenshot exhibits the Microsoft Azure Portal interface.
- Step 2: Once logged in, you’ll need to create the Azure resources that your device, in our case a N3uron node, will require in order to connect to the Azure Event Grid and start exchanging messages.
- Step 3: Navigate to the search bar, enter Event, and subsequently choose Event Grid Namespaces from the dropdown menu.

The image displays the ‘Event Grid Namespaces’ option in the dropdown menu of Microsoft Azure.
- Step 4: In the Overview page, select +Create in any of the Namespaces cards available in the MQTT events or Custom events sections.

The picture displays how to create a new Event Grid Namespace in Microsoft Azure.
- Step 5: In the Basics tab, complete the fields as follows:
- Subscription: Select the subscription to use for your hub. In this example, we have selected Azure subscription 1.
- Resource Group: Select a resource group or create a new one. To create a new one, select Create new and fill in the name you want to use. To use an existing resource group, select the specific resource group. For more information, see Manage Azure Resource groups by using the Azure portal. In this example, we have selected CS_N3uron.
- Name: Enter a name for your Namespace. In this example, we have named it NS-N3uron.
- Region: Select the region you want your hub to be located in. Select the location closest to you.
-
- Availability zones: Select the checkbox if available. To learn more about it, follow this link, What are availability zones?.
- Throughput units: This setting controls the capacity of your Event Grid. To learn more about it, follow this link, Throughput units.

The screenshot displays the ‘Basics’ tab within the ‘Create Namespace’ window of Microsoft Azure’s Event Grid.
- Step 6: On the Review + create tab, review your settings and select Create.

The image shows the ‘Review + create’ tab within the ‘Create Namespace’ window of Microsoft Azure’s Event Grid.
Configure Namespaces settings
- Step 1: In the Overview page, select View in any of the Namespace cards available in the MQTT events or Custom events sections.

The picture illustrates the configuration process for a new Event Grid Namespace in Microsoft Azure.
- Step 2: Select the namespace from the list of resources in the subscription.

Screenshot illustrating the process of selecting an Event Grid Namespace from the list of resources within the Microsoft Azure subscription.
- Step 3: Enable MQTT in your configuration.

Picture showing how to enable MQTT in your Event Grid configuration within Microsoft Azure.
- Step 4: Check the option Enable MQTT and specify the desired number of client sessions for each authentication name. For this example, we will configure 4 client sessions per authentication name.

Enable MQTT and selecting the ‘Maximum client sessions per authentication name’ option to configure 4 client sessions in Microsoft Azure Event Grid.
Configure Publishing and Subscribing to MQTT messages
- Note: If you don’t already have a certificate, you can create a sample certificate using the step CLI. Please follow this link for further information, Quickstart: Publish and subscribe to MQTT messages on Event Grid Namespace.
Generate Sample Client Certificate and Thumbprint
In this example, we will use self-signed X.509 certificates to generate the thumbprint and authenticate client connections for three different clients:
- client-n3uron-pub: This client has publisher permissions.
- client-n3uron-sub: This client has subscriber permissions.
- client-app: This client also has subscriber permissions.
- Step 1: To create root and intermediate certificates, run the following command. Remember the password for the next step.
step ca init –deployment-type standalone –name MqttAppSamplesCA –dns localhost –address 127.0.0.1:443 –provisioner MqttAppSamplesCAProvisioner
- Step 2: Use the CA files generated to create a certificate for the first client, client-n3uron-pub. Ensure you specify the correct paths for the cert and secrets files in the command.
step certificate create client-n3uron-pub client-n3uron-pub.pem client-n3uron-pub.key –ca .step/certs/intermediate_ca.crt –ca-key .step/secrets/intermediate_ca_key –no-password –insecure –not-after 8760h
- Step 3: Use the CA files generated to create a certificate for the second client, client-n3uron-sub. Be sure to use the correct paths for the cert and secrets files in the command.
step certificate create client-n3uron-sub client-n3uron-sub.pem client-n3uron-sub.key –ca .step/certs/intermediate_ca.crt –ca-key .step/secrets/intermediate_ca_key –no-password –insecure –not-after 8760h
- Step 4: Use the CA files generated to create a certificate for the third client, client-app. Make sure to specify the correct paths for the cert and secrets files in the command.
step certificate create client-app client-app.pem client-app.key –ca .step/certs/intermediate_ca.crt –ca-key .step/secrets/intermediate_ca_key –no-password –insecure –not-after 8760h
Create Clients in Event Grid Namespace
- Step 1: On the left menu, select Clients in the MQTT section.On the Clients page, select the + Client on the toolbar.
- Step 2: On the Clients page, select the + Client on the toolbar.

Screenshot illustrating the process of creating clients in Event Grid Namespace within Microsoft Azure.
- Step 3: Go to the Create Client page, and fill in the following fields as follows:
- Client Name: Client names must be unique within a namespace. In this example, Client-N3uron-Pub.
- Description: Provide a short description for your client. In this case, Client N3uron Publisher.
- Client Authentication Name: The client authentication serves as a unique identifier for the client. In this example, client-n3uron-pub.
- Client Certificate Authentication Validation Scheme: Choose thumbprint-based authentication.
- Primary Thumbprint: To obtain the Primary Thumbprint, execute a command inside the directory where your client-n3uron-pub.pem file is located, then copy the string returned by the command and paste it.
step certificate fingerprint client-n3uron-pub.pem
-
- Secondary Thumbprint: Leave it empty.
- Connection Status: Enabled.
- + Add Key: attribute = type, Type = String, Value = pub.

Screenshot displaying the Create Client page in Microsoft Azure Event Grid.
- Step 4: Continue with the same process for the other two clients, Client-N3uron-Sub and Client-App adjusting the respective information.
Create topic spaces
- Step 1: On the left menu, select Topic spaces in the MQTT section.
- Step 2: On the Topic spaces page, select + Topic space on the toolbar.

Screenshot illustrating the process of creating topic spaces in Microsoft Azure Event Grid.
- Step 3: Provide a name for the topic space, on the Create topic space page.
- Step 4: Select + Add topic template.
- Step 5: Enter N3uron/# for the topic template, and then select Create to create the topic space.
Screenshot illustrating the process of creating topic spaces in details in Microsoft Azure Event Grid.
Creating client groups
Client groups allow you to group a set of clients together based on common characteristics. The primary purpose of client groups is to simplify the configuration of authorization. You can grant authorization to a client group for publishing or subscribing to a specific topic space. This means that all clients within the client group are authorized to perform the publish or subscribe actions on the specified topic space. Previously, we added an attribute to our clients. Client attributes consist of key-value pairs, and we will use the ‘type’ attribute to create permission bindings later.
- Step 1: Under Client groups, select + Client group.

Screenshot highlighting the selection of + Client group under Client groups.
- Step 2: Add a client group name for cg-pub (client group publisher). In the query use attributes.type = “pub” and Description = Client group with publishing permissions.

Screenshot showcasing the addition of a client group named ‘cg-pub’ (client group publisher).
- Step 3: Add client group name for cg-sub (client group subscriber). In the query use attributes.type = “sub” and Description = Client group with subscription permissions.

Screenshot featuring the addition of a client group named ‘cg-sub’ (client group subscriber).
Configuring Access Control Using Permission Bindings
- Step 1: On the left menu, select Permission bindings in the MQTT section.
- Step 2: On the Permission bindings page, select + Permission binding on the toolbar.

Screenshot emphasizing the selection of Permission bindings in the MQTT section from the left menu.
- Step 3: Configure the permission binding as follows:
- Provide a name for the permission binding. In this case, pub-binding.
- For the client group name, select cg-pub.
- For the Topic space name, select the topic space you created in the previous step. In this example, N3uronTopicSpace.
- Grant the Publisher permission to the client group on the topic space.

Screenshot showcasing the addition of a permission binding using the + Permission binding option on the Permission bindings page.
- Repeat Step 3 for the subscribers. Configure the permission binding as follows:
- Provide a name for the permission binding. In this case, sub-binding.
- For the client group name, select cg-sub.
- For the Topic space name, select the topic space you created in the previous step. In this case, N3uronTopicSpace.
- Grant the Subscribe permission to the client group on the topic space.

Screenshot configuring permission bindings for ‘pub-binding’ (publishers) and ‘sub-binding’ (subscribers).
Start Configuring the N3uron IIoT Platform
Log into the N3uron IIoT Platform Using a Web Browser.
If this is your first time accessing N3uron, open your web browser and type http://localhost:8003. By default, the User and Password are admin and n3uron respectively.

Screenshot illustrating the initial step of the login process to N3uron IIoT Platform configuration.
- Note: In this example, we will configure two N3uron nodes. In one of them, we will create an MQTT Publisher client, and in the other, an MQTT Subscriber client.
Create a Module Instance Within N3uron’s WebUI Interface for a Publisher
- Step 1: In the Navigation panel, select Config.
- Step 2: In the Explorer panel, select Modules.
- Step 3: Click on the Model menu and select New Module.
- Step 4: The instance can be given any name but for this example, we will use MqttClient.

Screenshot illustrating the process of creating a module instance for a publisher within N3uron’s WebUI interface.
- Step 5: Provide a name for the module, in this case, MqttClient, and set the module type as MqttClient. Leave the rest of the properties as their default values and click Save.

Screenshot showcasing the configuration of module properties for ‘MqttClient’ within N3uron’s WebUI interface.
Configuring N3uron’s MQTT Module within the WebUI’s Explorer Panel for a Publisher
- Step 1: In the Explorer panel, select the MQTT instance you have just created.
- Step 2: Click on the Model menu bottom bar and select New Connection.
- Step 3: Provide a name for the new connection. In this example, AZURE_EG.
- Step 4: Configure the connection properties as follows:
- Version: Microsoft Azure Event Grid (Preview) allows choosing between MQTT v3.1.1 and MQTT v5 on TCP port 8883. Choose MQTT 3.x.
- Destination Broker: Select Microsoft Azure.
- Username: Enter the Client Authentication Name configured for your publisher client. In this case, client-n3uron-pub.
- Password: Leave this field empty.
- Certificate: Select your X.509 certificate file. In this case, client-n3uron-pub.pem.
- Private key: Select your X.509 private key file. In this case, client-n3uron-pub.key.
- Protocol: Select MQTTS.
- Broker URL: Enter the Hostname of your Azure Event Grid MQTT broker. In this case, ns-n3uron.westeurope-1.ts.eventgrid.azure.net.

Screenshot depicting the configuration of N3uron’s MQTT Module for a publisher within the WebUI’s Explorer Panel.
- Port: 8883.
- Client-ID: In this case, client-n3uron-pub.
Note: If you choose to allow more than one client session per authentication name in your MQTT settings, you can utilize the same username and certificates with other clients as long as you don’t exceed the client session quota per authentication name. Remember to adjust the Client-ID for the other clients, such as ‘client-n3uron-pub-1’, and so forth.
- Leave the rest of the properties as their default values and click on Save.

Screenshot displaying the configuration of MQTT settings within N3uron’s WebUI Explorer Panel for a publisher.
Publishing Data via N3uron to Azure Event Grid
- Step 1: Within the Model panel, right-click on the AZURE_EG Connection you have just configured, select New Publisher, and give it a name. In this example, we will simply use Publisher.
- Step 2: Click on it and add a name in the Topic field. To publish an MQTT message to Azure Event Grid MQTT broker, you must use the same topic you have configured in your Event Grid Namespace’s Topic Space. In this case, the topic is called N3uron.
- Step 3: In the message format settings, choose the following:
- Serialization: JSON.
- Data Structure: Compact. Doing this will help reduce the message size and, consequently, lower bandwidth usage. Click the following link to learn more about data structure.
- Date format: In this case UNIX Epoch.
- Compression: None.
- Encoding: UTF-8.
- Step 4: Click on the Tag Filter button, select New Tag Filter, and change the default name. In this example, we have used TagFilter. Leave Mode, Path, and Regex pattern as their default values.
With this configuration, every tag configured in N3uron will be published to our Azure Event Grid MQTT broker.

Screenshot illustrating the process of publishing data from N3uron to Azure Event Grid.
- Step 5: In the Explorer panel, select Tags.
- Step 6: In the Model menu, right-click on the folder icon, select New Tag, and give it a name. In this example, we will use Process_Value.
- Step 7: Within the Configuration panel, set the following properties using the values shown below, leaving the rest of them as their default values:
- Type: Number.
- Simulation/Enabled: Yes.

Screenshot demonstrating the extension of configuring N3uron to publish data to Azure Event Grid.
Create a Module Instance within N3uron’s WebUI Interface for a Subscriber
- Step 1: In the Navigation panel, select Config.
- Step 2: In the Explorer panel, select Modules.
- Step 3: Click on the Model menu and select New Module.
- Step 4: The instance can be given any name but for this example, we will use MqttClient.

Screenshot depicting the process of creating a module instance for a subscriber within N3uron’s WebUI interface.
- Step 5: Provide a name for the module, in this case MqttClient, set the module type, in this case MqttClient. Leave the rest of the properties as their default values and click Save.
")
Screenshot showcasing the configuration of the ‘MqttClient’ module for a subscriber within N3uron’s WebUI interface.
Configuring N3uron’s MQTT Module within the WebUI’s Explorer Panel for a Subscriber
- Step 1: In the Explorer panel, select the MQTT instance you have just created.
- Step 2: Click on the Model menu bottom bar and select New Connection.
- Step 3: Give the new connection a name. In this example, it has been named AZURE_EG.
- Step 4: Configure the connection properties:
- Version: Microsoft Azure Event Grid (Preview) allows to use between MQTT v3.1.1 and MQTT v5 on TCP port 8883. In this case, MQTT 3.x.
- Destination Broker: Microsoft Azure Event Grid (Preview) allows to use between Microsoft Azure or Custom. In this case, Microsoft Azure.
- Username: Here write Client Authentication Name you configured as your subscriber client. In this case, client-n3uron-sub.
- Password: Leave the password empty.
- Certificate: Select your X.509 certificate file. In this case, client-n3uron-sub.pem.
- Private key: Select your X.509 private key file. In this case, client-n3uron-sub.key.
- Protocol: Select MQTTS.
- Broker URL: Enter the Hostname of your Azure Event Grid MQTT broker. In this case, ns-n3uron.westeurope-1.ts.eventgrid.azure.net.

Screenshot illustrating the configuration of N3uron’s MQTT Module for a subscriber within the WebUI’s Explorer Panel.
- Port: 8883.
- Client-ID: In this case, client-n3uron-sub.
Note: If you choose to allow more than one client session per authentication name in your MQTT settings, you can utilize the same username and certificates with other clients as long as you don’t exceed the client session quota per authentication name. Remember to adjust the Client-ID for the other clients, such as ‘client-n3uron-sub-1’, and so forth.
- Leave the rest of the properties as their default values and click on Save.

Screenshot displaying the extension of configuring N3uron’s MQTT Module for a subscriber within the WebUI’s Explorer Panel.
Subscribing to Data from Azure Event Grid via N3uron
- Step 1: Within the Model panel, right-click on the AZURE_EG Connection you have just configured, select New Subscriber, and give it a name. In this example, we will simply use Subscriber.
- Step 2: Click on the newly created subscriber and specify a name in the Topic field. To publish an MQTT message to Azure Event Grid MQTT broker, you must use the same topic you have configured in your Event Grid Namespace’s Topic Space. In this case, the topic is called N3uron.
- Step 3: In the message format settings, choose the following;
- Encoding: UTF-8.
- Compression: None.
- Deserialization: JSON.
- Step 4: Leave the remaining of the settings as default.

Screenshot depicting the process of subscribing to data from Azure Event Grid via N3uron.
- Step 5: In the Explorer panel, select Tags.
- Step 6: In the Model menu, right-click on the folder icon, select New Tag, and give it a name. In this example, we will use Subscribed_Value.
- Step 7: Within the Configuration panel, set the following properties using the values shown below, leaving the rest of them as their default values:
- Type: Number.
- Source:
- Enable: Yes.
- Module type: MqttClient.
- Module name: MqttClien.
- Config:
- Subscriber: AZURE_EG/Subscriber.
- Tag Address: /Process_Value.

Screenshot illustrating the extension of configuring subscriber tags and properties within N3uron’s WebUI interface.
Subscribing to Data from Azure Event Grid via your MQTT Client App
- Step 1: Open your favourite MQTT client app (in this case we will use MQTT Explorer) and configure your subscription as follow:
- Name: In this case Azure-EG-App.
- Validate certificate: Enable it.
- Encryption(tls): Enable it.
- Protocol: mqtt://.
- Host: Enter the Hostname of your Azure Event Grid MQTT broker. In this case, ns-n3uron.westeurope-1.ts.eventgrid.azure.net.
- Port: 8883.
- Username: Here write the Client Authentication Name you configured as your subscriber client. In this case, client-app.
- Click on ADVANCED button.
- Topic: +Add N3uron as topic.
- QoS: 0.
- MQTT Client ID: In this case client-app. If you are using multiple clients with the same Client Authentication Name, please make sure to change the Client ID accordingly. For example, you can use ‘client-app-1,’ ‘client-app-2,’ and so on.
- Click on CERTIFICATES button.
- Client Certificate: Choose your .pem file. In this case client-app.pem.
- Client Key: Choose your .key file. In this case client-app.key.
- Save your configuration.
- Step 2: Connect your favourite MQTT app or in this case MQTT Explorer to Azure Event Grid Broker, and you should receive messages from the topic you are subscribed to.

Screenshot illustrating the process of subscribing to data from Azure Event Grid via an MQTT Client App.