Introduction
The remarkable growth of renewable energy in recent times, driven by technological advancements and a global commitment to sustainability with the goal of providing a secure and reliable energy supply to meet the increasing demand of our modern cities and industries, poses significant challenges for the energy sector.
In this article, we will showcase how to deploy an innovative, fully-featured, scalable and cost-efficient end-to-end solution for the management of operational data generated by power plants.
Let’s introduce the core components of this solution:
- N3uron: N3uron is a versatile IIoT software that runs both at the edge and the cloud, addressing the collection and standardization of data from field devices. It ensures the secure and reliable transmission of this data to a central location and also provides the means for long-term storage, aggregation as well as real-time visualization and control of the operational status of the assets.
- balena: balena is a secure fleet management solution with a lightweight container-based operating system that provides a centralized control plane to deploy, update and manage the software running at the edge. Easing up the maintenance and support operations of your hardware fleet.
- AWS: Amazon Web Services is a cloud computing platform that offers a wide range of on-demand services, including computing power, storage, and databases, allowing businesses and individuals to access and utilize scalable and reliable resources without the need for extensive upfront investment in infrastructure.
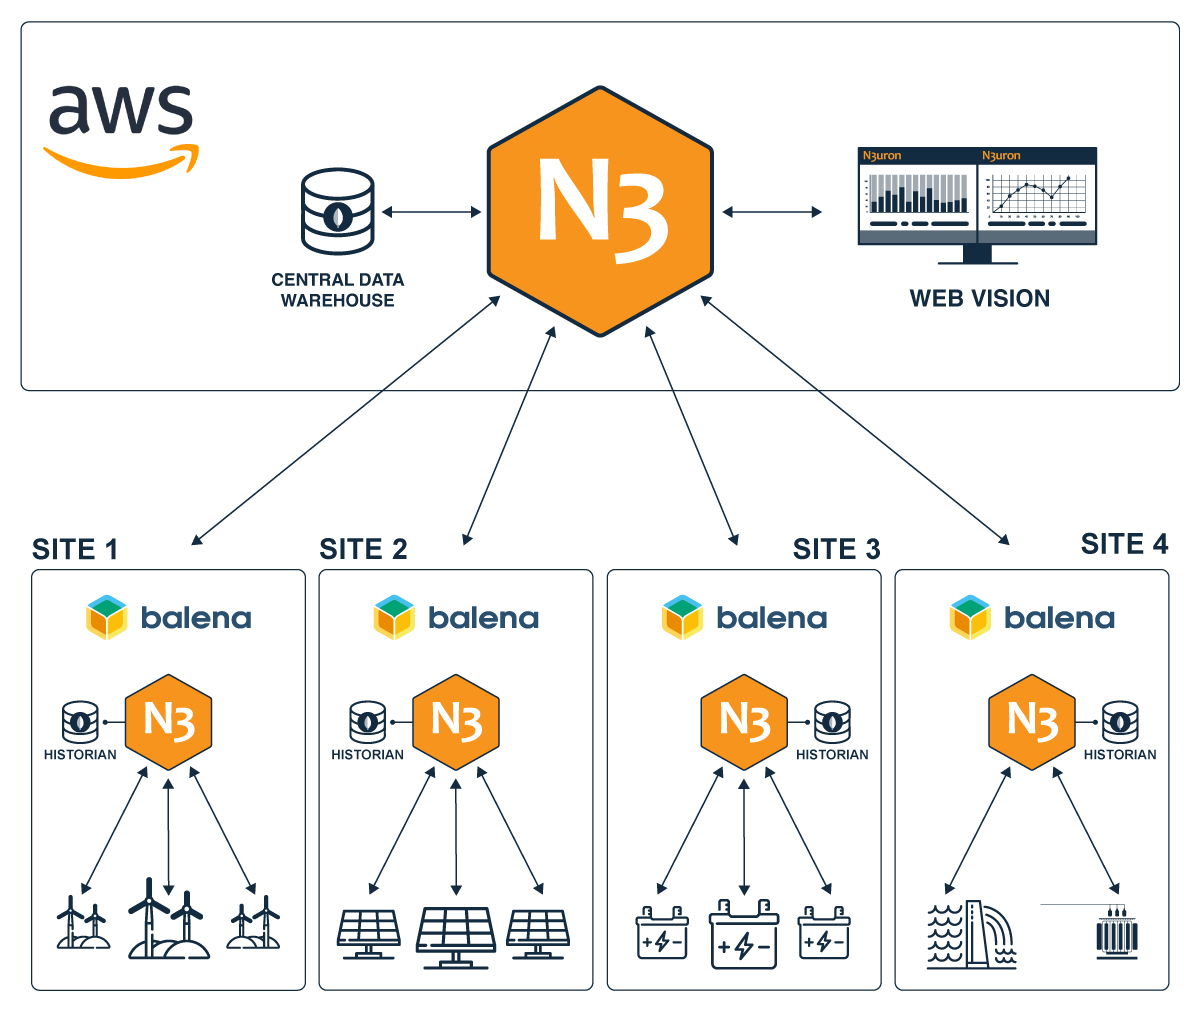
Our proposed architecture is a two-tier solution made up of a network of IIoT edge gateways and a central location running in the Cloud.
The edge tier runs the N3uron Industrial IoT software on top of the balena OS and fleet management solution and is responsible for collecting, standardizing and storing the operational data from field devices and systems at each edge location while at the same time transmitting the real-time events to a central location in the AWS Cloud.
The cloud tier powered by the N3uron platform receives aggregates and stores the data generated in all plants and provides the tools for data sharing, visualization, real-time monitoring, control and analytics.
Once you have completed the steps outlined in the following sections, you will have a fully functional deployment of this solution with real-time data from a photovoltaic plant located in southern Italy.
Requirements
- balenaCloud account (first 10 devices are free).
- Amazon Web Services (AWS) account.
- Seeedstudio EdgeBox-RPI 200 (similar hardware powered by balenaOS can be used)
Deploy the Edge Gateway
Our starting point involves provisioning our edge devices with balenaOS (a lightweight Linux OS optimized for containerized workloads), deploying N3uron and MongoDB to each of our devices.
Refer to the SeeedStudio Wiki page on how to set up the EdgeBox with balenaOS.
Why balena?
This process is usually manual, slow, painful and gets worse as our fleet of edge devices grows. Set up the hardware, install and configure the OS, firewall, users, access and security, then, install and configure your IIoT software and a data store with all its dependencies, finally, review everything and deliver the device to its destination, be it a Factory, a Power Plant, an Oil Refinery… But this is not the end, the device will require constant monitoring, maintenance, software updates and security patches to adapt to newer requirements and stay secure against an ever-growing number of cyber threats targeting critical infrastructure.
The powerful IIoT solution provided by the combination of N3uron and balena helps IT and OT teams simplify and accelerate their projects. Pre-provision your edge devices with balenaOS and remotely configure and deploy both N3uron and MongoDB. Monitor the health status of your fleet, prevent, diagnose and resolve any operational issues faster, apply frictionless updates and deploy new software with the click of a button.
balenaHub (Recommended)
balenaHub is a marketplace that offers ready-to-deploy applications for large device fleets. With just a few clicks, it is possible to deploy and manage these applications centrally using balenaCloud.
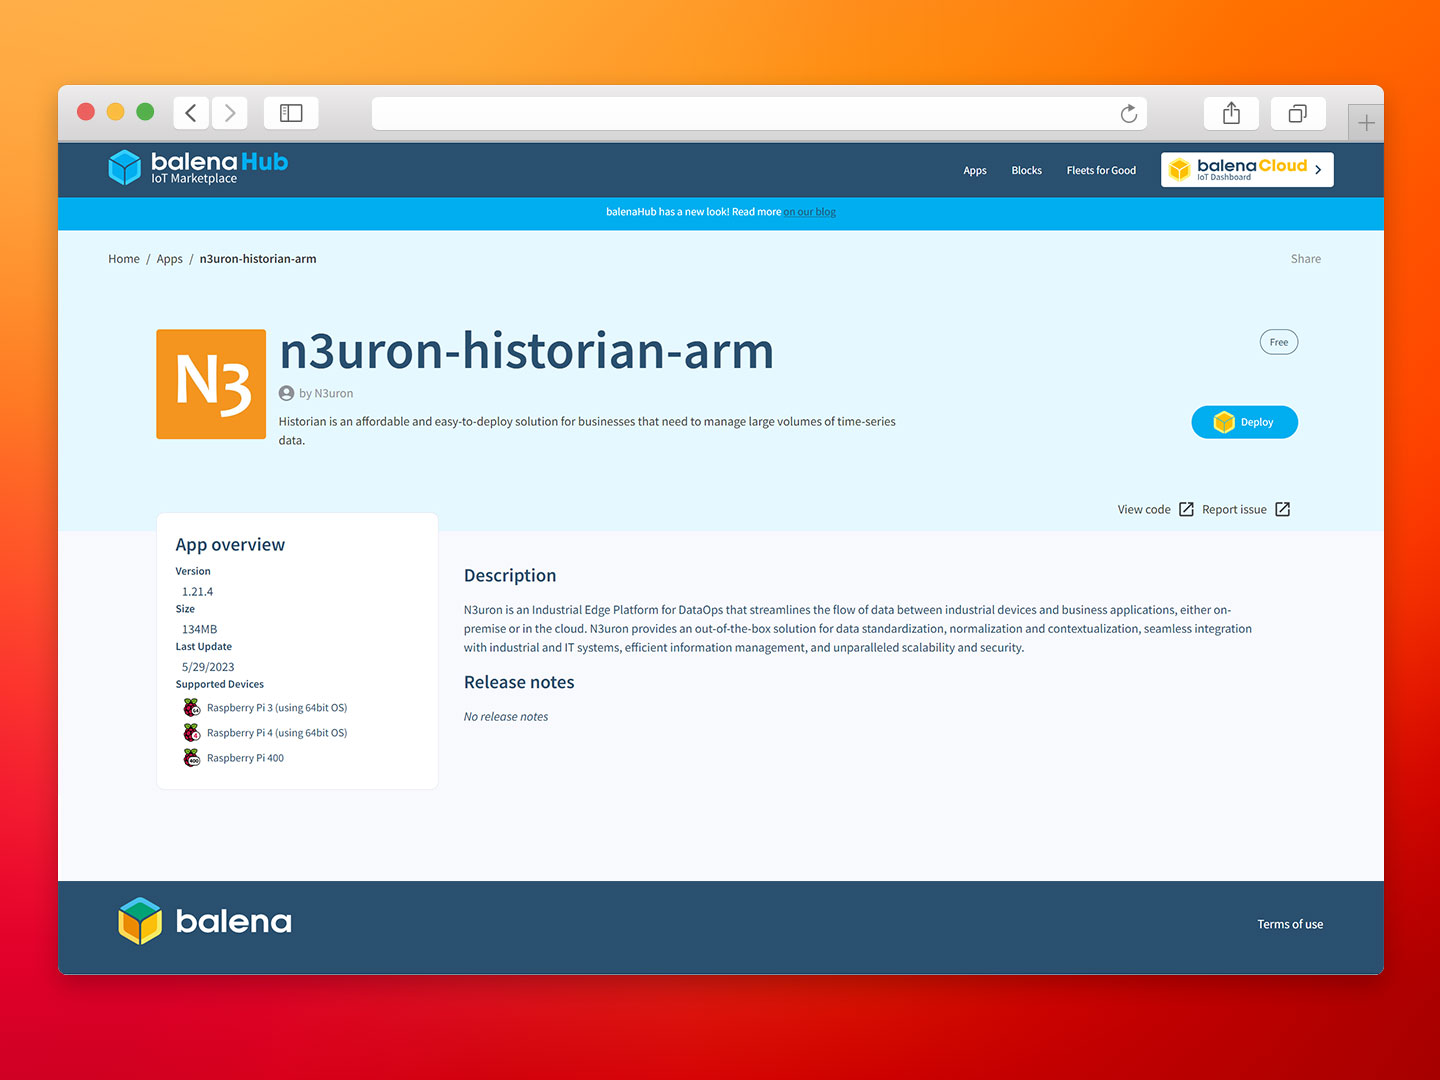
To deploy the N3uron IIoT-Gateway application on your device, go to the n3uron-historian-arm application on balenaHub and click the Deploy button, you will then be prompted to log in to your balenaCloud account. Once logged in, you can choose to deploy the app to either a new or an existing fleet.
GitHub repository (For advanced users)
If you are a balena CLI expert, feel free to use balena CLI. This option lets you configure in detail some aspects, like adding new services to your deployment or configuring the existing but requires that you have both Git and the balena CLI installed on your system.
To do this, create an application in your balenaCloud dashboard, clone our repository, customize it to your needs and use the balena push command to deploy the stack to your fleet of devices.
git clone https://github.com/n3uron/balena-historian-arm
cd balena-historian-arm
balena login
balena push
Configure N3uron
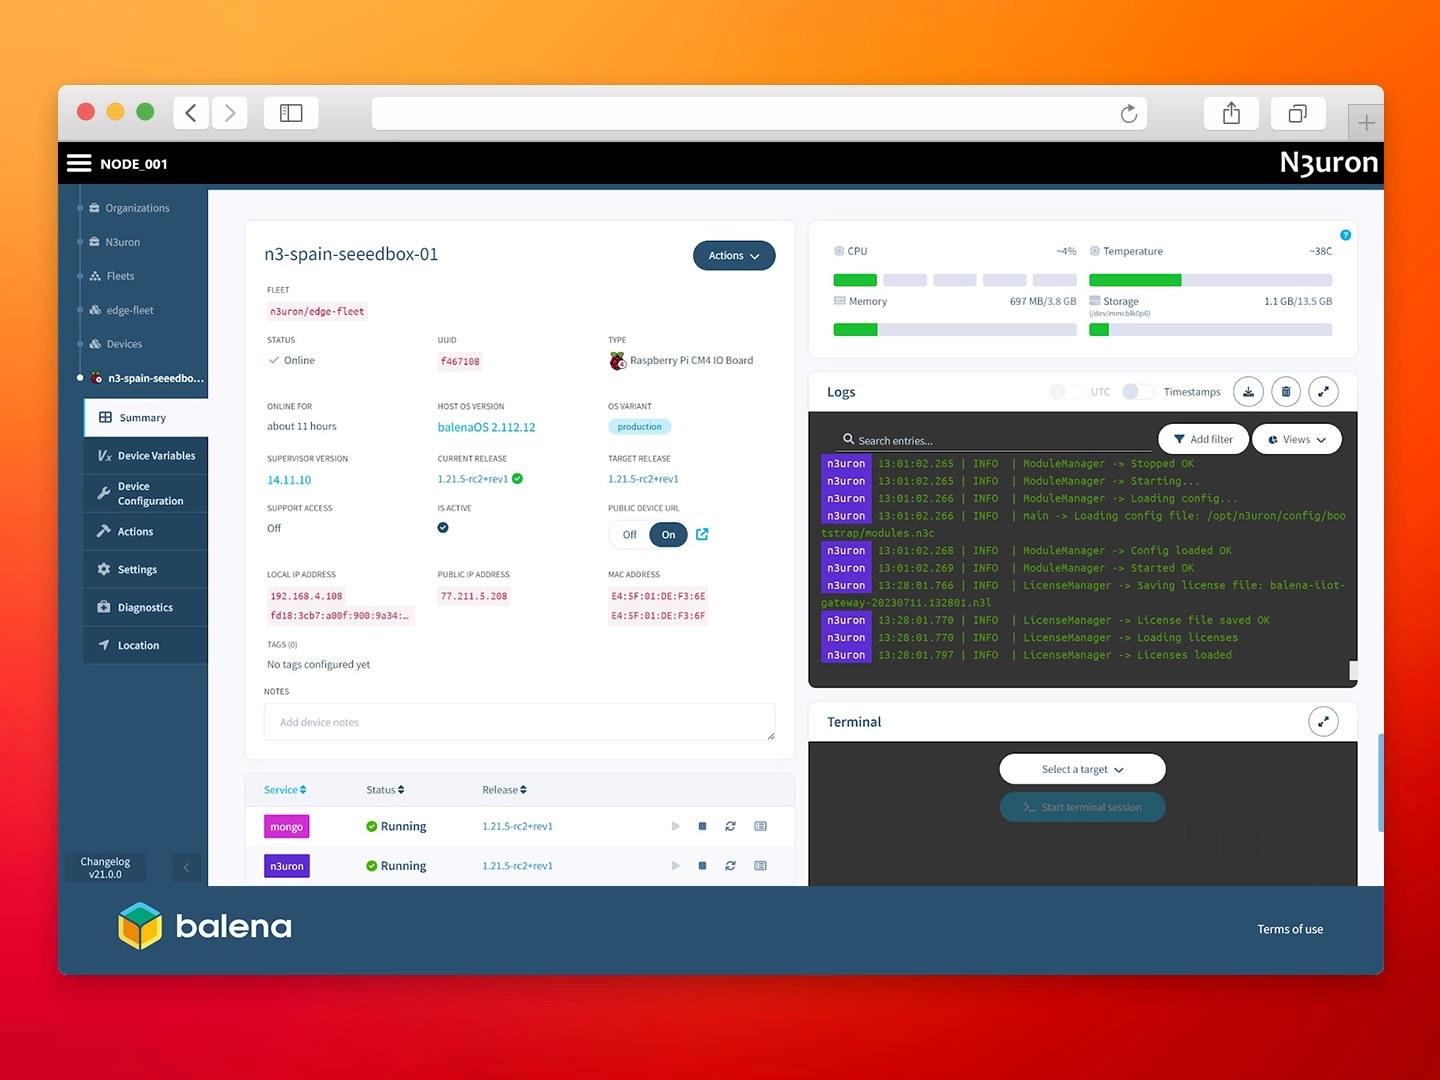
We’ll use the balena Public Device URL feature to access the N3uron WebUI, enable this functionality from the balenaCloud dashboard for your device.
Then click the right arrow and It’ll open a secure HTTPS tunnel to your device in a new tab.
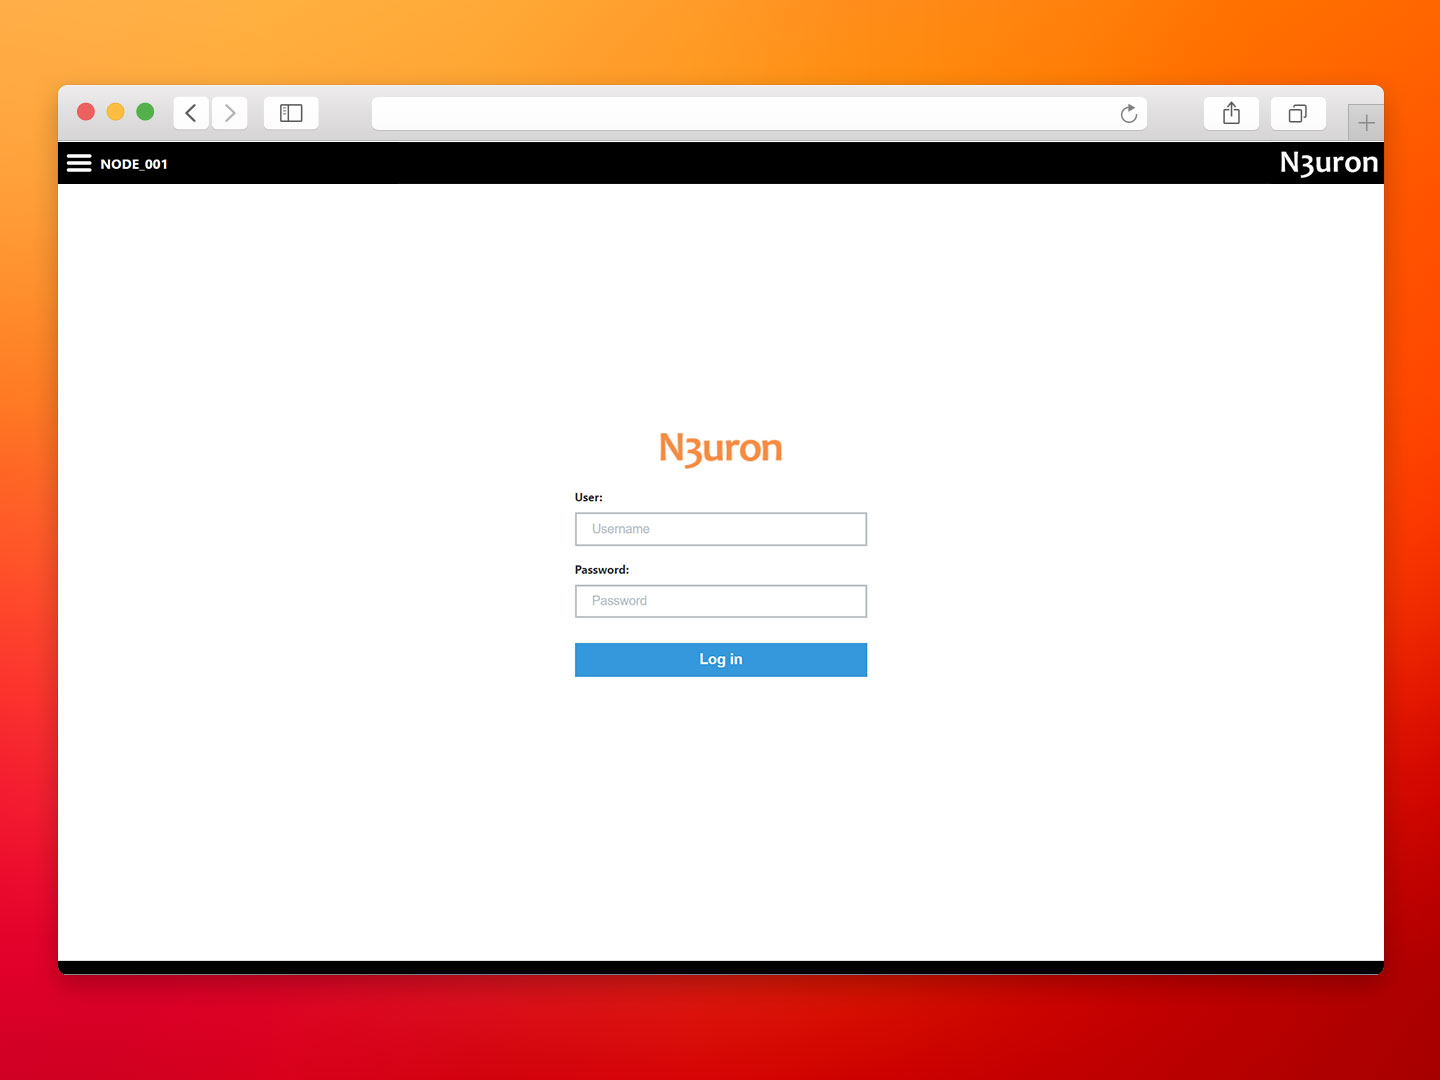
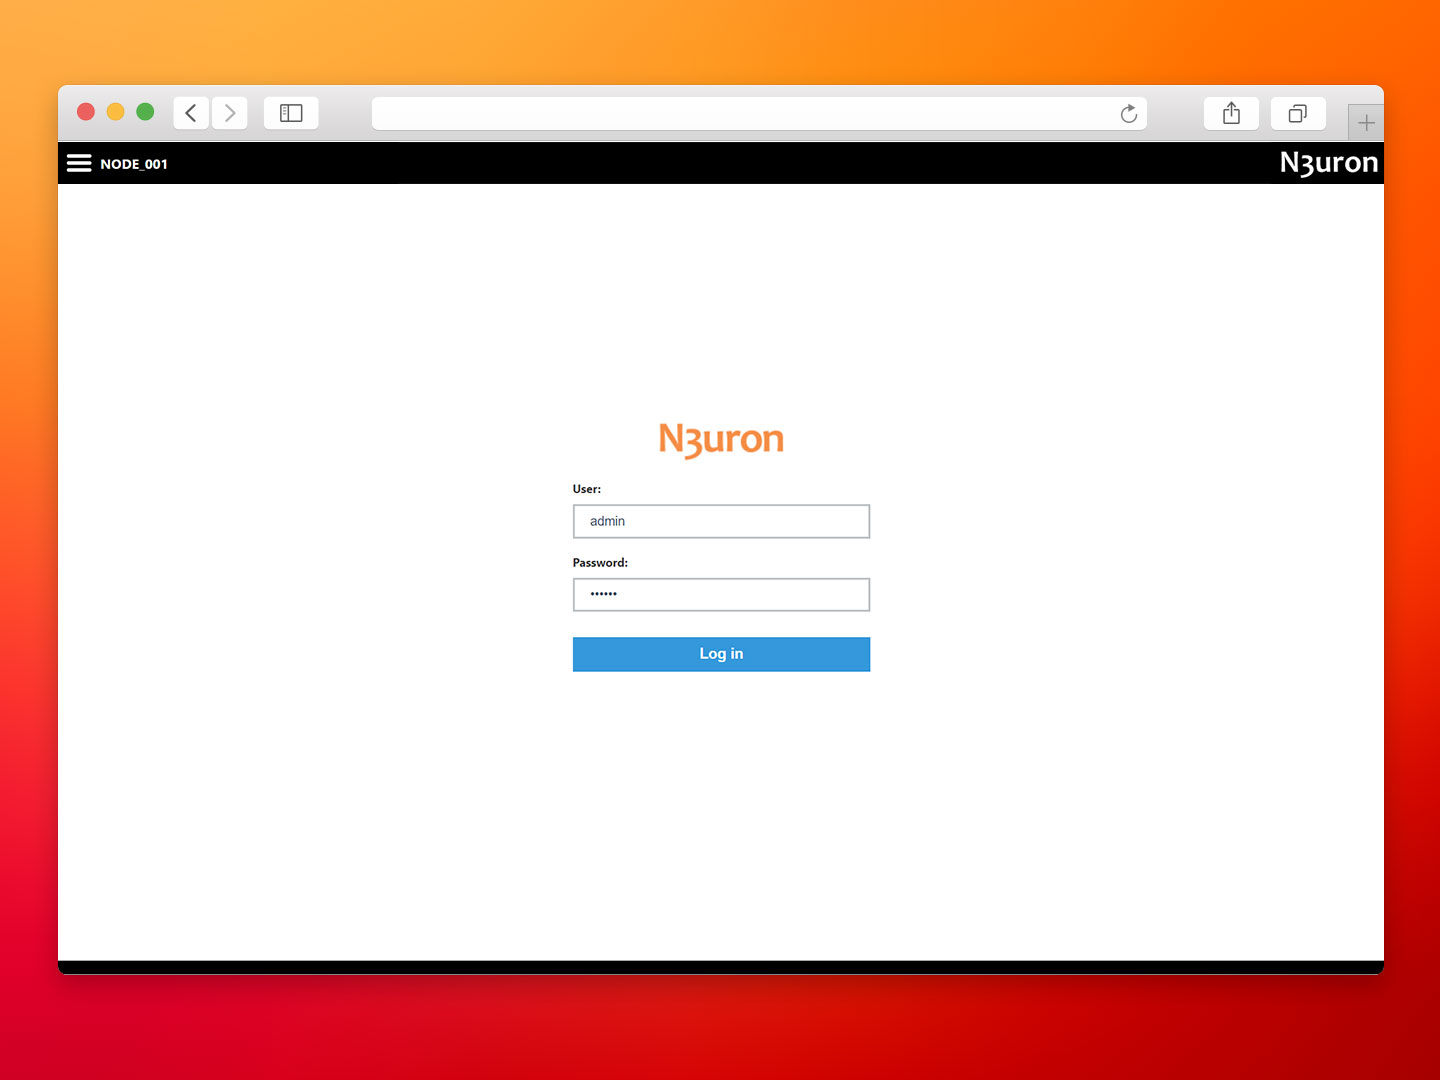
Login to the WebUI:
- Username: admin
- Password: n3uron
OPC UA Client
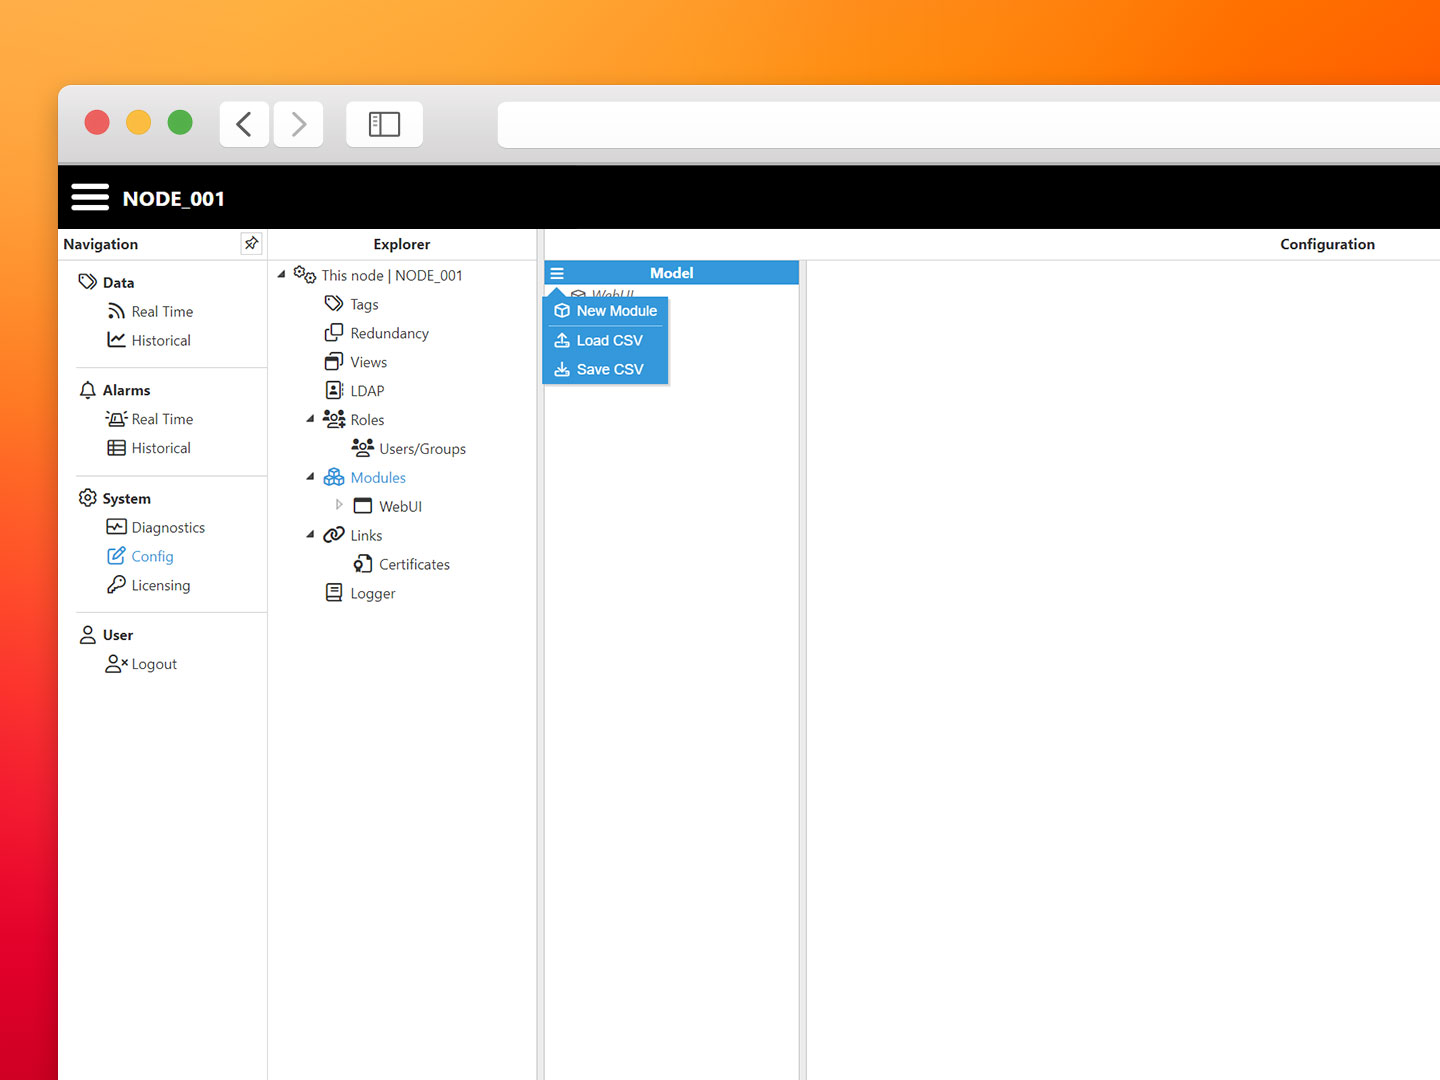
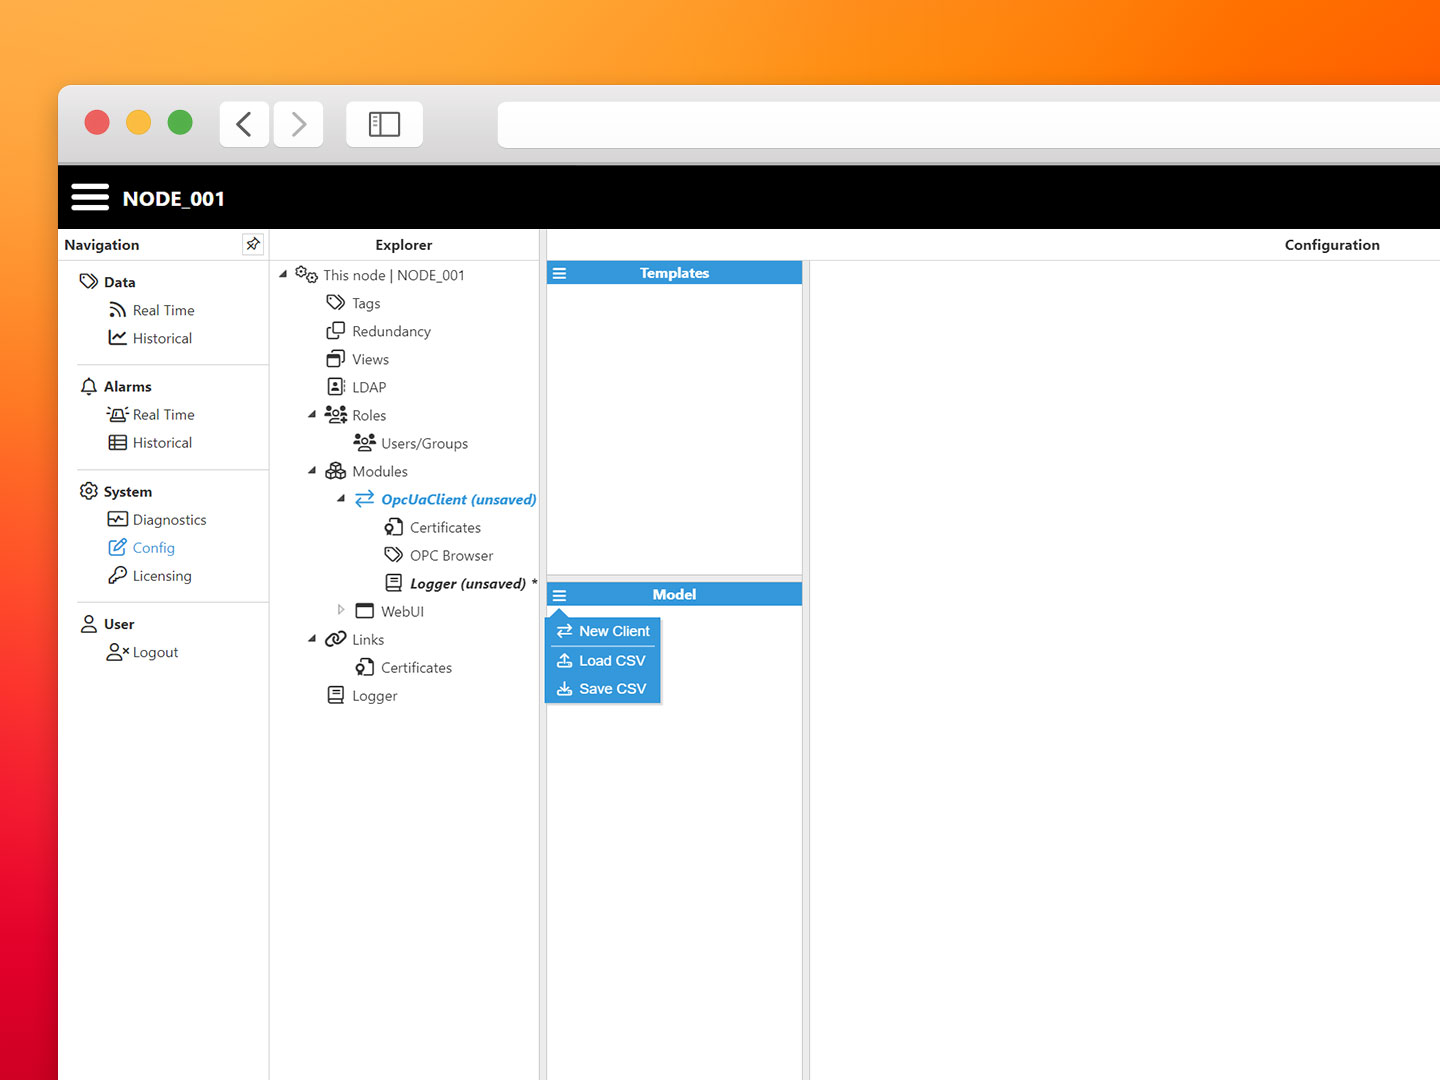
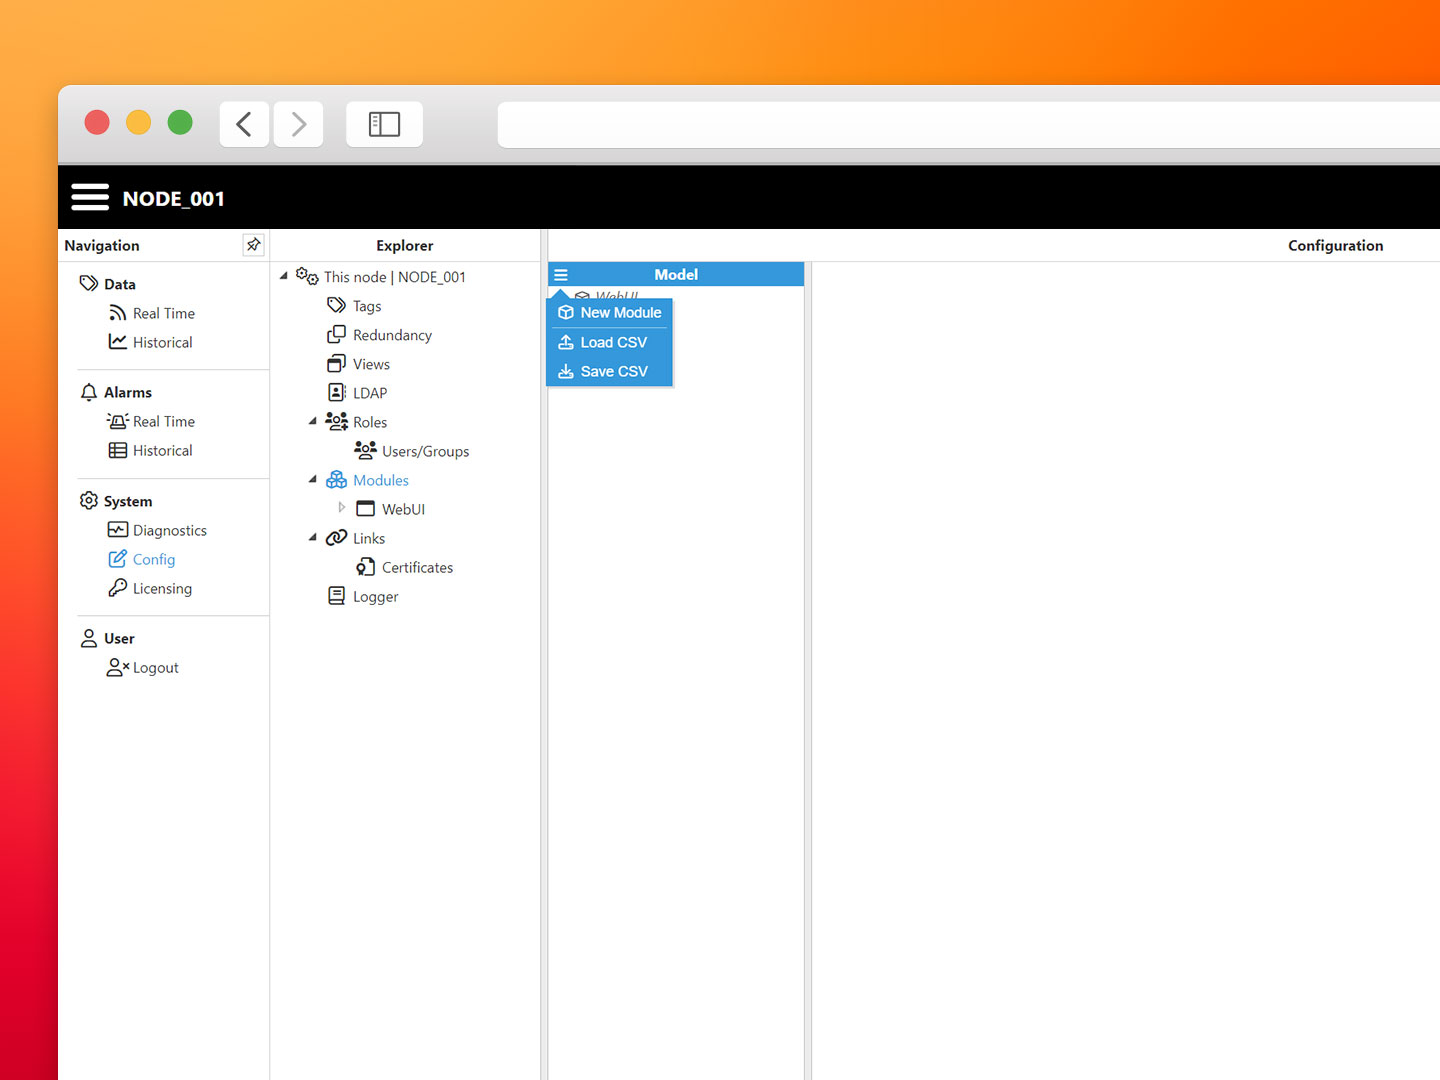
- Step 1: Go to Config→Modules and create a new module, naming it OpcUaClient.
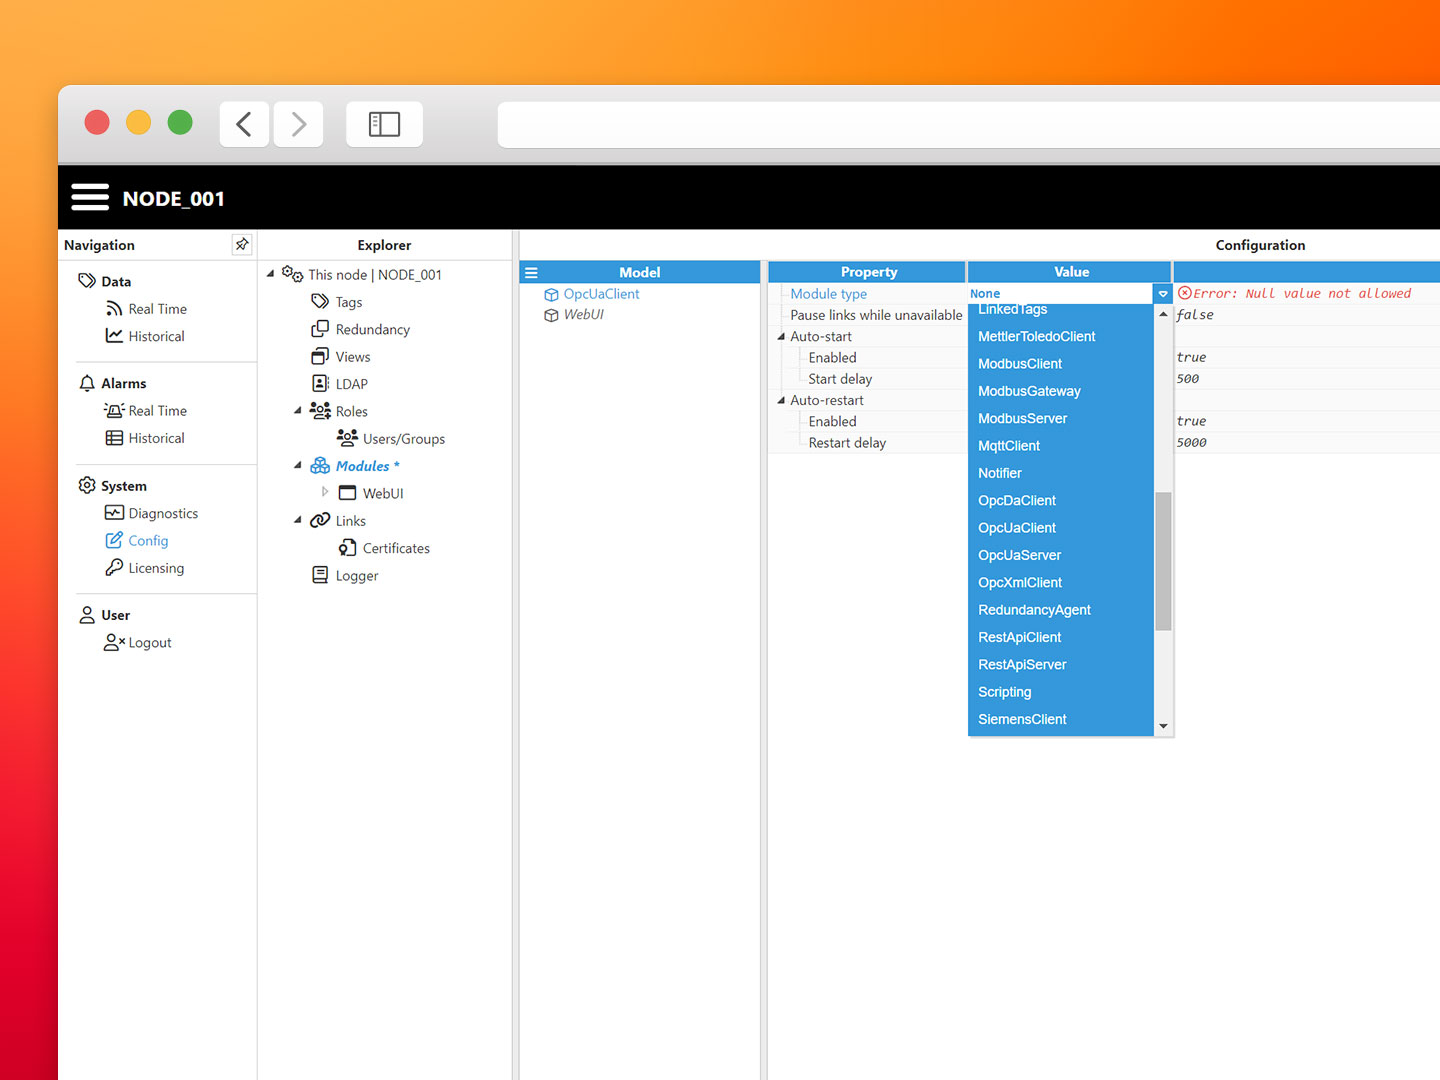
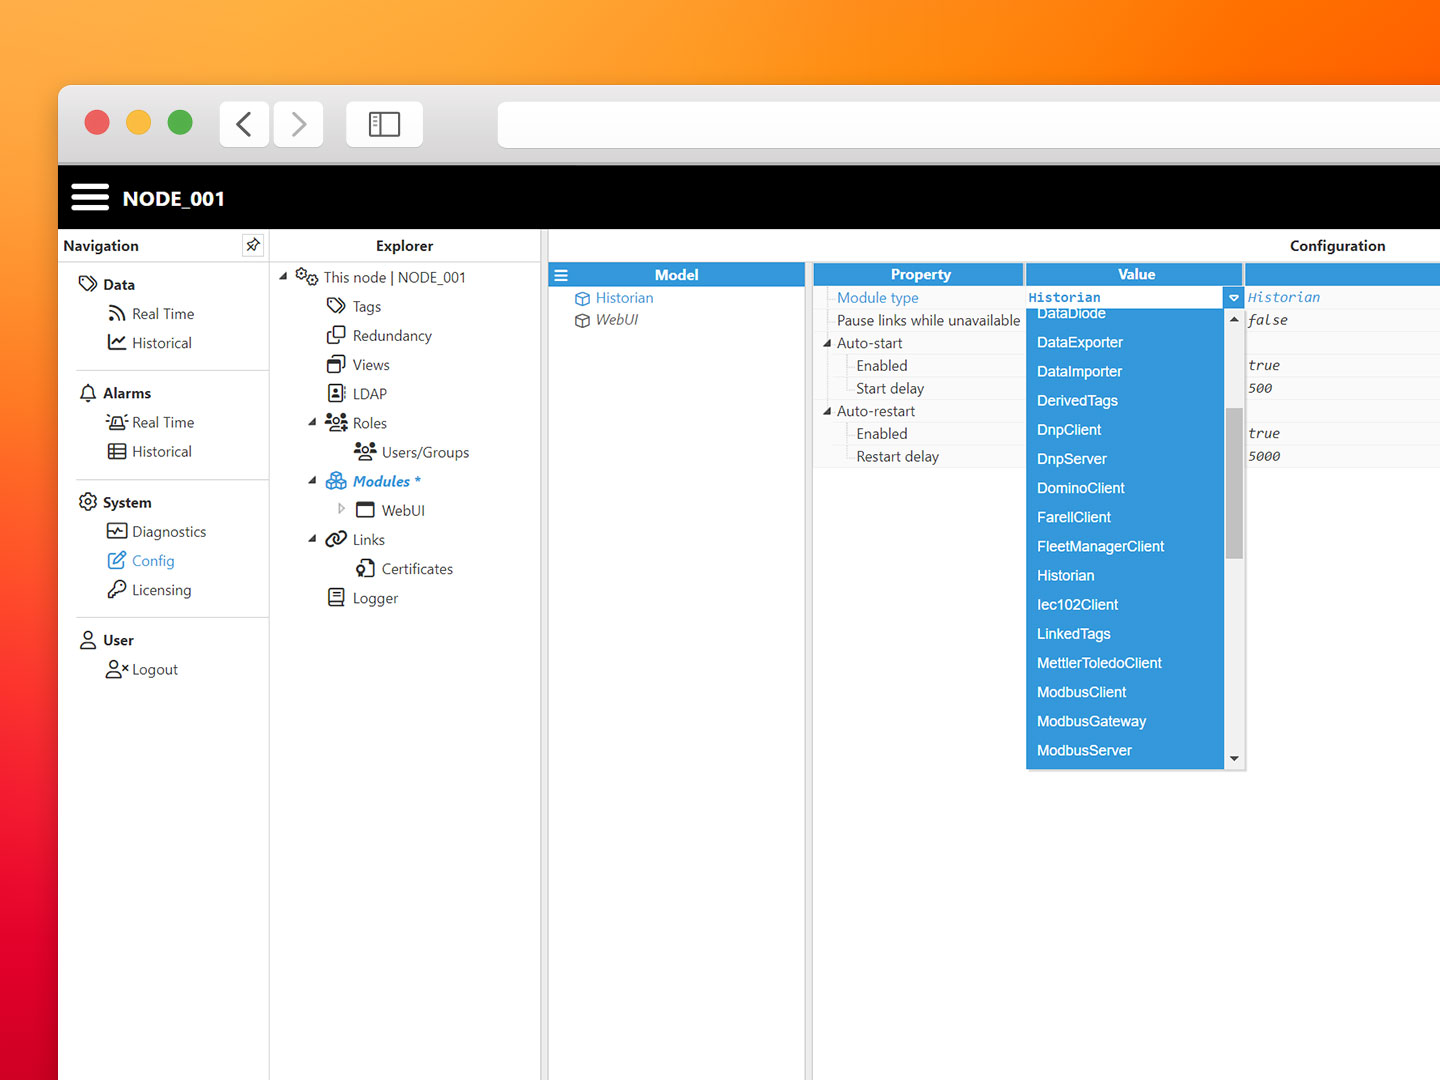
- Step 2: Select OpcUaClient as the module type and click Save to load the new module.
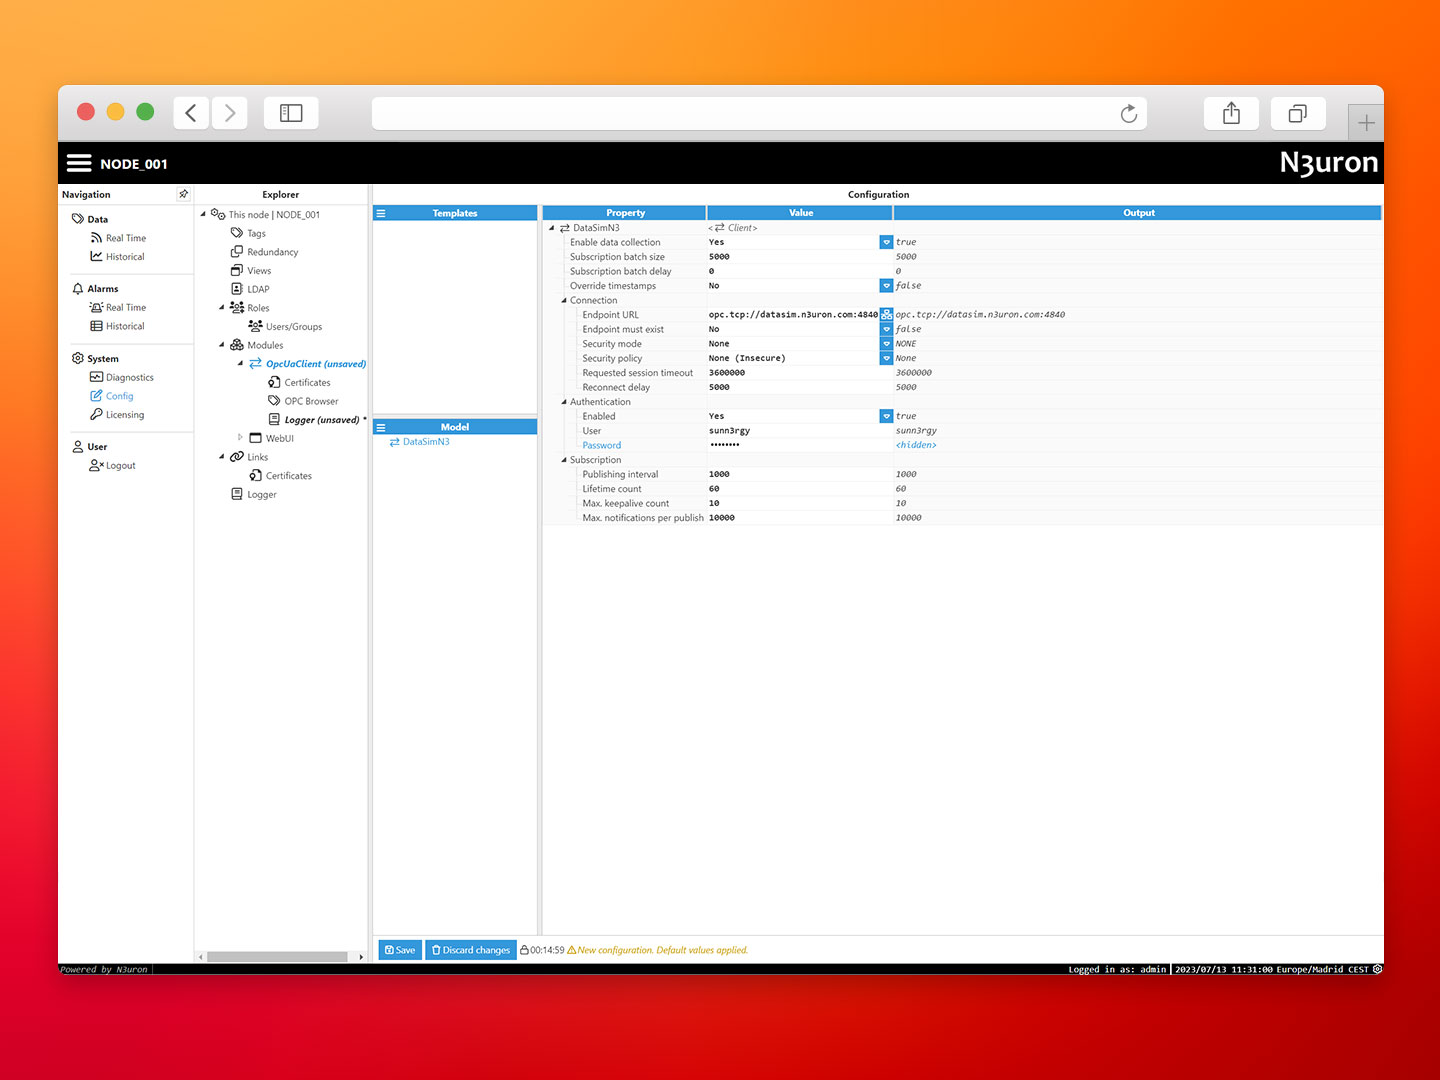
- Step 3: Navigate to Config→Modules, select the newly created OpcUaClient instance and create a New Client, name it DataSimN3.
- Step 4: Configure the client with the provided values, keep in mind this is NOT a production environment, we have disabled important security features of OPC UA for this demo.
- Connection:
- Endpoint URL: opc.tcp://datasim.n3uron.com:4840
- Security mode: None
- Security policy: None (Insecure)
- Authentication:
- Enabled: yes
- User: sunn3rgy
- Password: n3uron
- Connection:
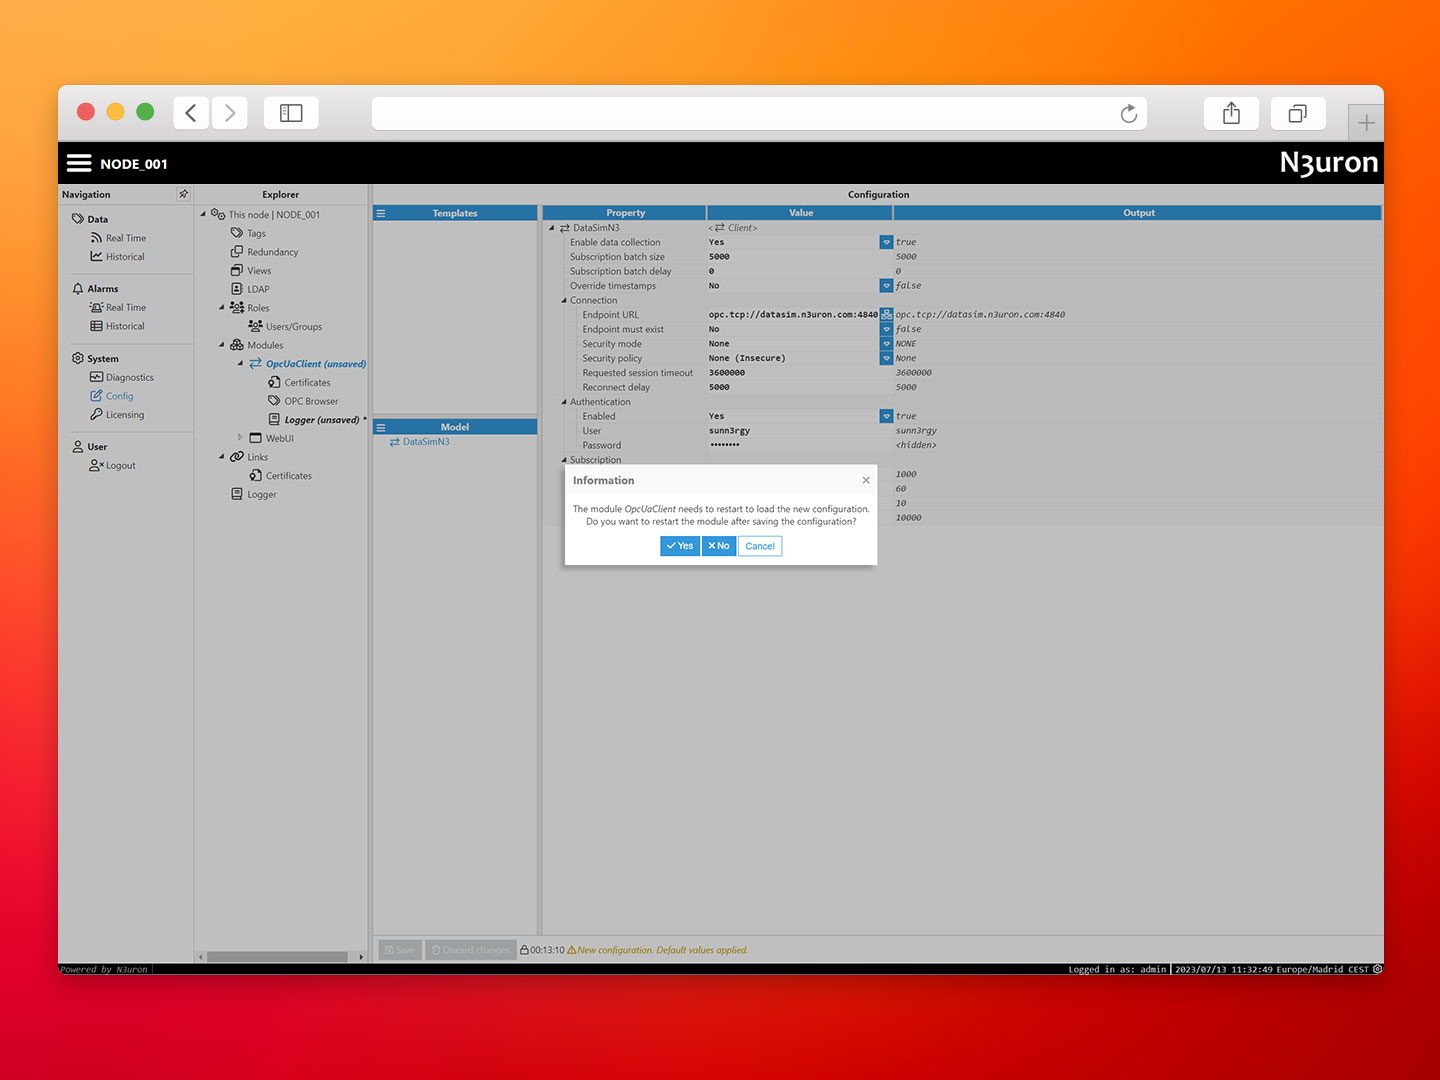
- Step 5: Review the configuration, then click Save and reload the module.
Data model
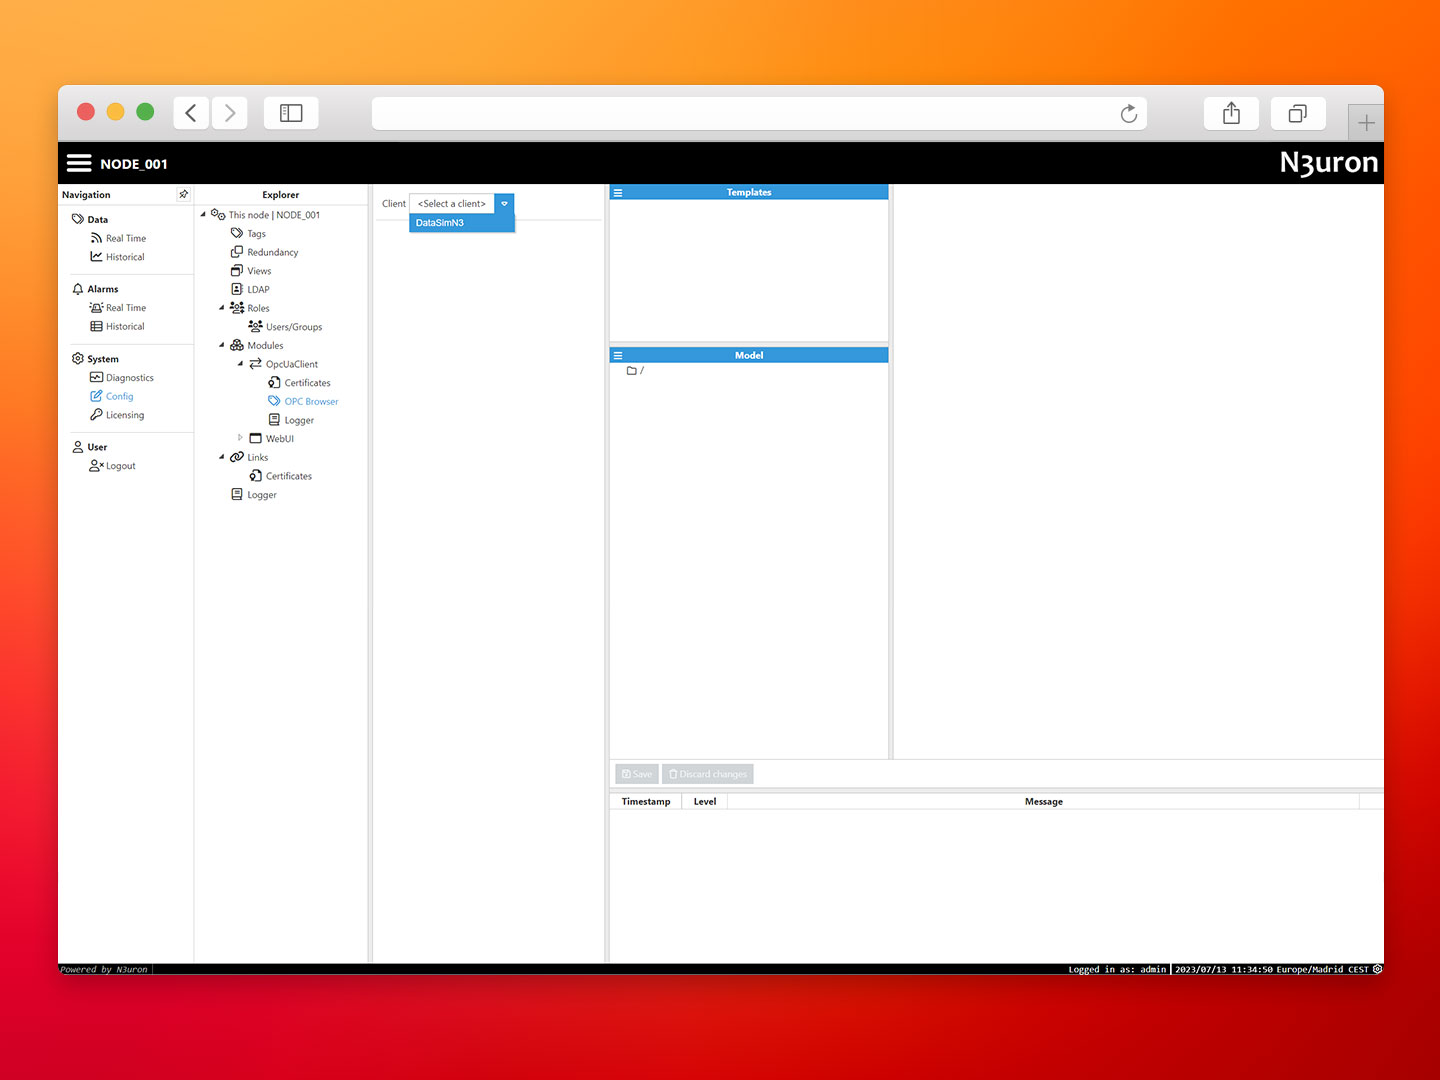
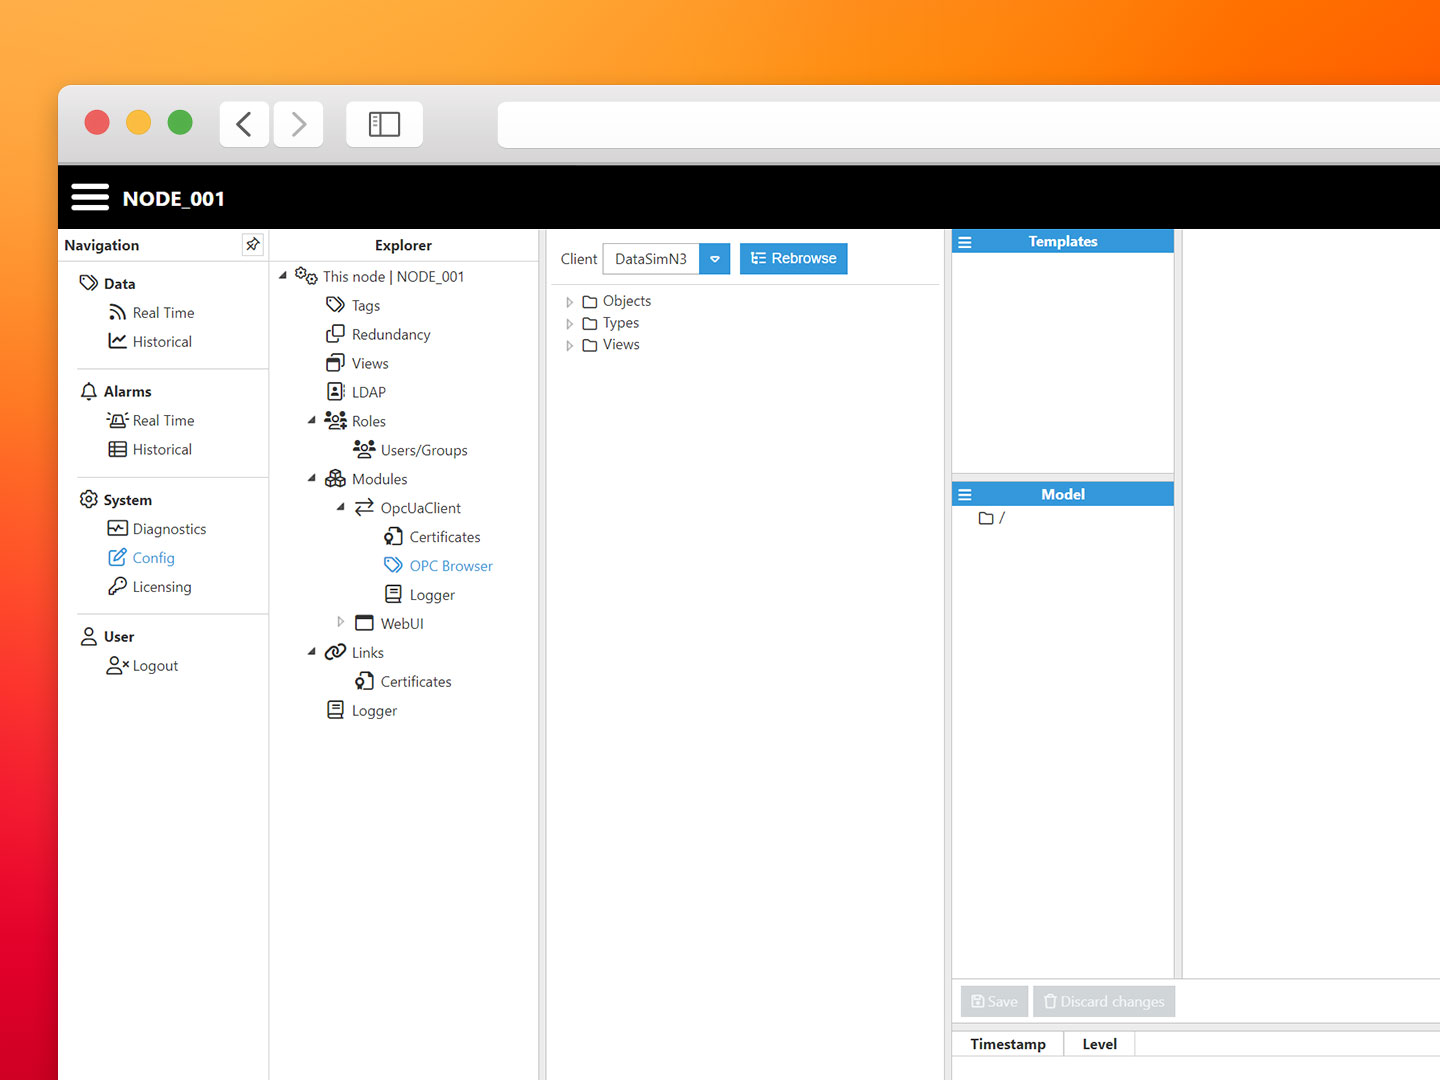
Open the OPC Browser inside the OPC UA Client module and select the previously created DataSimN3 instance.
This will be our workspace to explore the remote OPC UA Server and build the data model.
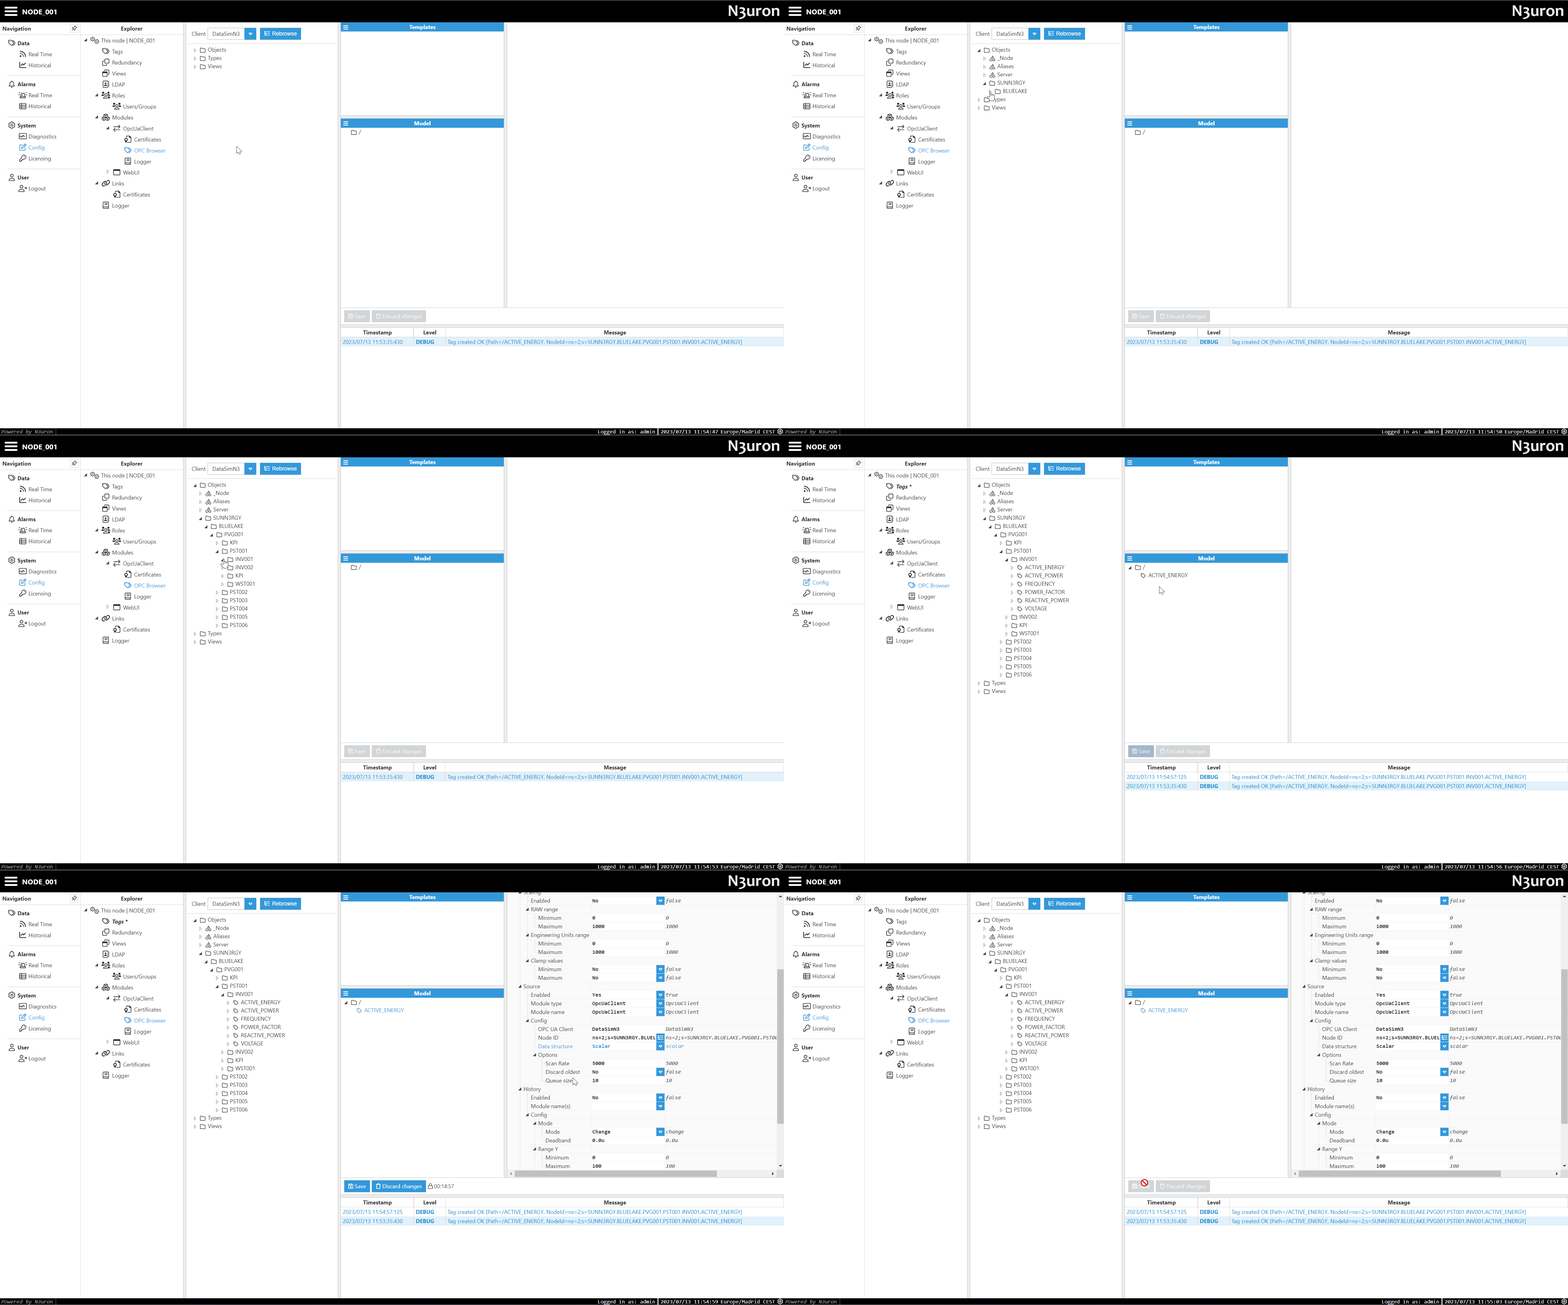
Creating new tags or templates from the data exposed by OPC UA is as simple as drag-and-drop the desired object from the Browser section to the Model (new feature with N3uron v1.21.5).
Templates
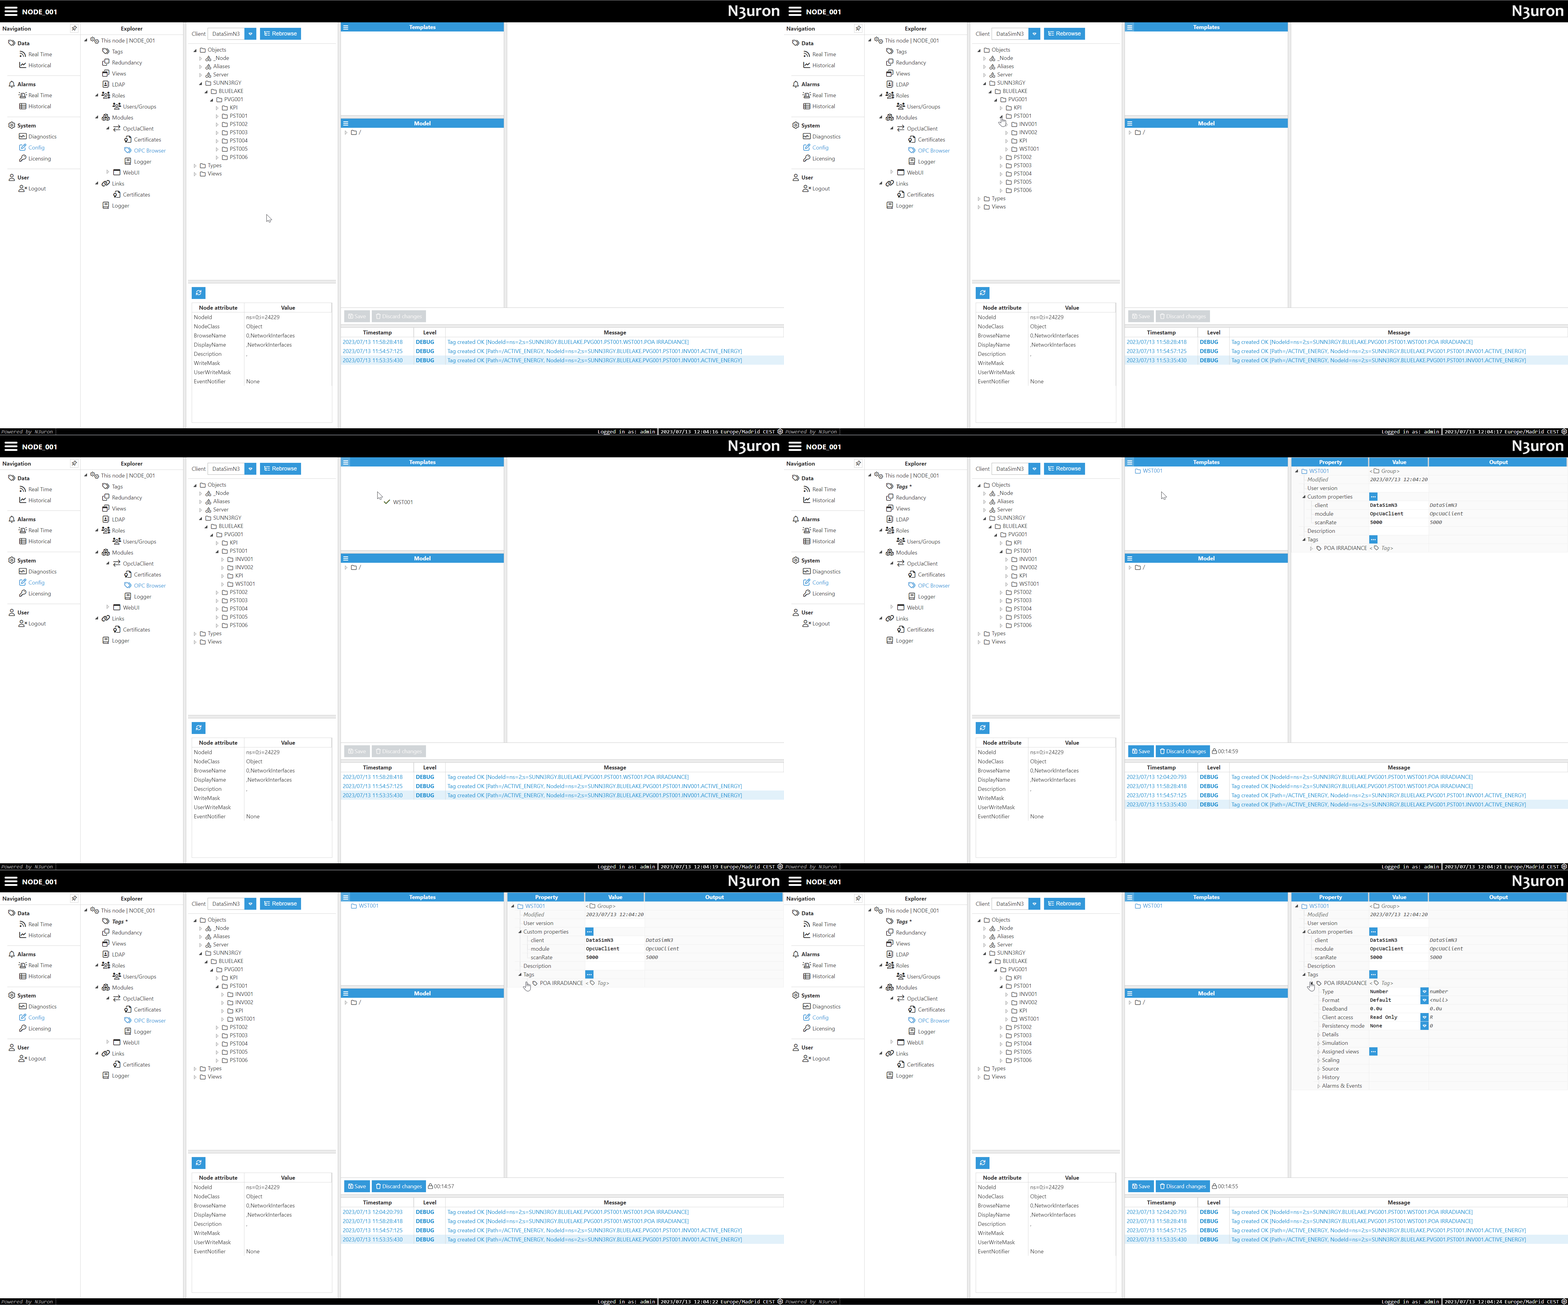
Let’s see a simple example of how to create a new template for a Weather Station.
- Step 1: Drag-and-drop the desired object into the Templates section and start building your template using custom properties, inheritance and more.
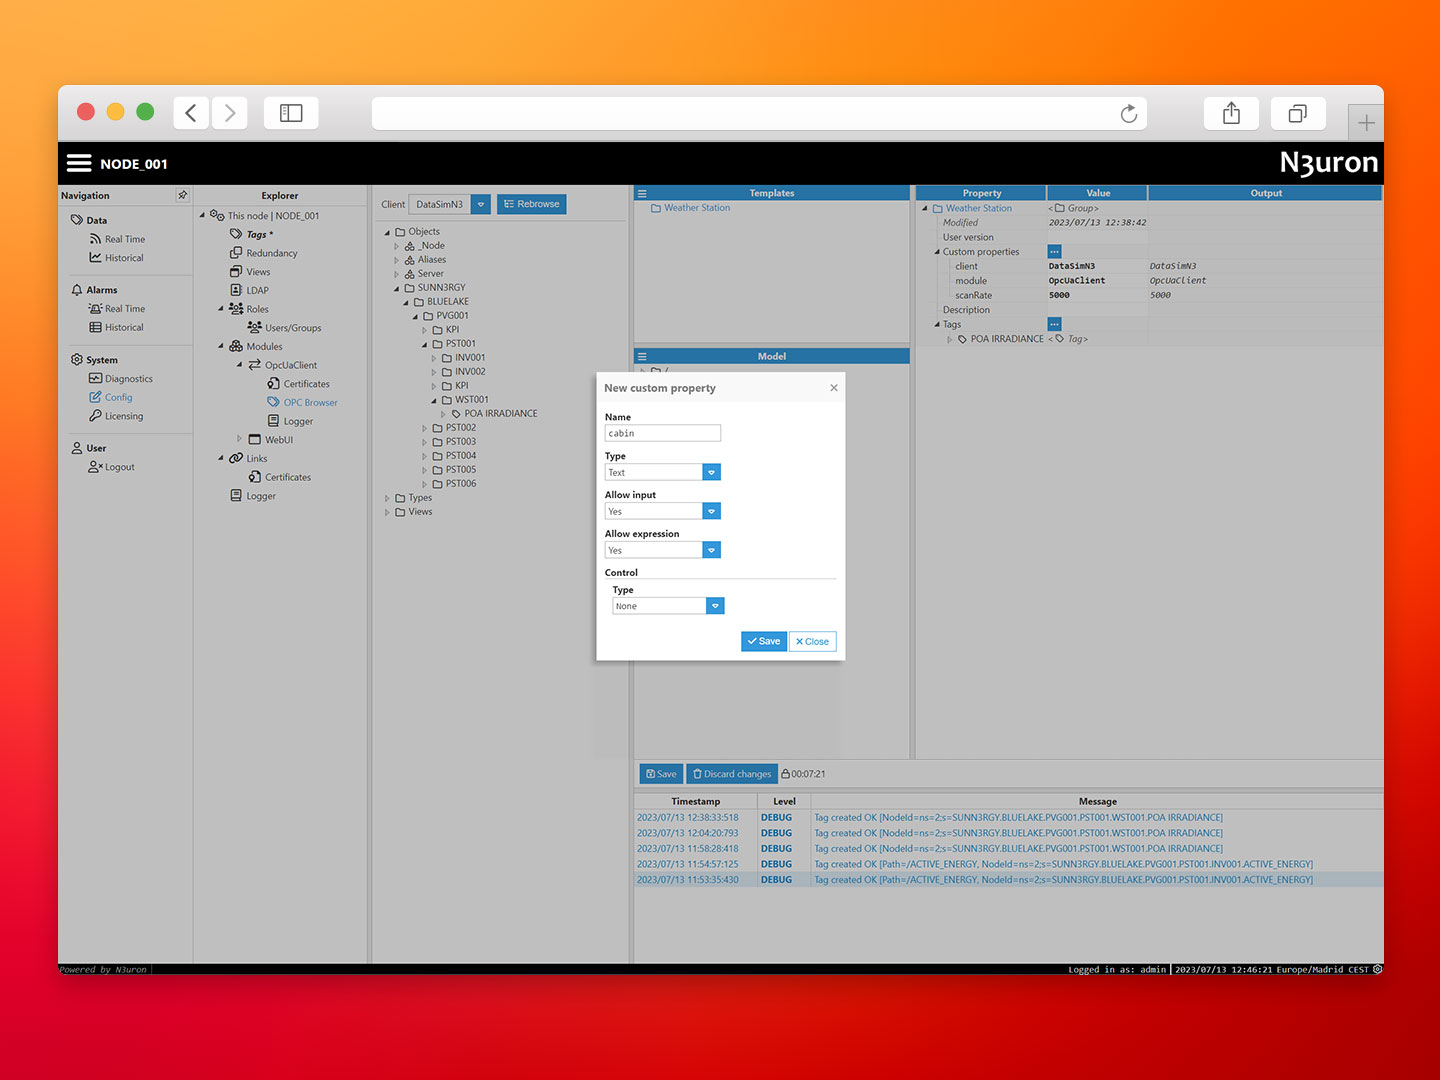
- Step 2: Create a custom property called “cabin” and set ={cabin} as the default value, this implies the value will be inherited from higher-level instances.
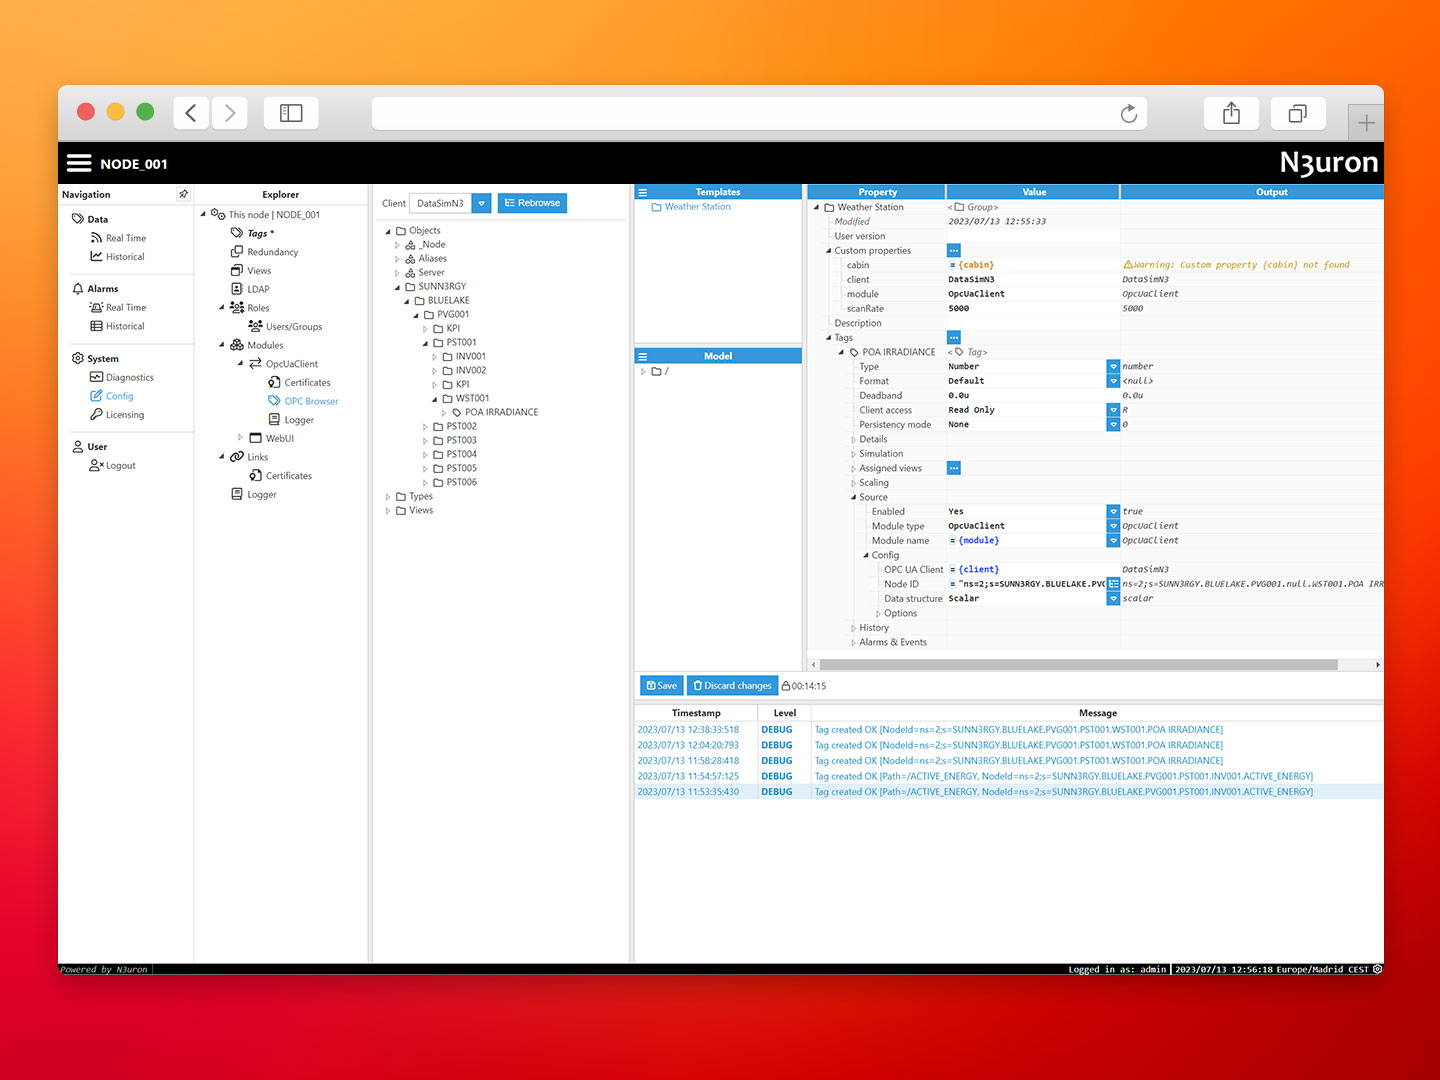
- Step 3: Modify the OPC UA Node ID property of the tag named POA_IRRADIANCE to use an expression leveraging the custom property.
- Current Node ID: ns=2;s=SUNN3RGY.BLUELAKE.PVG001.PST001.WST001.POA IRRADIANCE
- New Node ID: =”ns=2;s=SUNN3RGY.BLUELAKE.PVG001.”+{cabin}+”.WST001.POA IRRADIANCE”
The expression will be evaluated and filled with the appropriate values to construct the NodeID as you can see below.
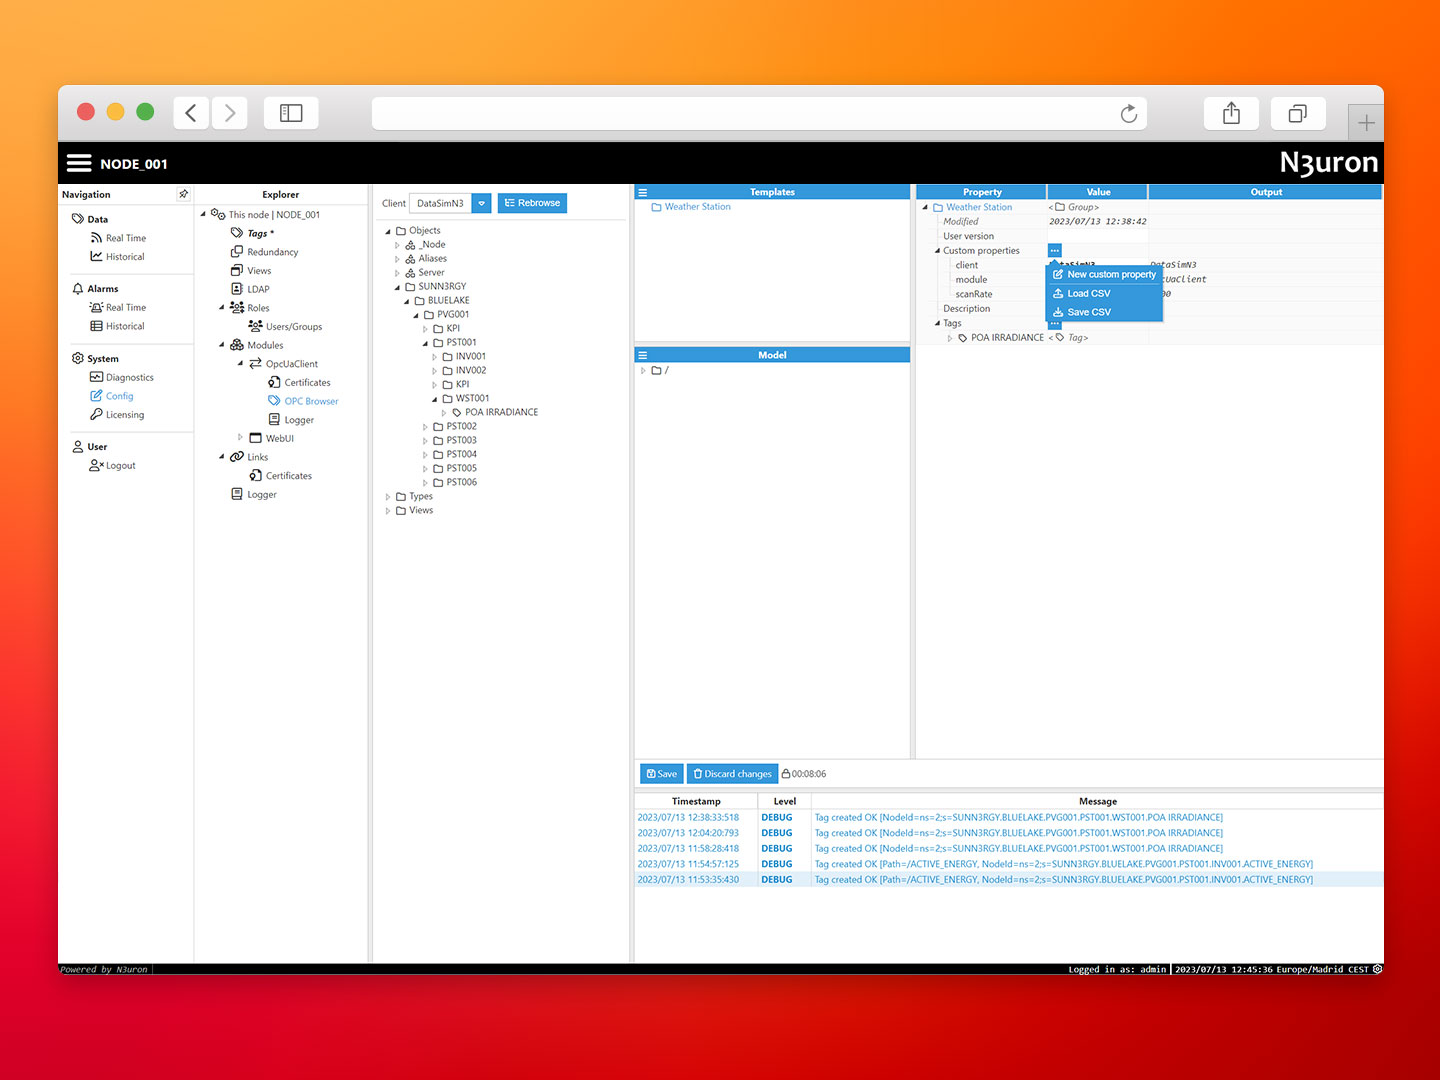
To continue with this demo, we provide a complete data model in the DataModel folder that you can easily import into your N3uron instance using the built-in export/import feature for templates and tags.
- Step 1: Navigate to the Tags section in Explorer and delete the examples we just created, then proceed to import the data model.
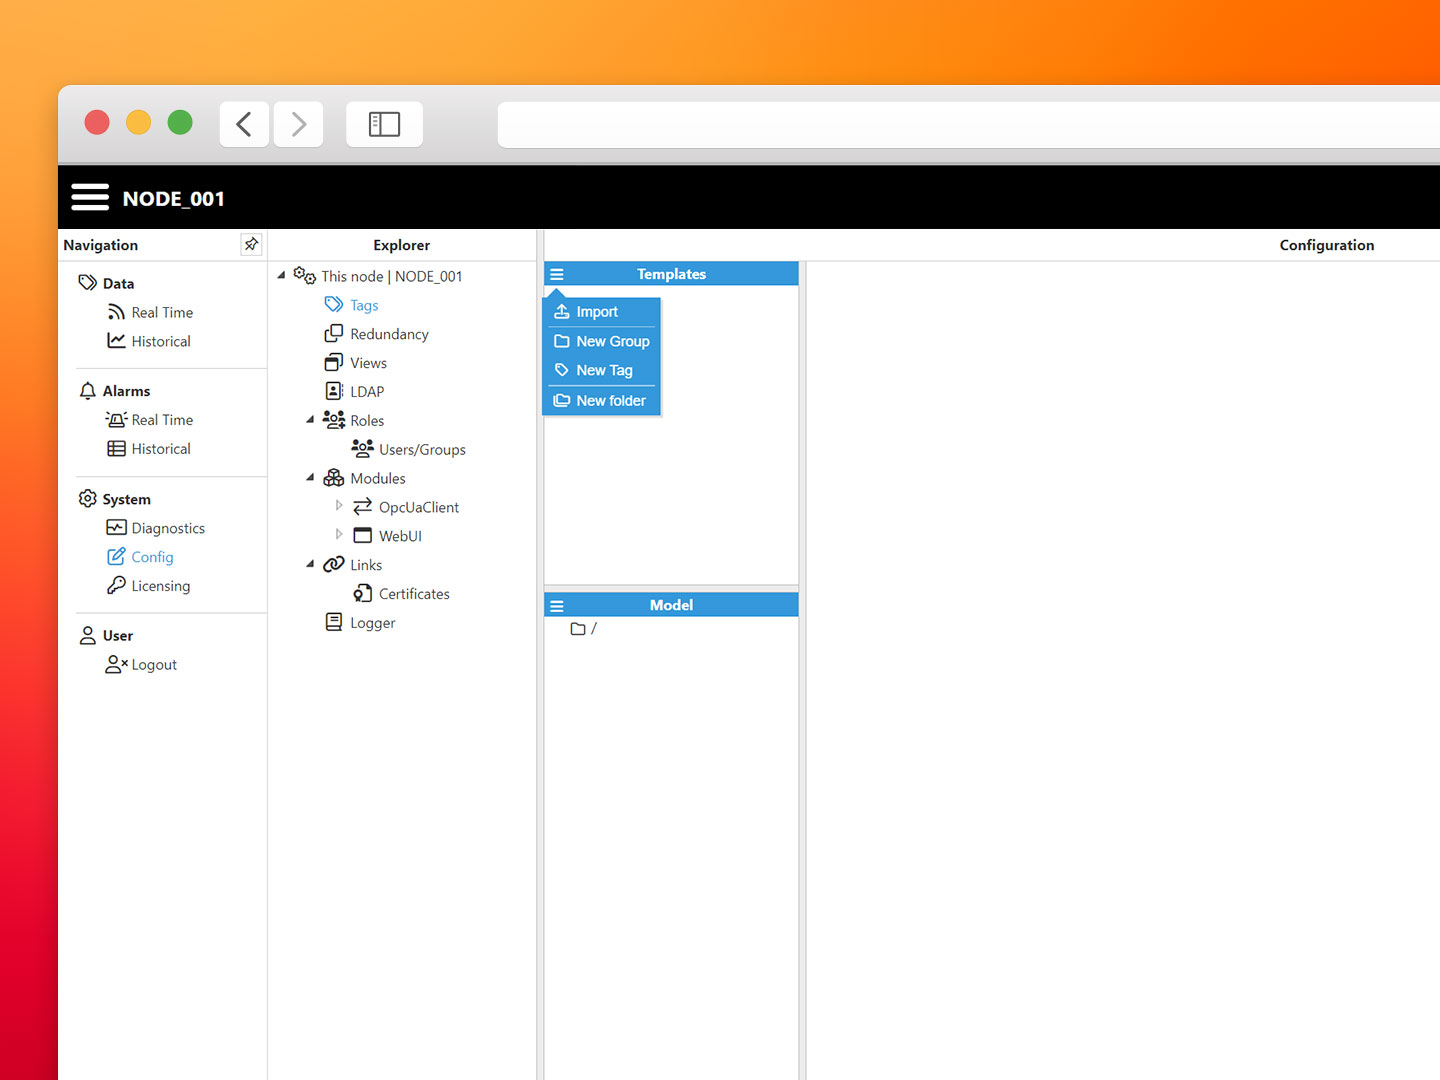
- Step 2: Click on Import and select the templates.zip file.
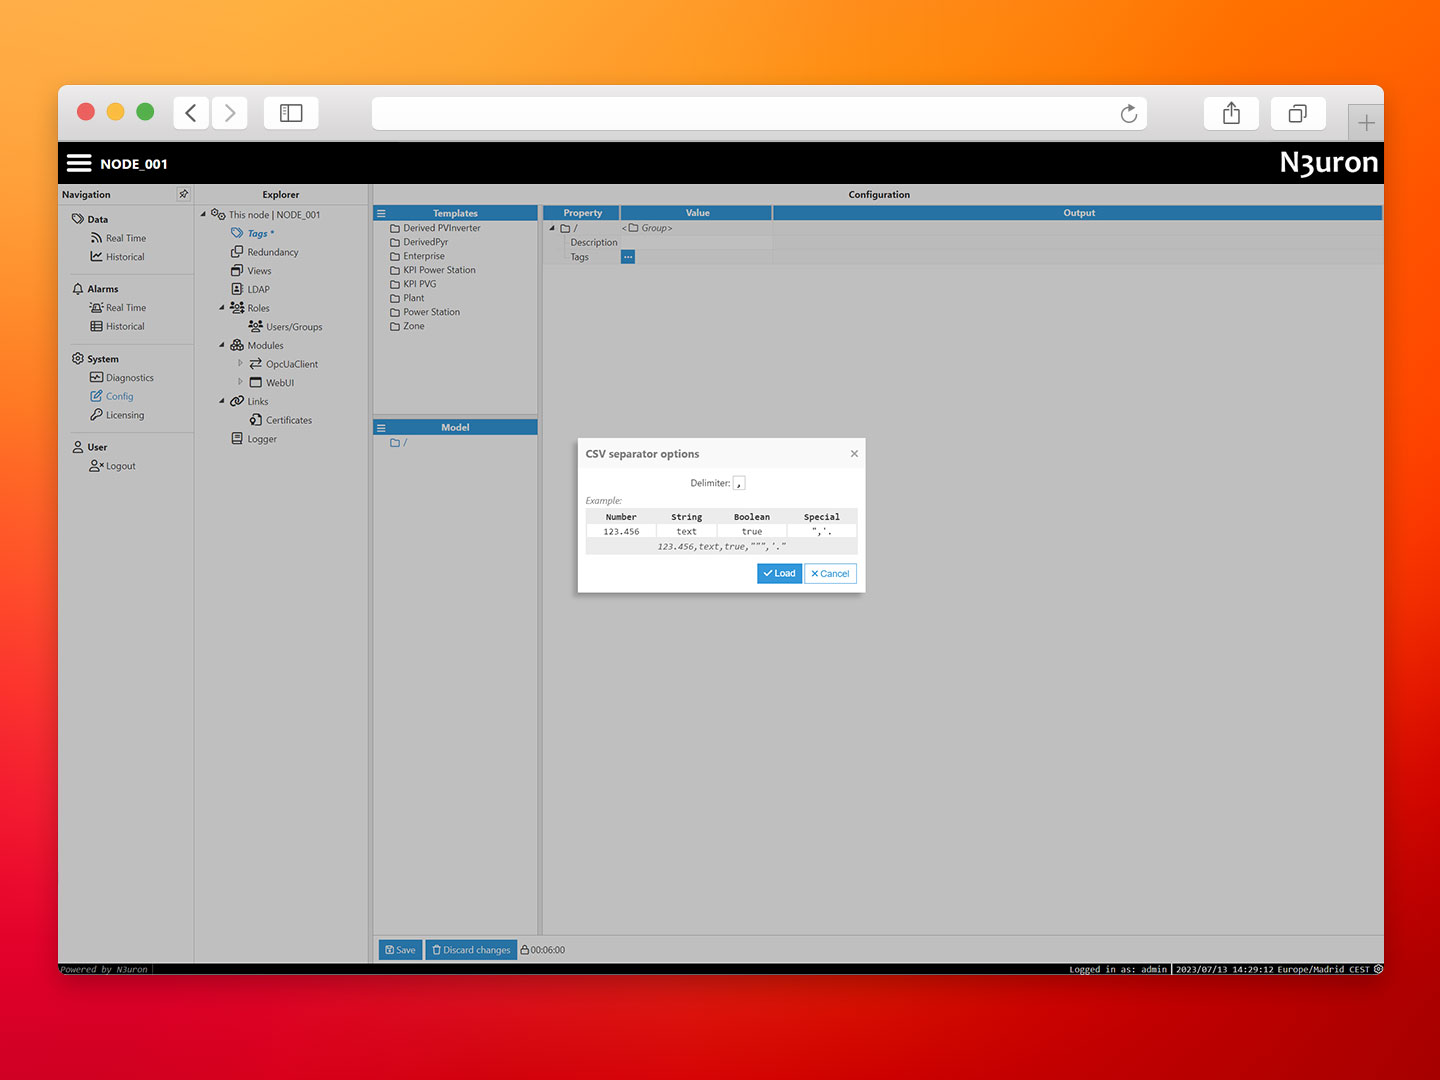
- Step 3: To import the Tags, select the “/” group in the model section, then click on Tags, select Load CSV and import the tags.csv file provided. Click Save to persist changes.
Local Historian
In this architecture, we’ll store historical data both at every edge gateway and the central server in AWS for long-term storage, sharing and analytics. This section will guide you to setup and configure the Historian module at the edge.
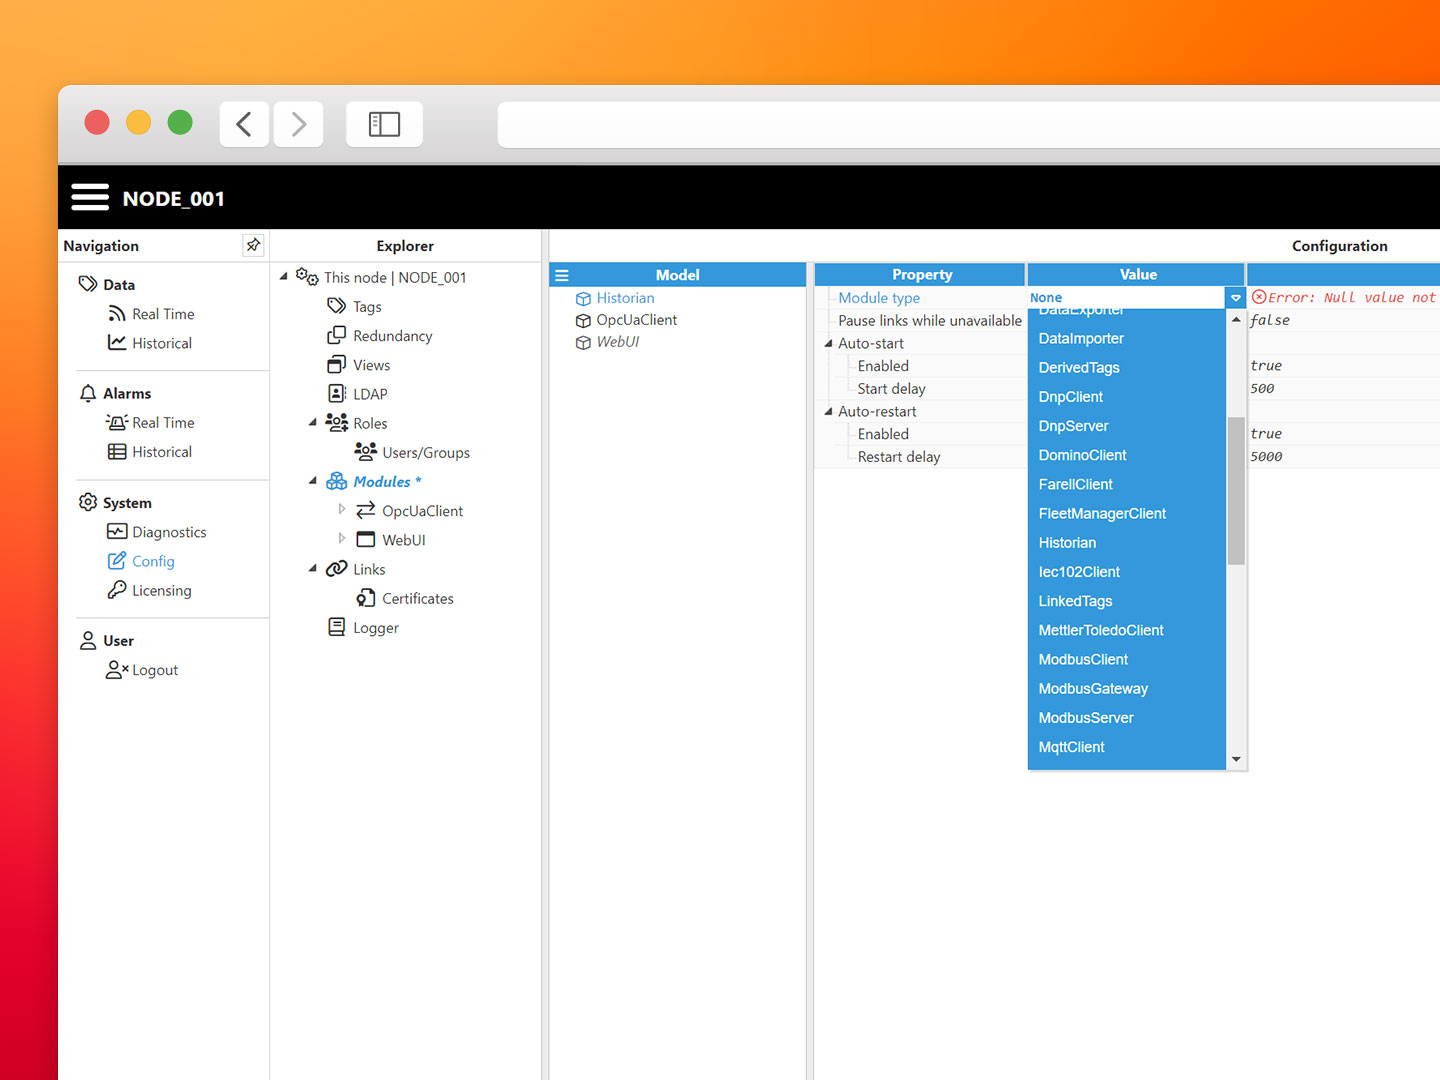
- Step 1: Navigate to Config→Modules and create a new module named Historian of type Historian.
-
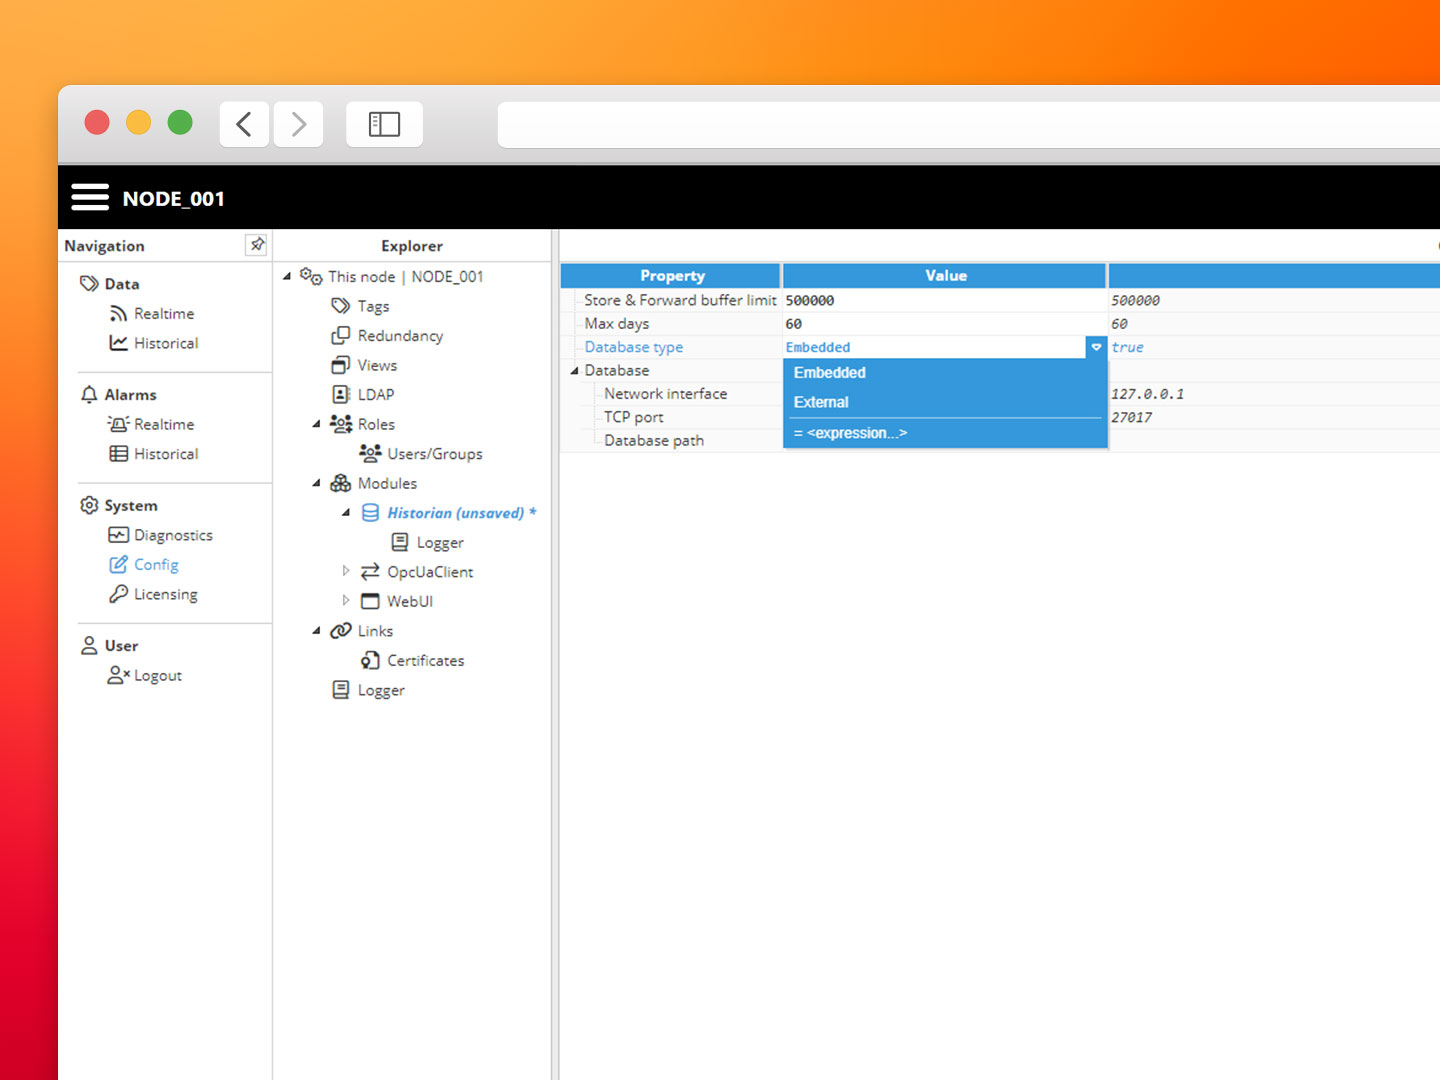
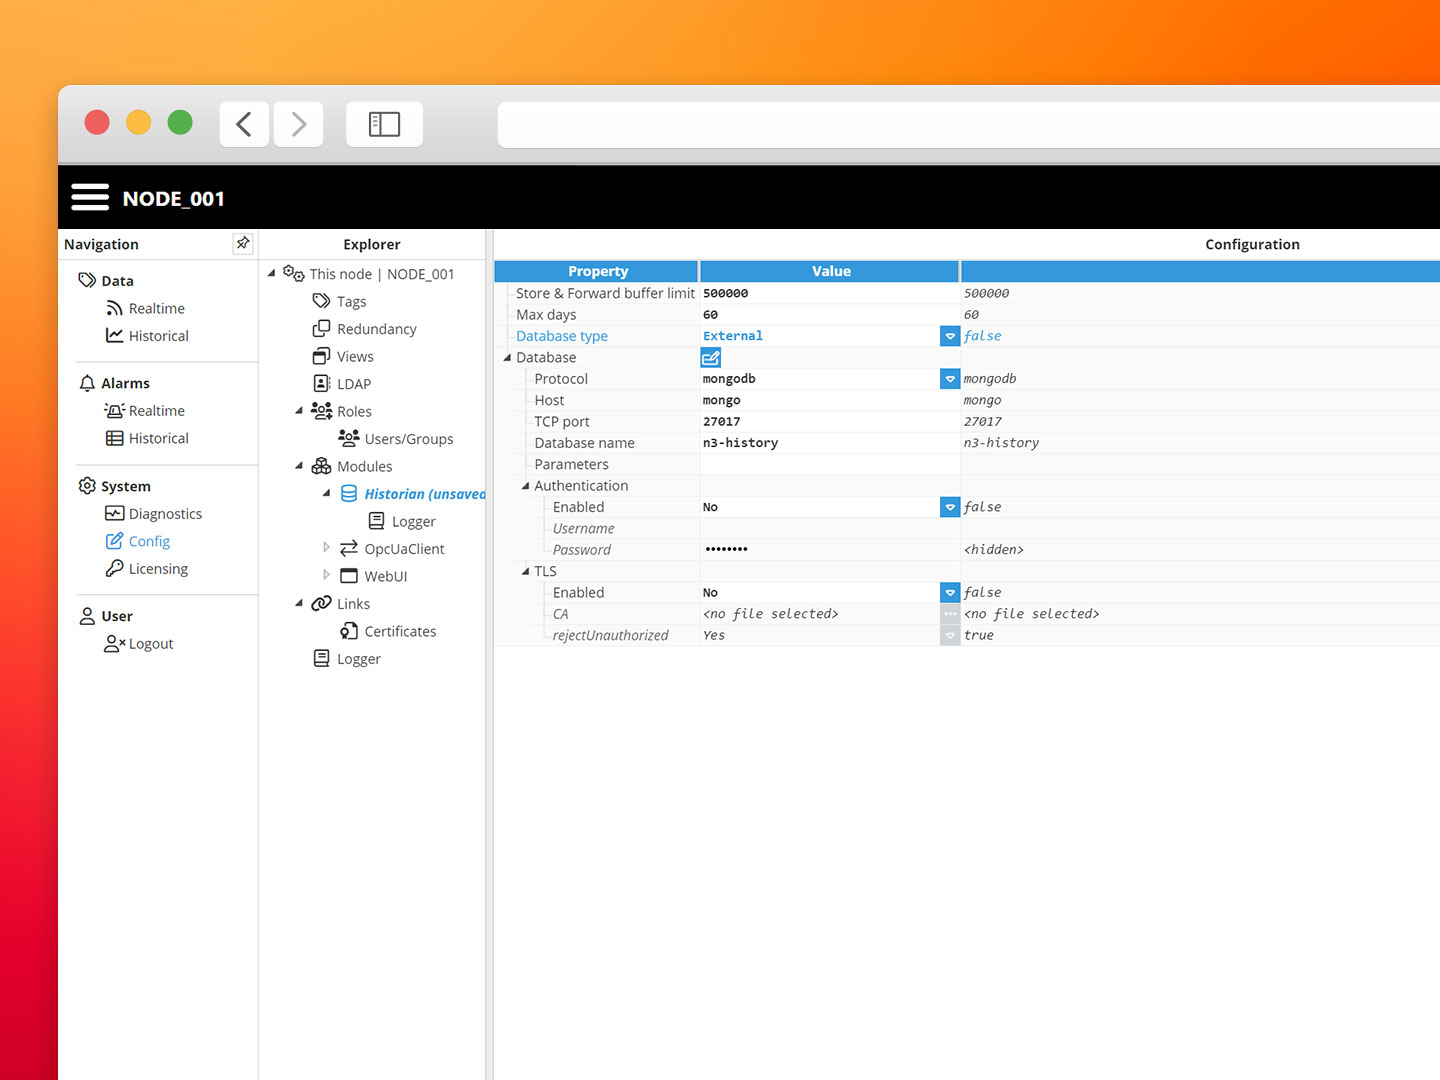
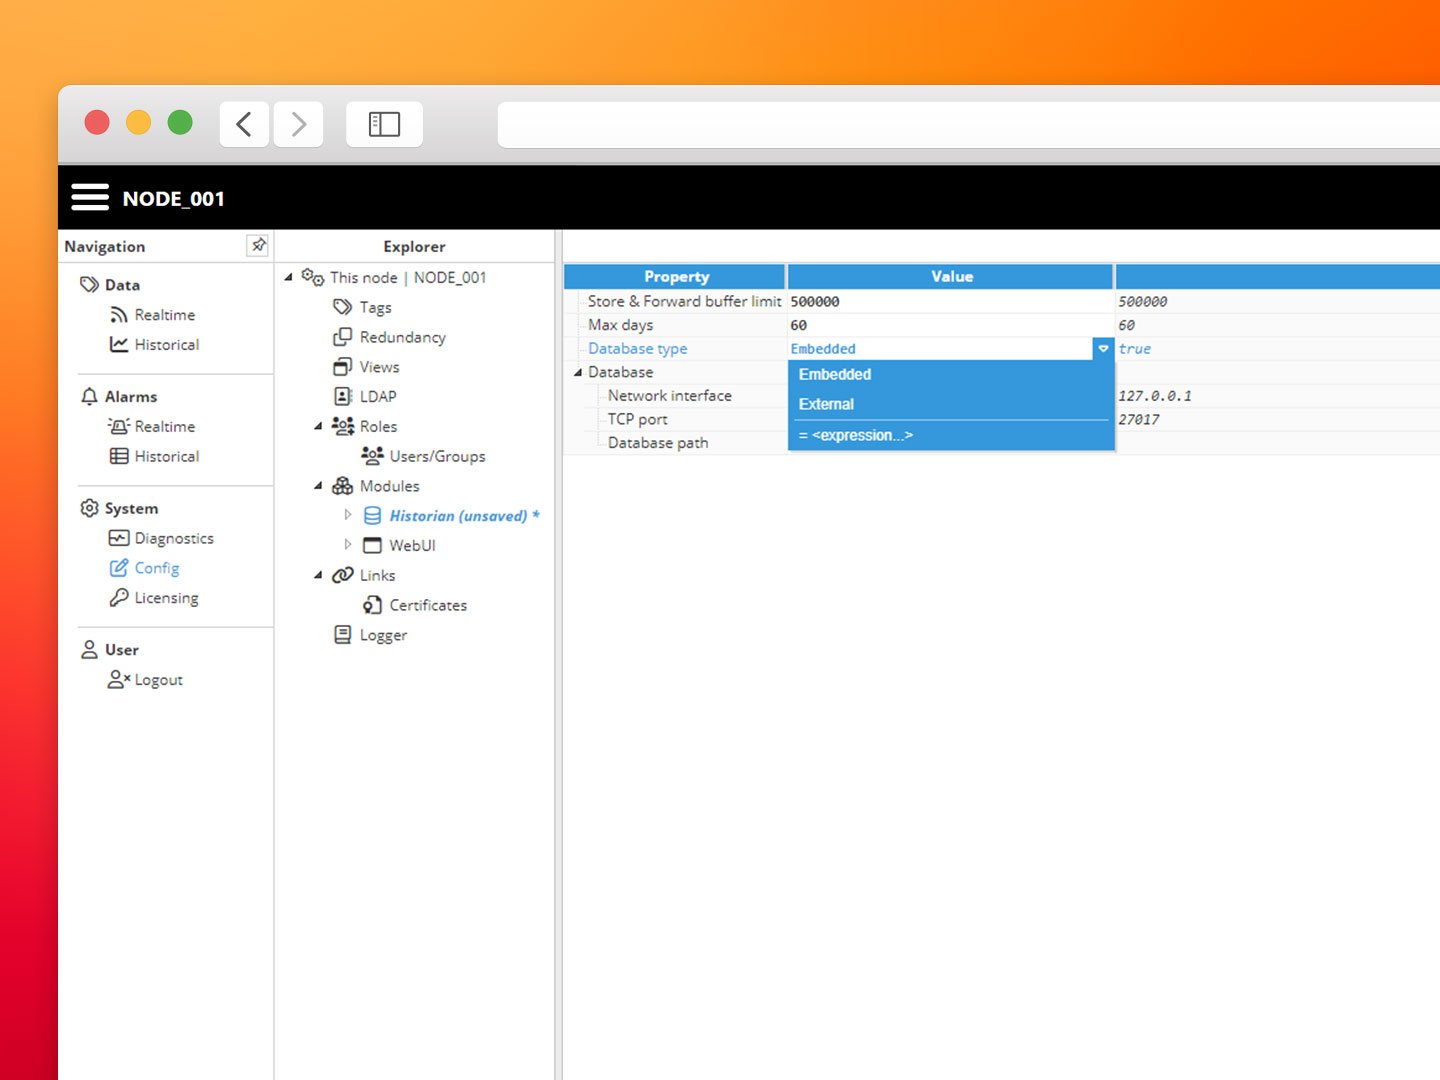
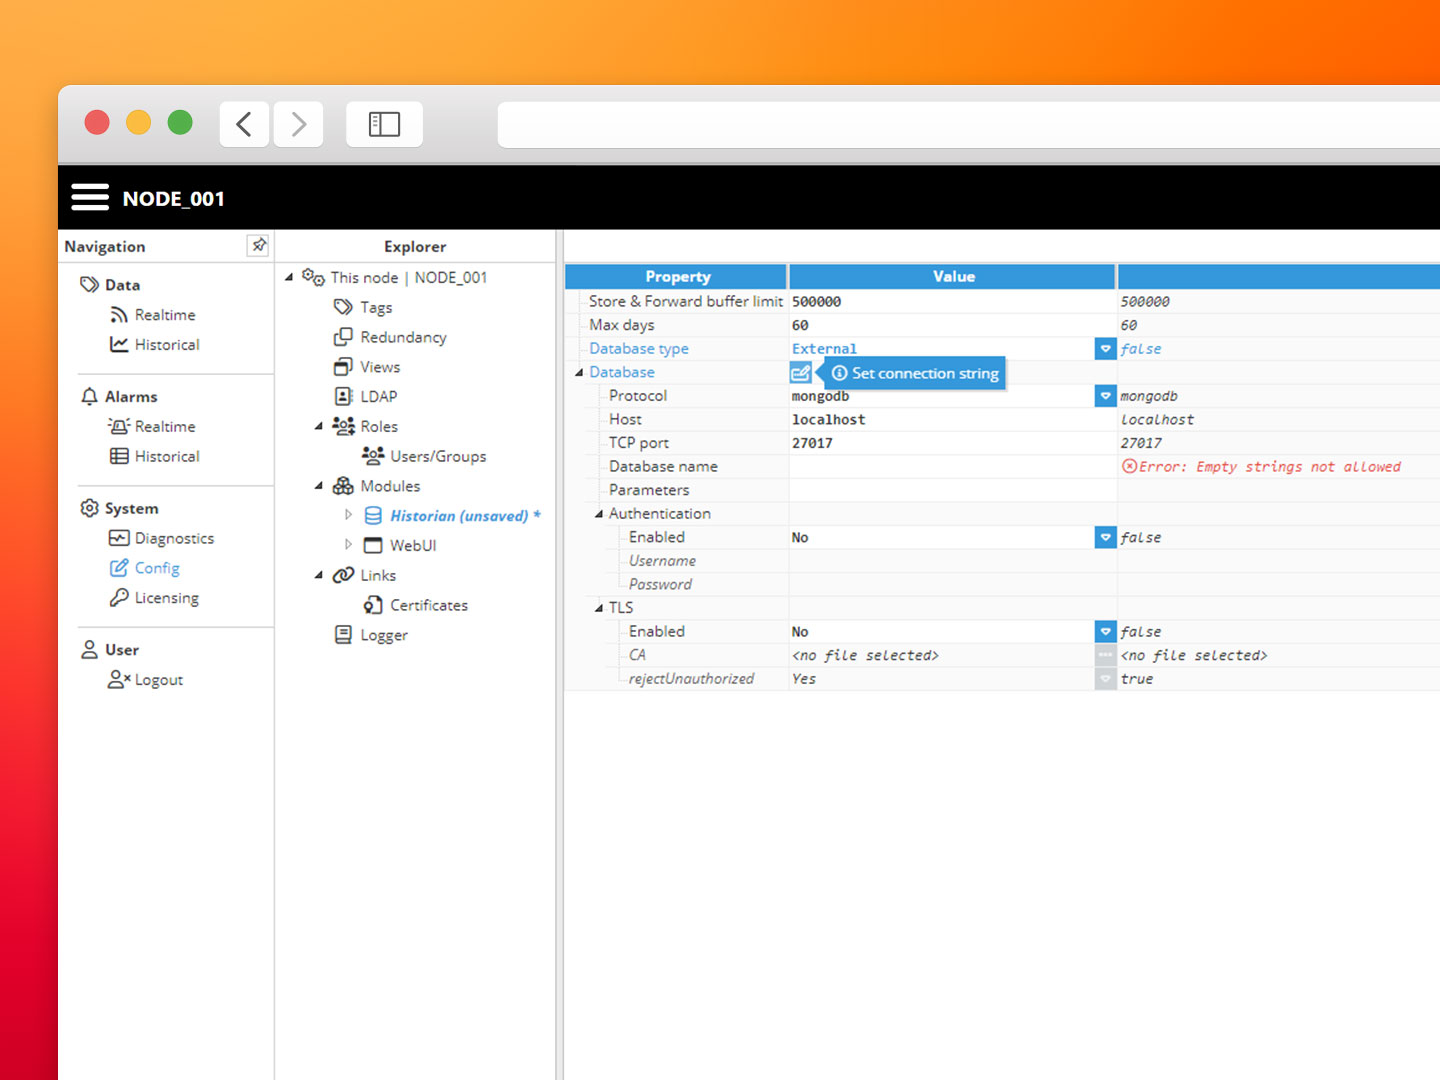
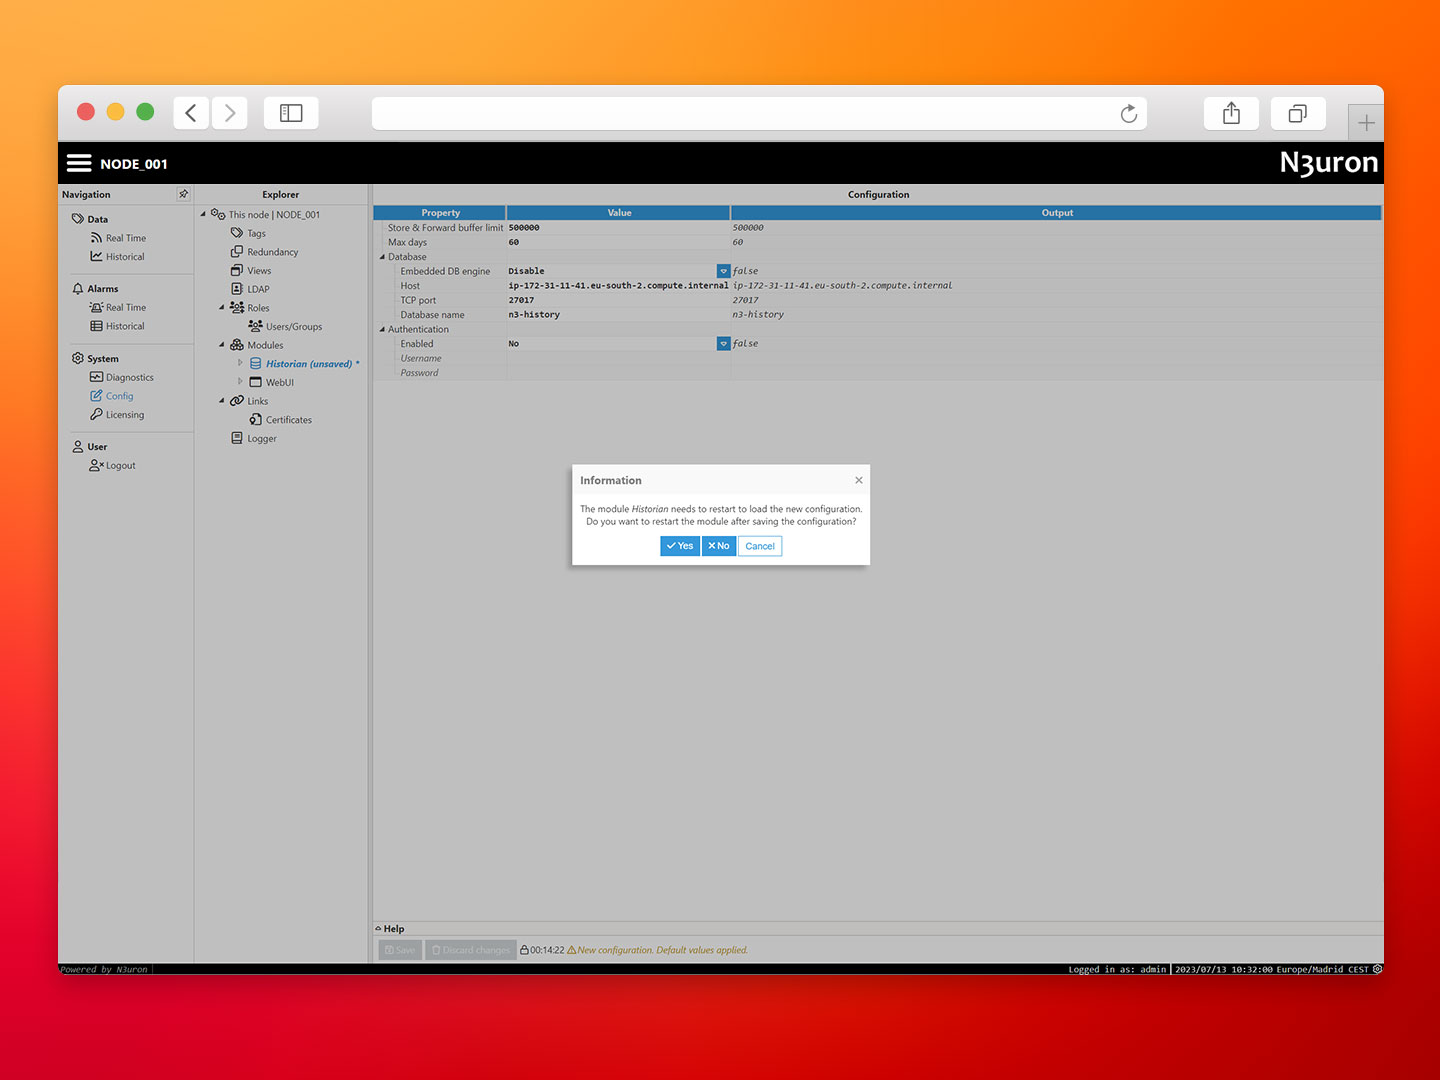
Step 2: Go to the module configuration and disable the embedded database (not available in our container images) to use an external MongoDB.
-
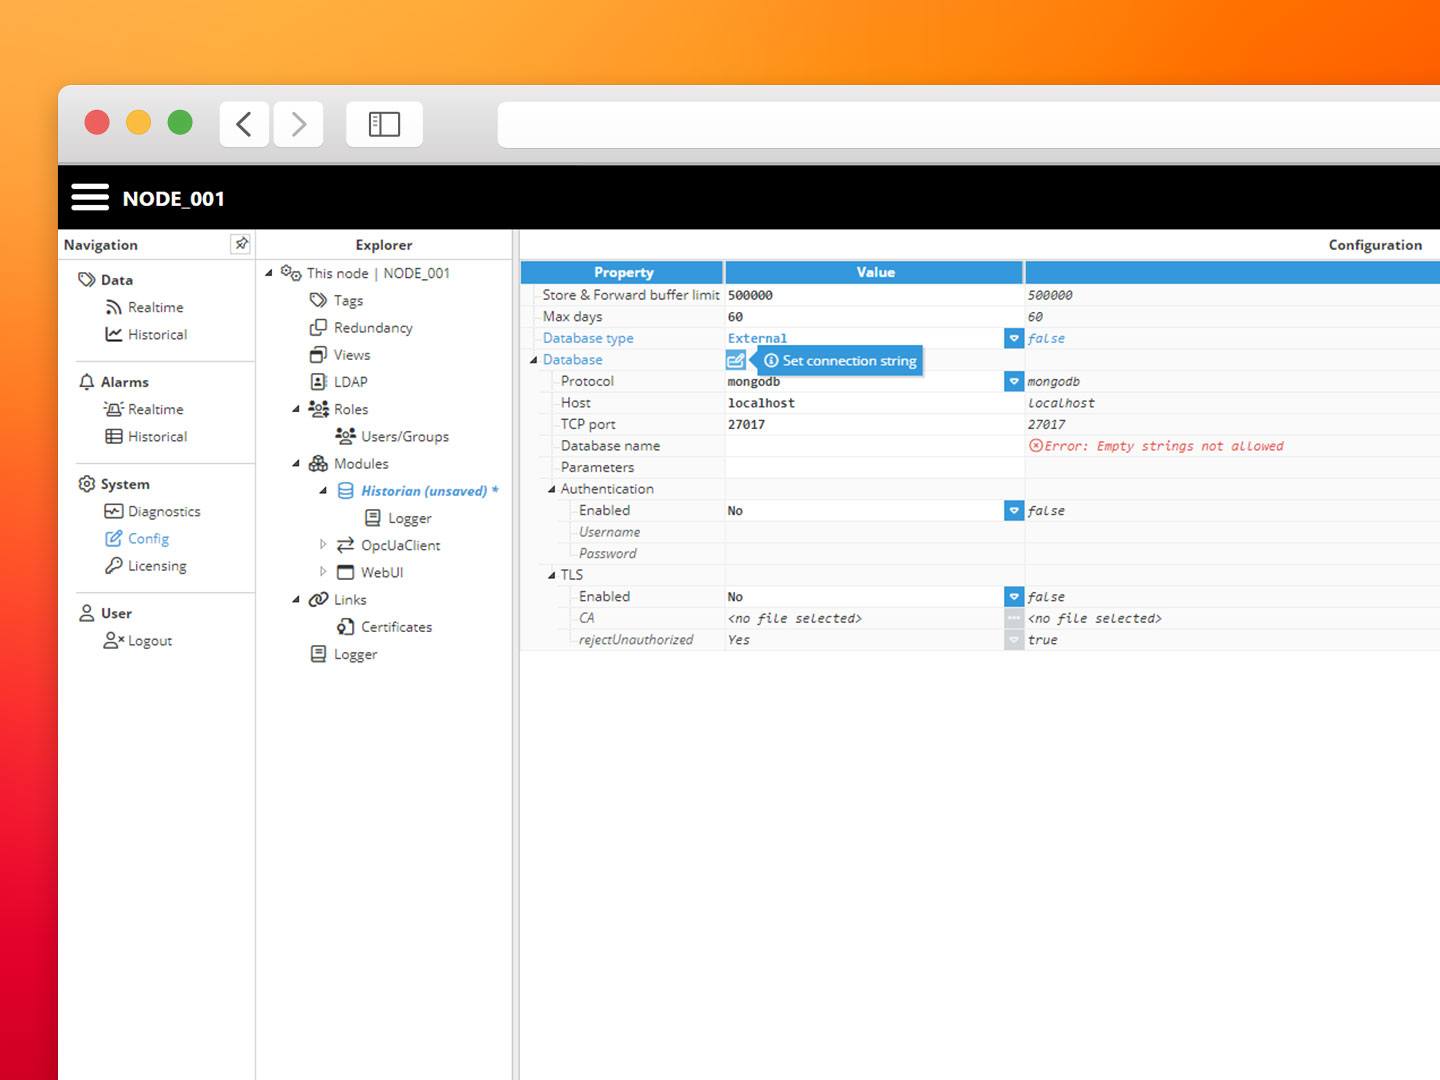
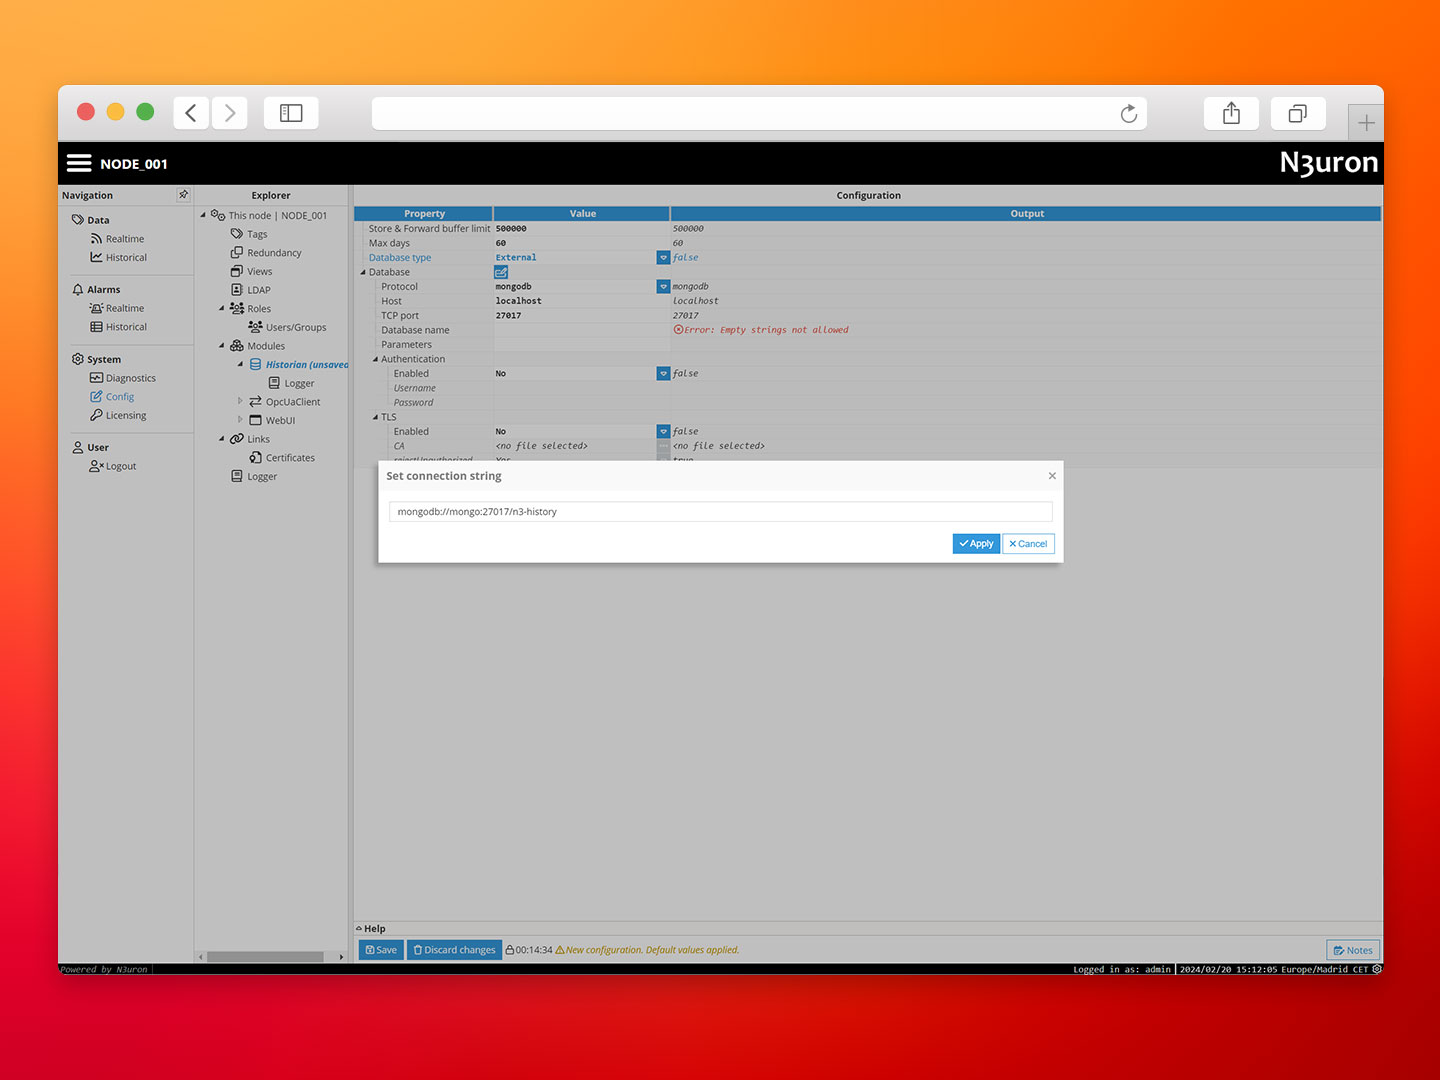
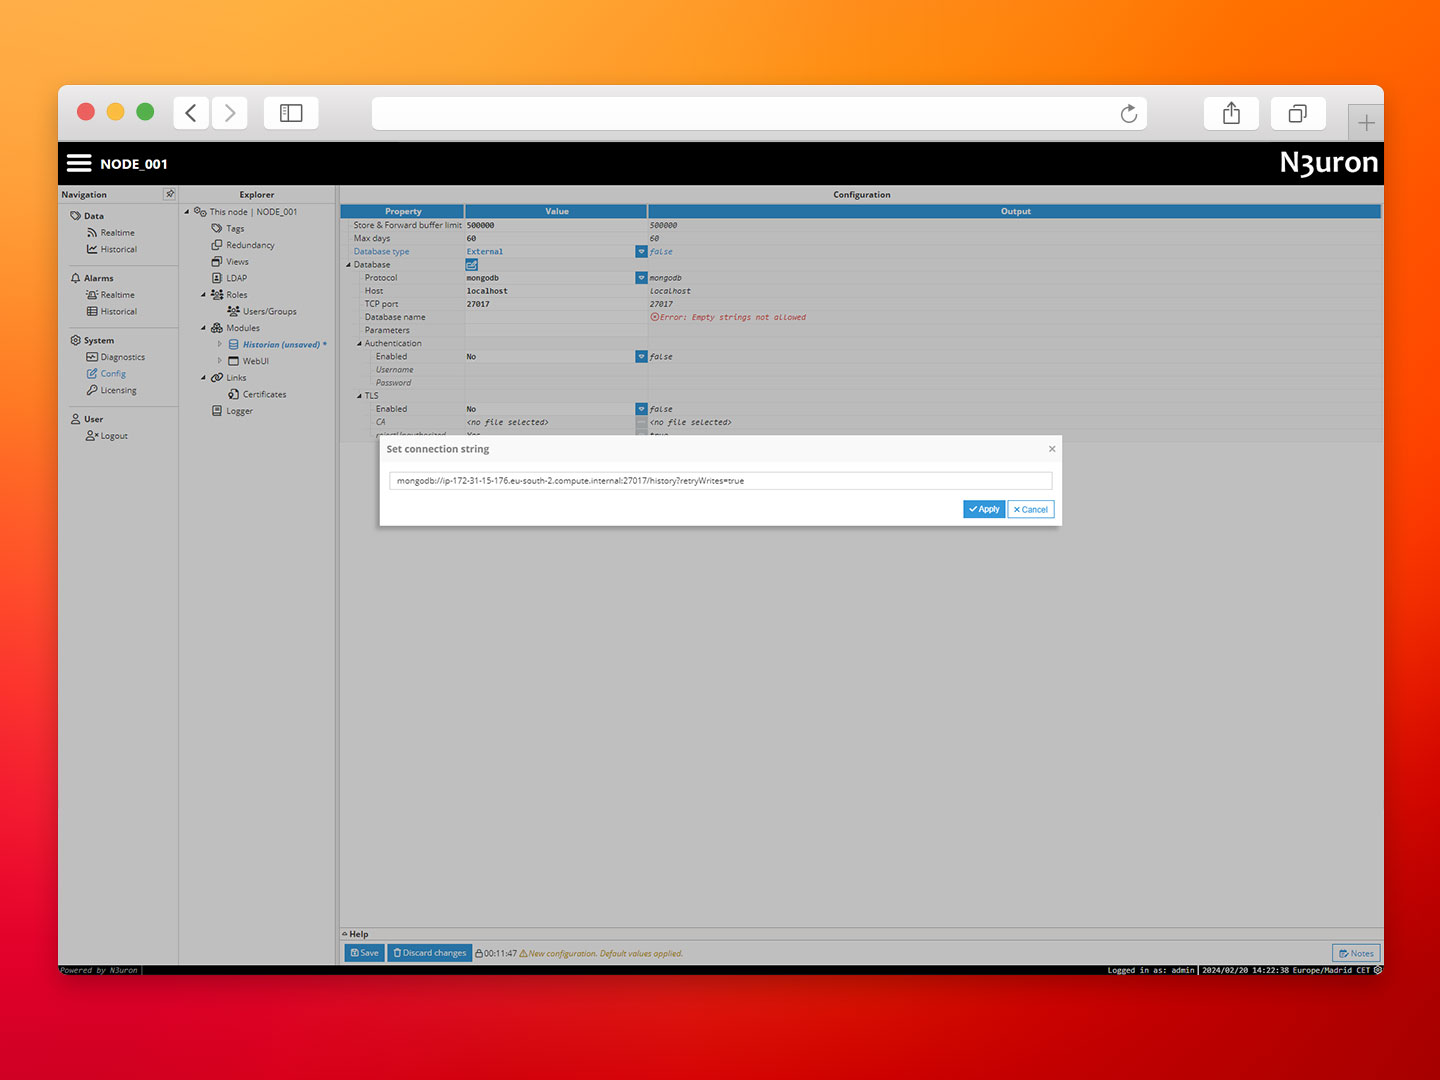
Step 3: Configure the database with the following connection URL → mongodb://mongo:27017/n3-history.
Make sure to save changes and reload the module.
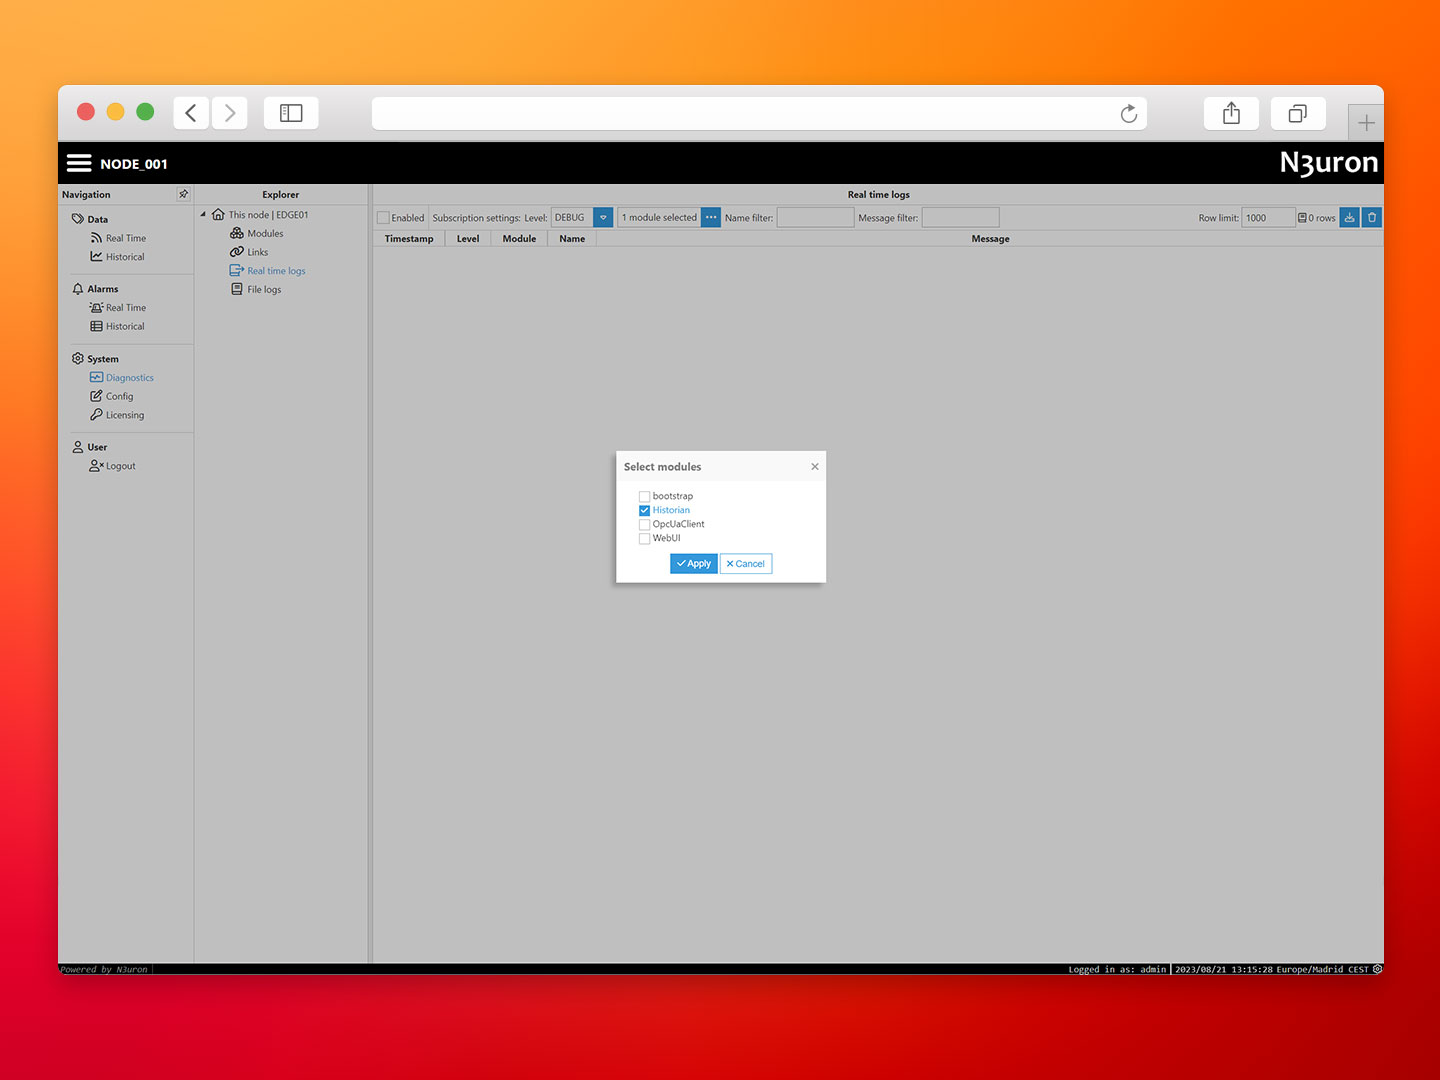
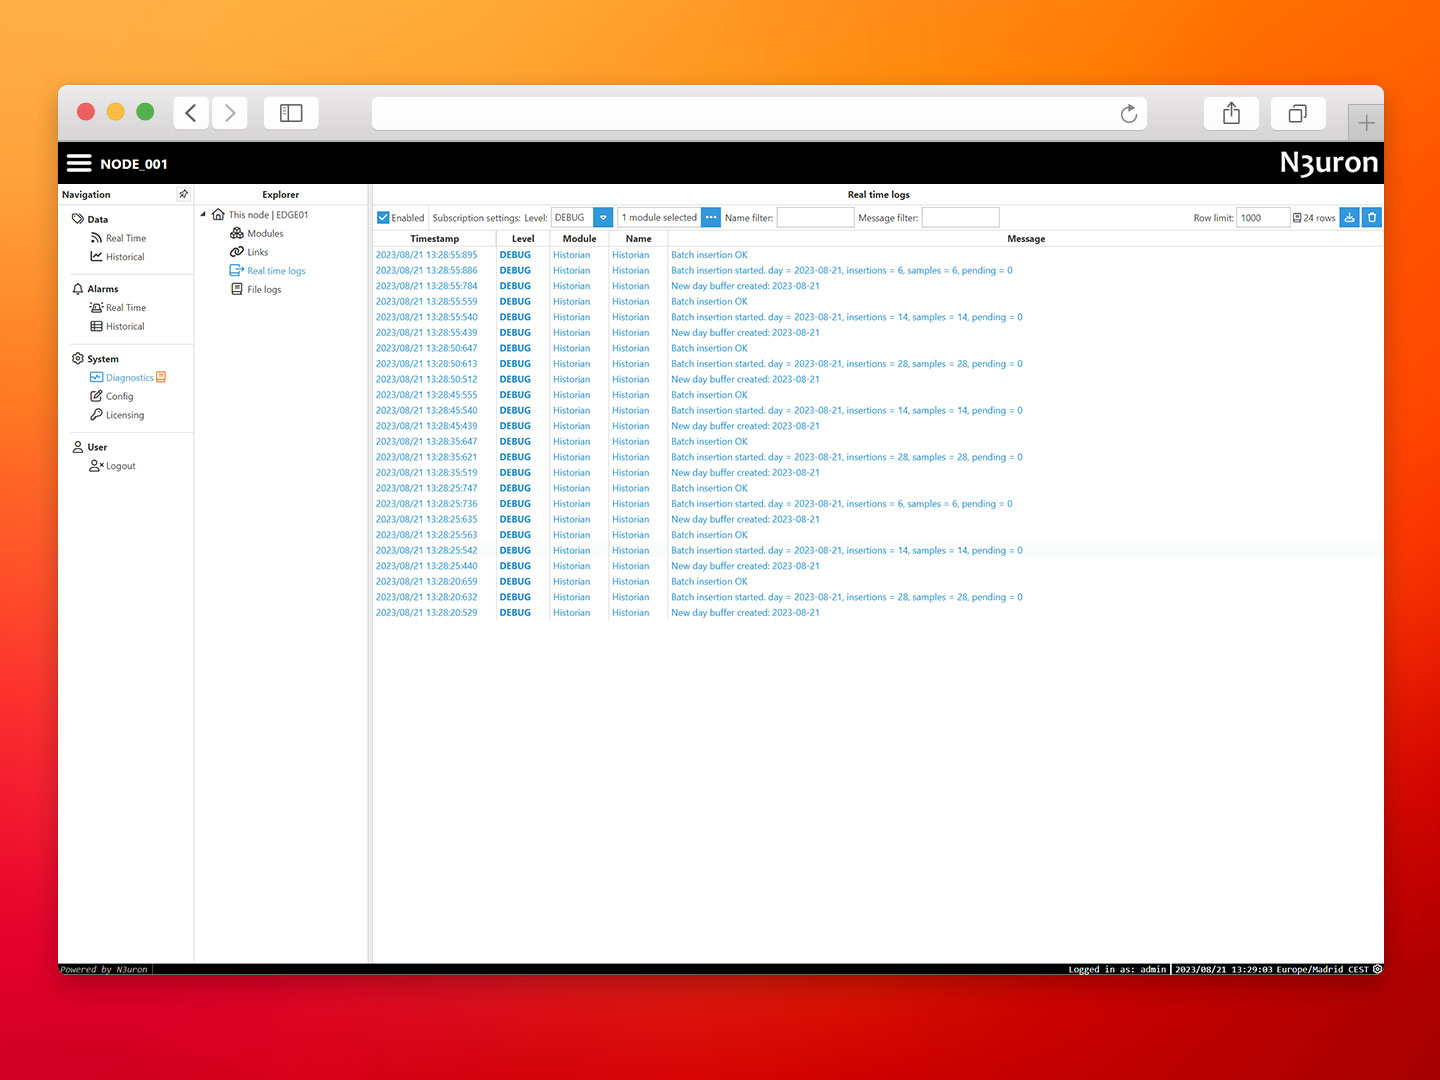
We’ll make use of the N3uron built-in diagnostics tools to verify if new events are being inserted into the database. Head to System→Diagnostis, select the Historian module at DEBUG level and mark the Enabled checkbox at the top.
Wait for a few seconds and you’ll start to see the logs.
We can now confirm the Historian module is keeping a local history of the values received via OPC UA in the MongoDB database running alongside N3uron.
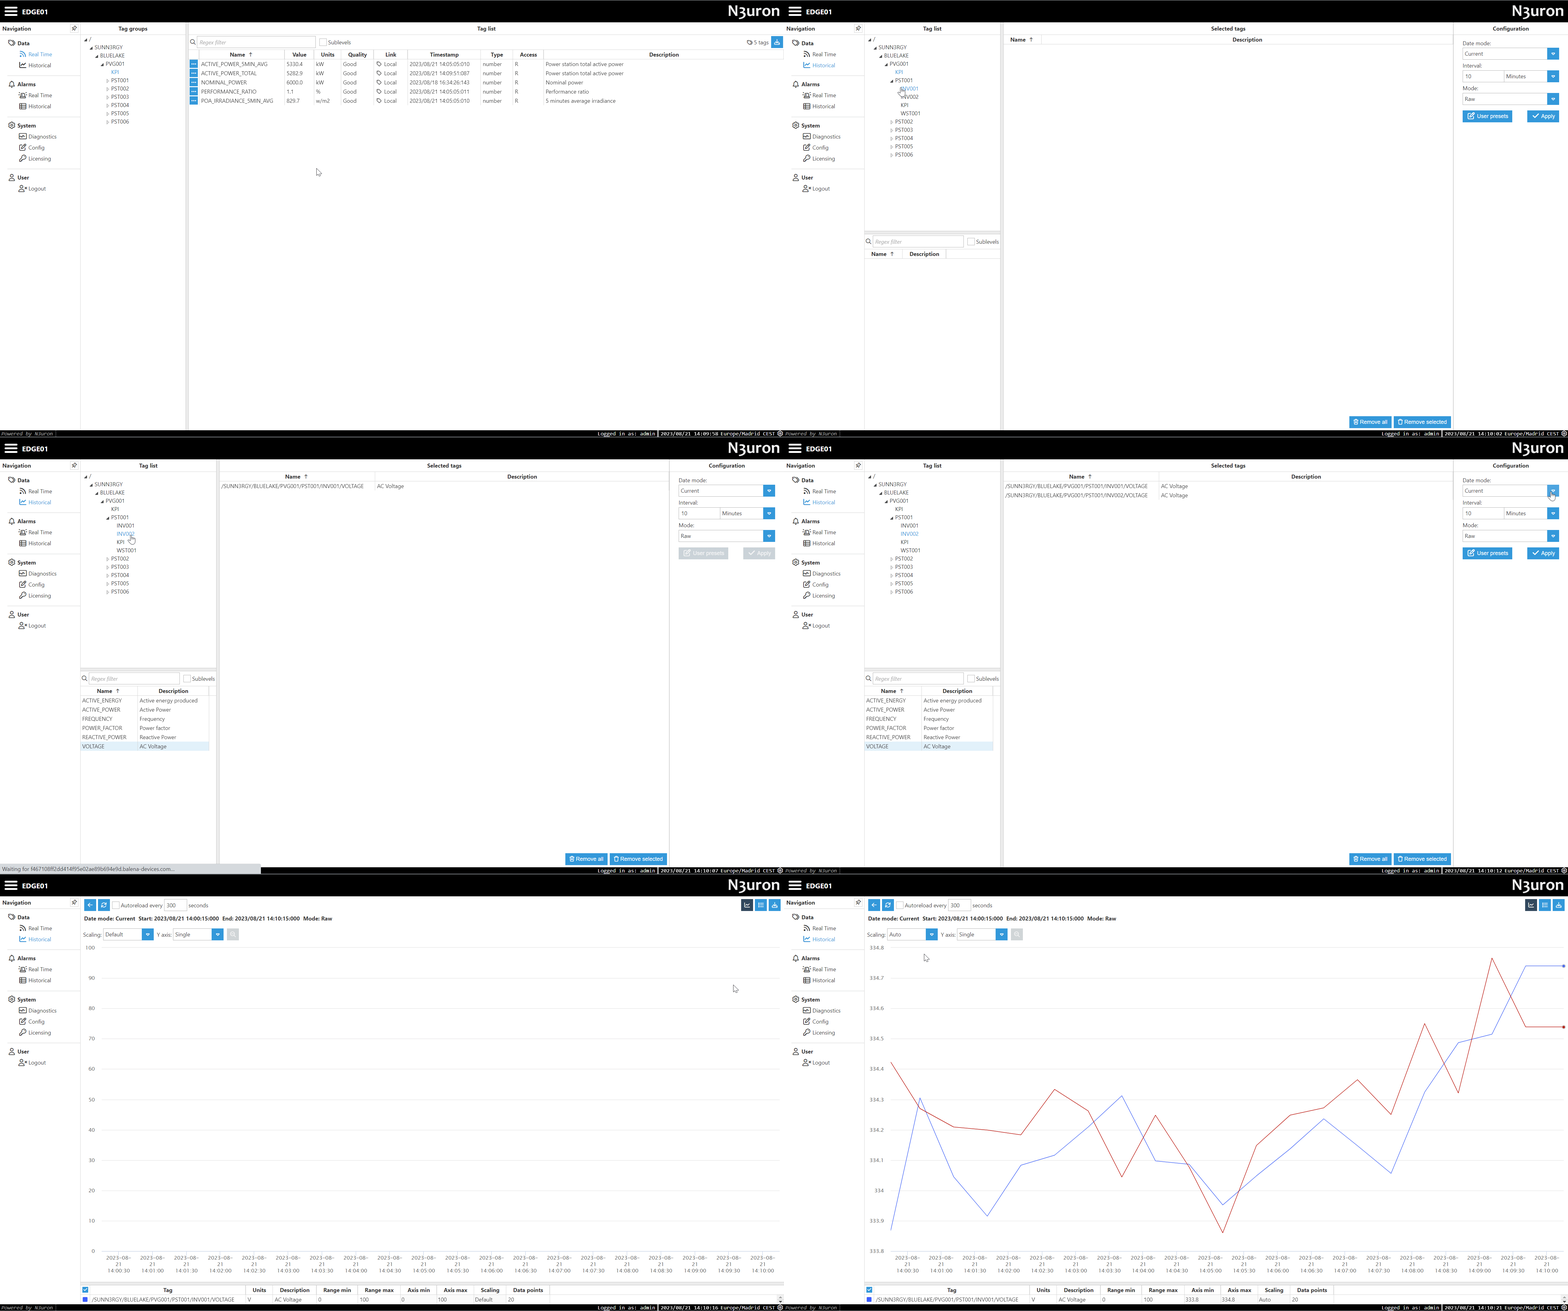
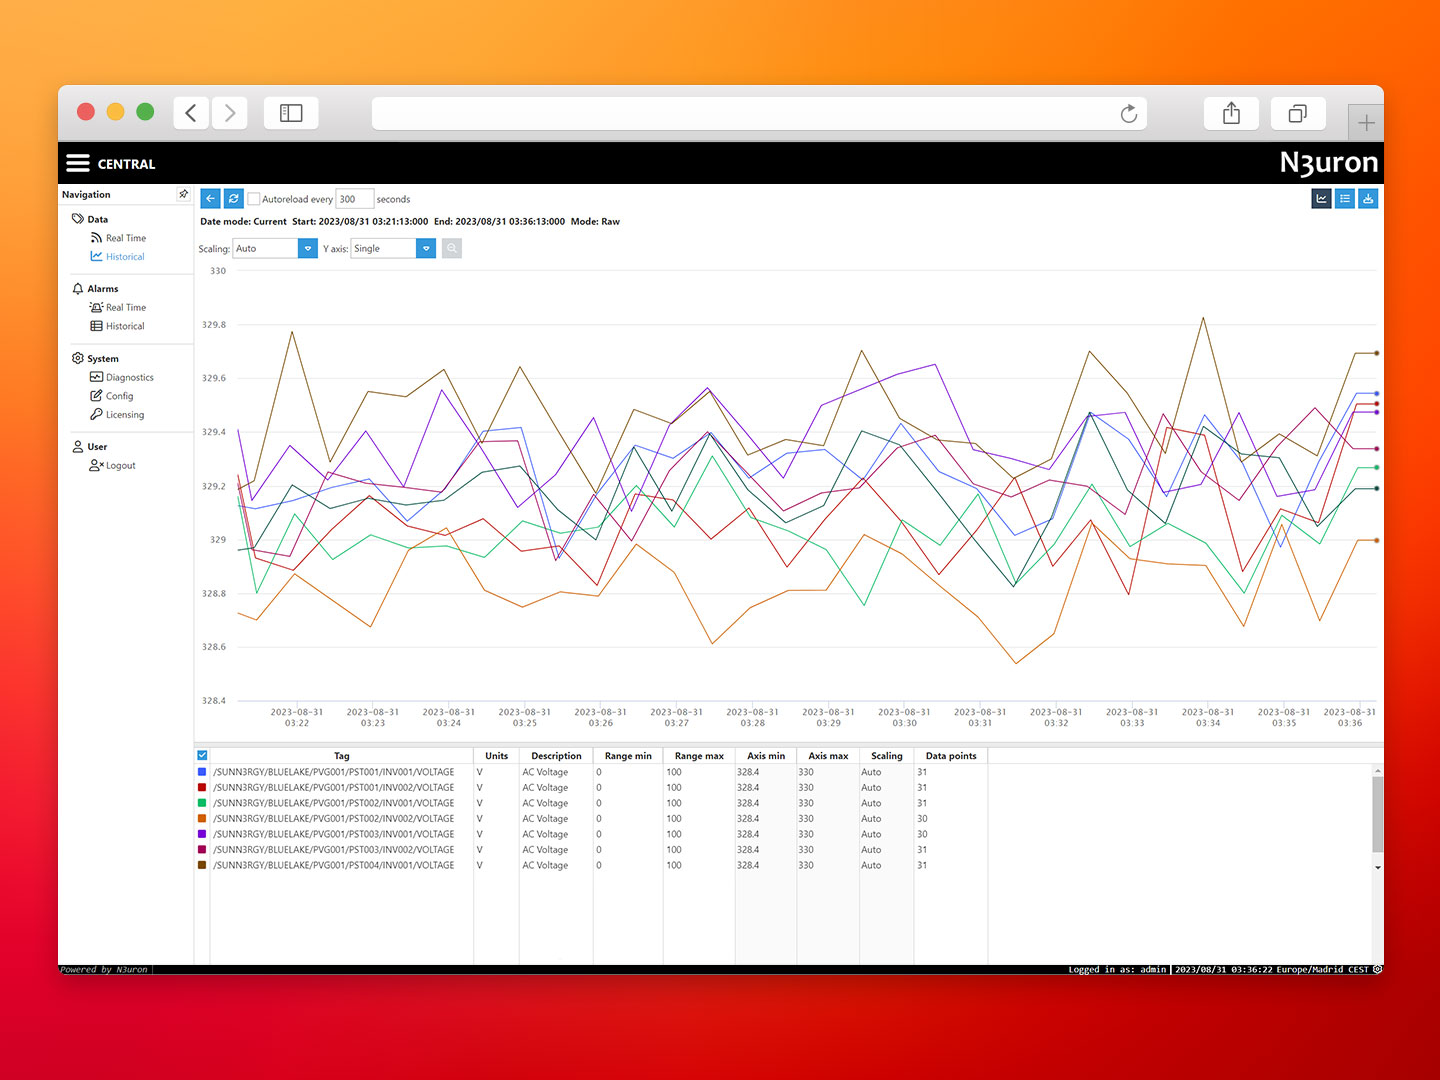
Making queries for historical data from the N3uron WebUI is pretty straightforward, head to the Historical section below RealTime, then drag-and-drop the tags you want to retrieve from the Tag list, configure the timeframe and mode (raw, aggregated, delta…).
The following GIF displays the process.
At this point, you’ll have a working IIoT-Gateway with a local data historian.
N3uron Central Historian in AWS
Once the edge part is set up using balena. We will deploy a central N3uron instance in AWS that will receive, store and consolidate all the data from the edge.
With the flexibility of N3uron and scale of AWS Cloud we can swiftly assemble a complete Data Management solution in any region and process large amounts of IIoT data.
We’ll use Terraform to create and manage all the resources in the AWS. Terraform is a popular Infrastructure-as-Code tool to automate the provisioning of infrastructure on multiple cloud providers, we have defined a deployment for this demo with two EC2 machines, one for N3uron and the other for MongoDB.
Why you should use automation and Infrastructure-as-Code?
Manual provisioning of infrastructure is a time-consuming, error-prone task, humans are not designed to follow and apply a complex set of rules and steps to deliver a desired state in a reliable and scalable way, but machines are.
Automation is key to ensuring all processes are performed in a secure, reliable and reproducible manner when building, testing or modifying your infrastructure, combined with the power and flexibility of the Cloud provides a solid foundation to grow, scale and adapt your business to achieve your IIoT goals.
Deploy N3uron and MongoDB
You’ll need the AWS CLI and the Terraform CLI installed on your machine to continue with this demo.
- Step 1: Configure the AWS CLI if you don’t have it already. Make sure to have an existing KeyPair created in that region.
aws configure
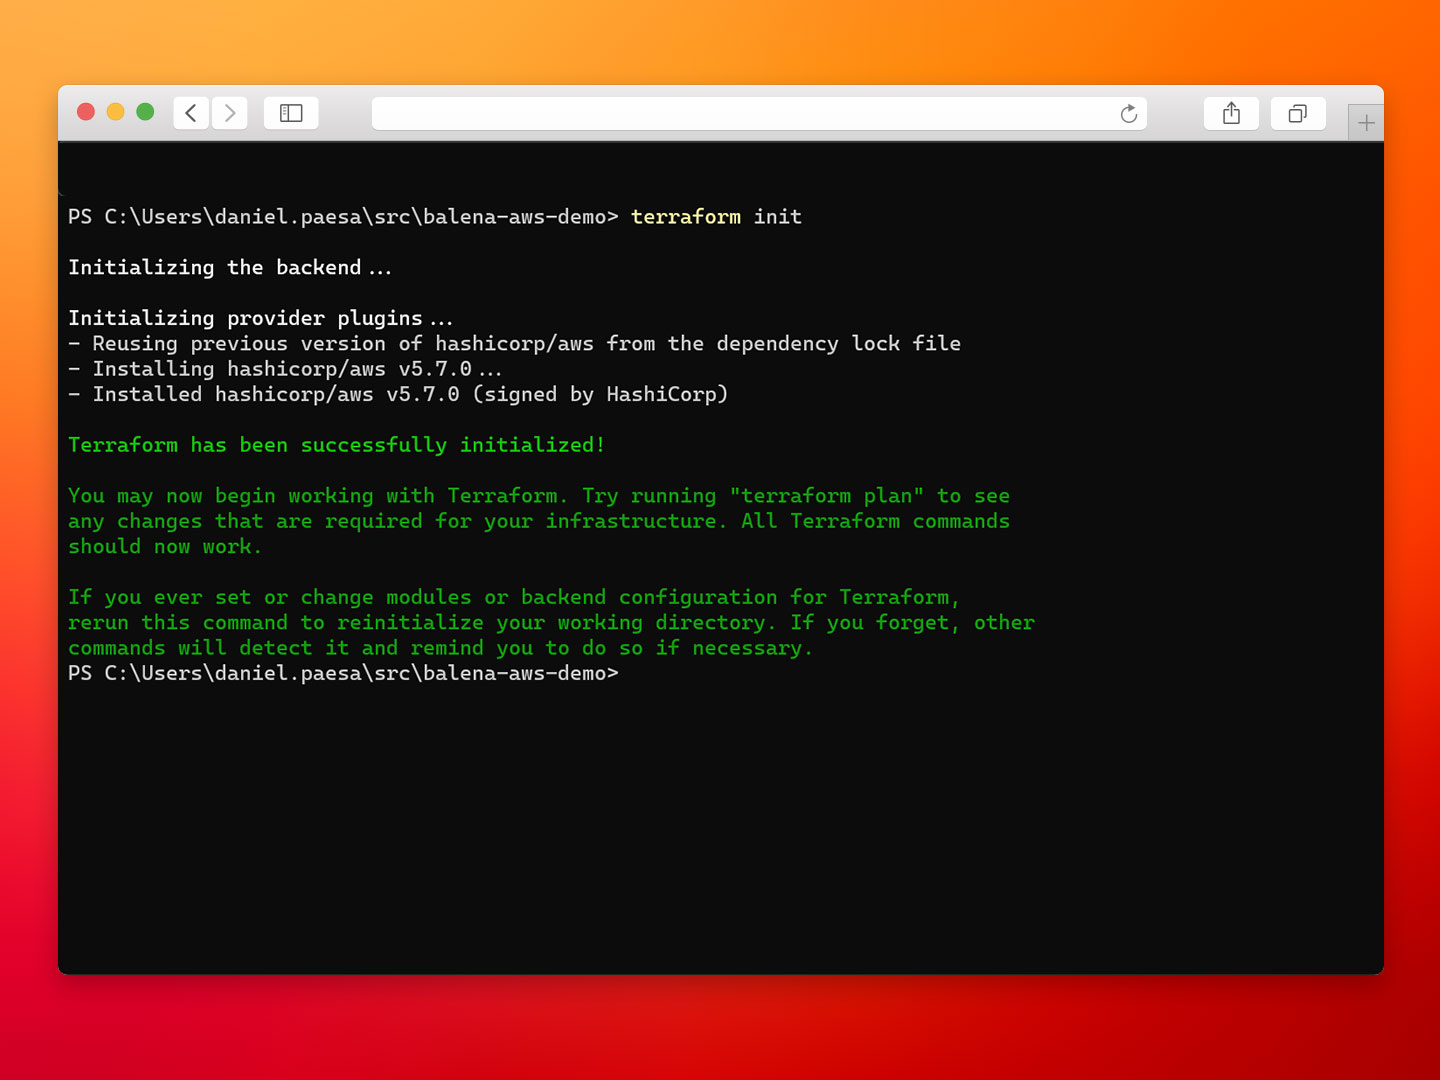
- Step 2: Clone our GitHub repository and initialize Terraform.
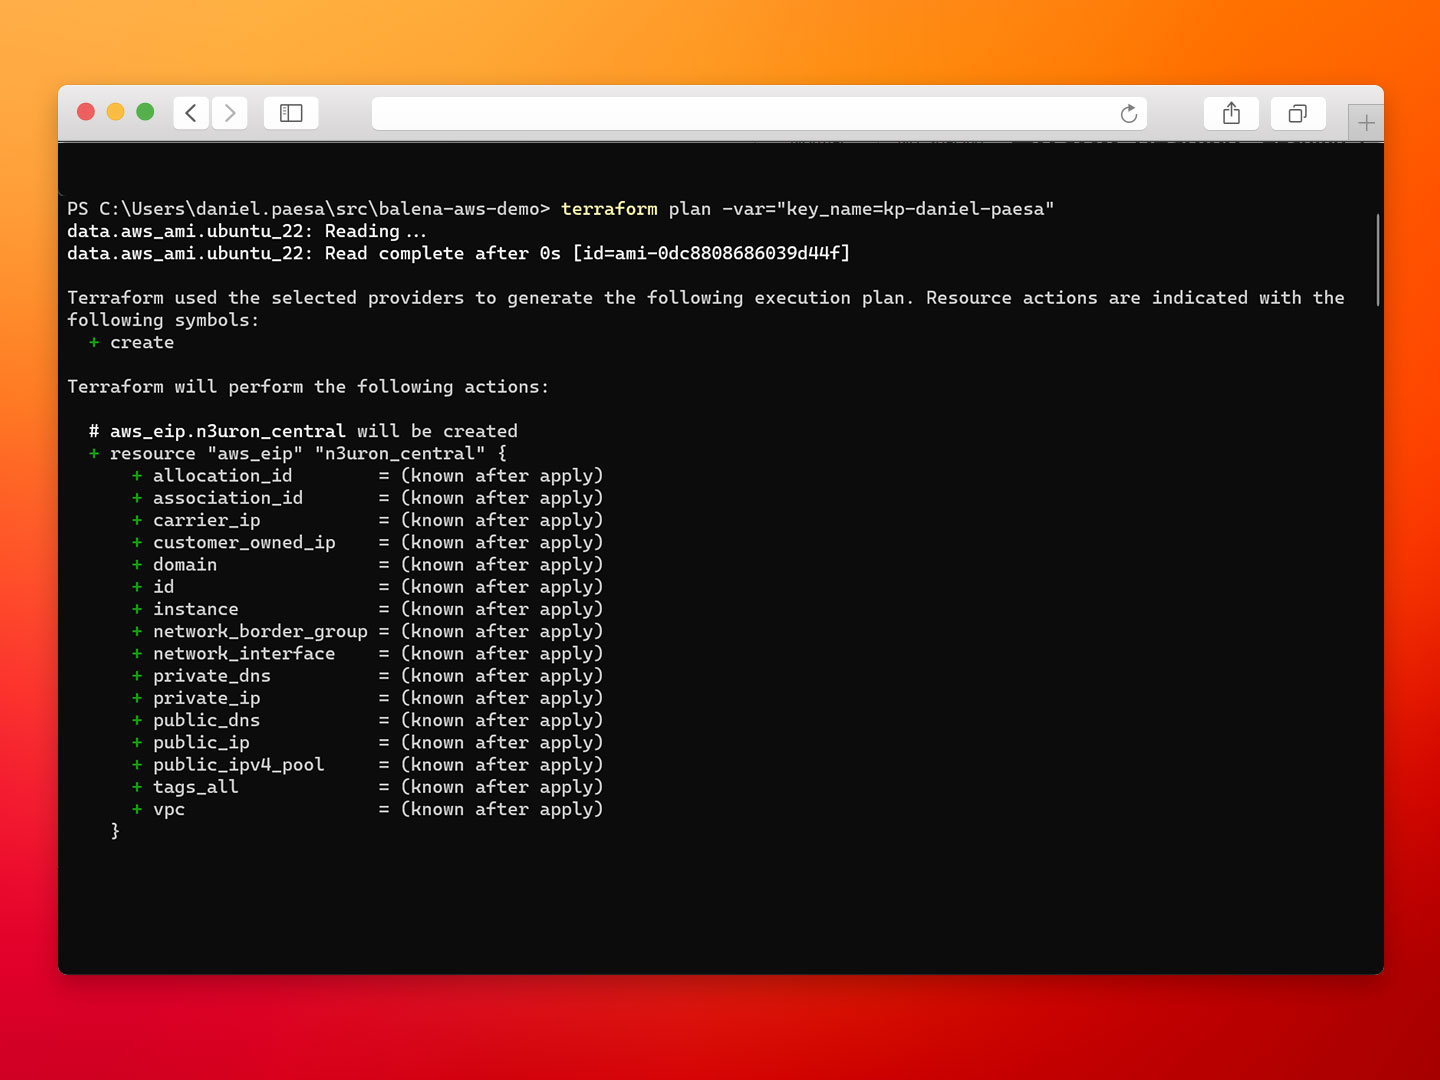
- Step 3: Execute the `terraform plan` command to visualize a plan of the changes Terraform will make in your infrastructure. Set the name of your existing KeyPair in the key_name variable, this KeyPair will be installed in the EC2 instances to allow SSH access.
terraform plan -var=”key_name=your-kp-name”
Review the plan and continue with the next step.
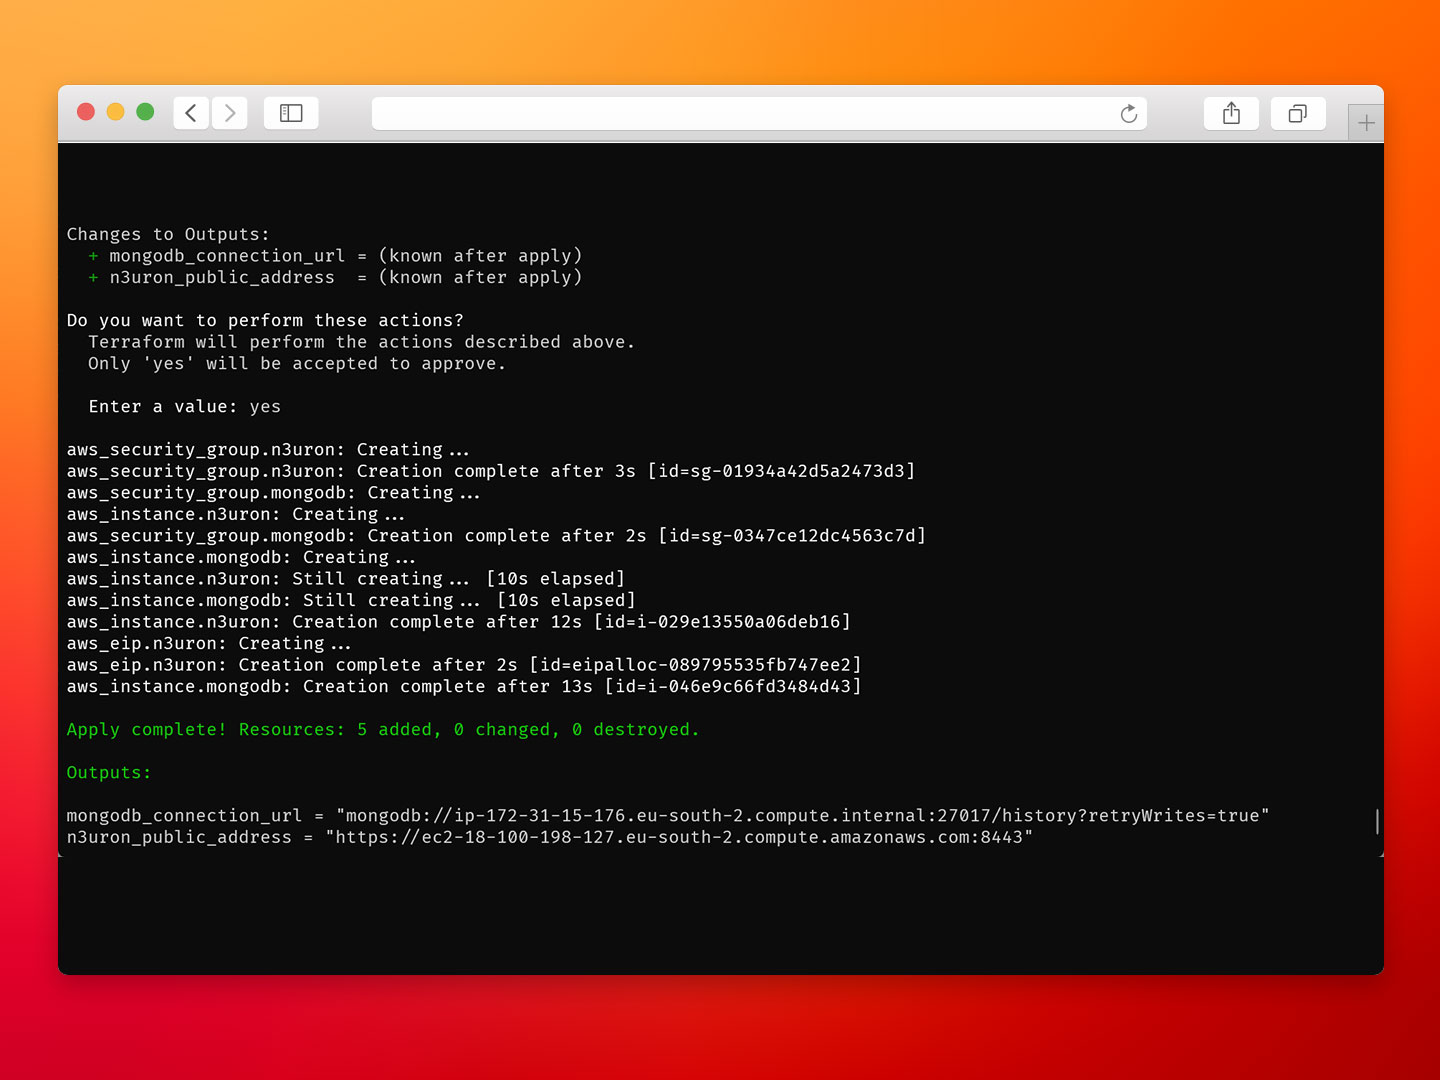
- Step 4: Now we need to tell Terraform to create the AWS resources defined in this repository, it’ll prepare a plan with all the changes needed to reach the desired state, review the changes and type “yes” to confirm.
terraform apply -var=”key_name=your-kp-name”

Note: Remember to run ‘terraform destroy’ at the end of this demo, otherwise you will continue to be billed for the resources created.
- Step 5: Wait until it finalizes and copy the output n3uron_public_address of the newly created EC2 instance, this address will take you directly to the N3uron WebUI (N3uron is automatically installed with our One-Step Installer for Linux).
Configure N3uron
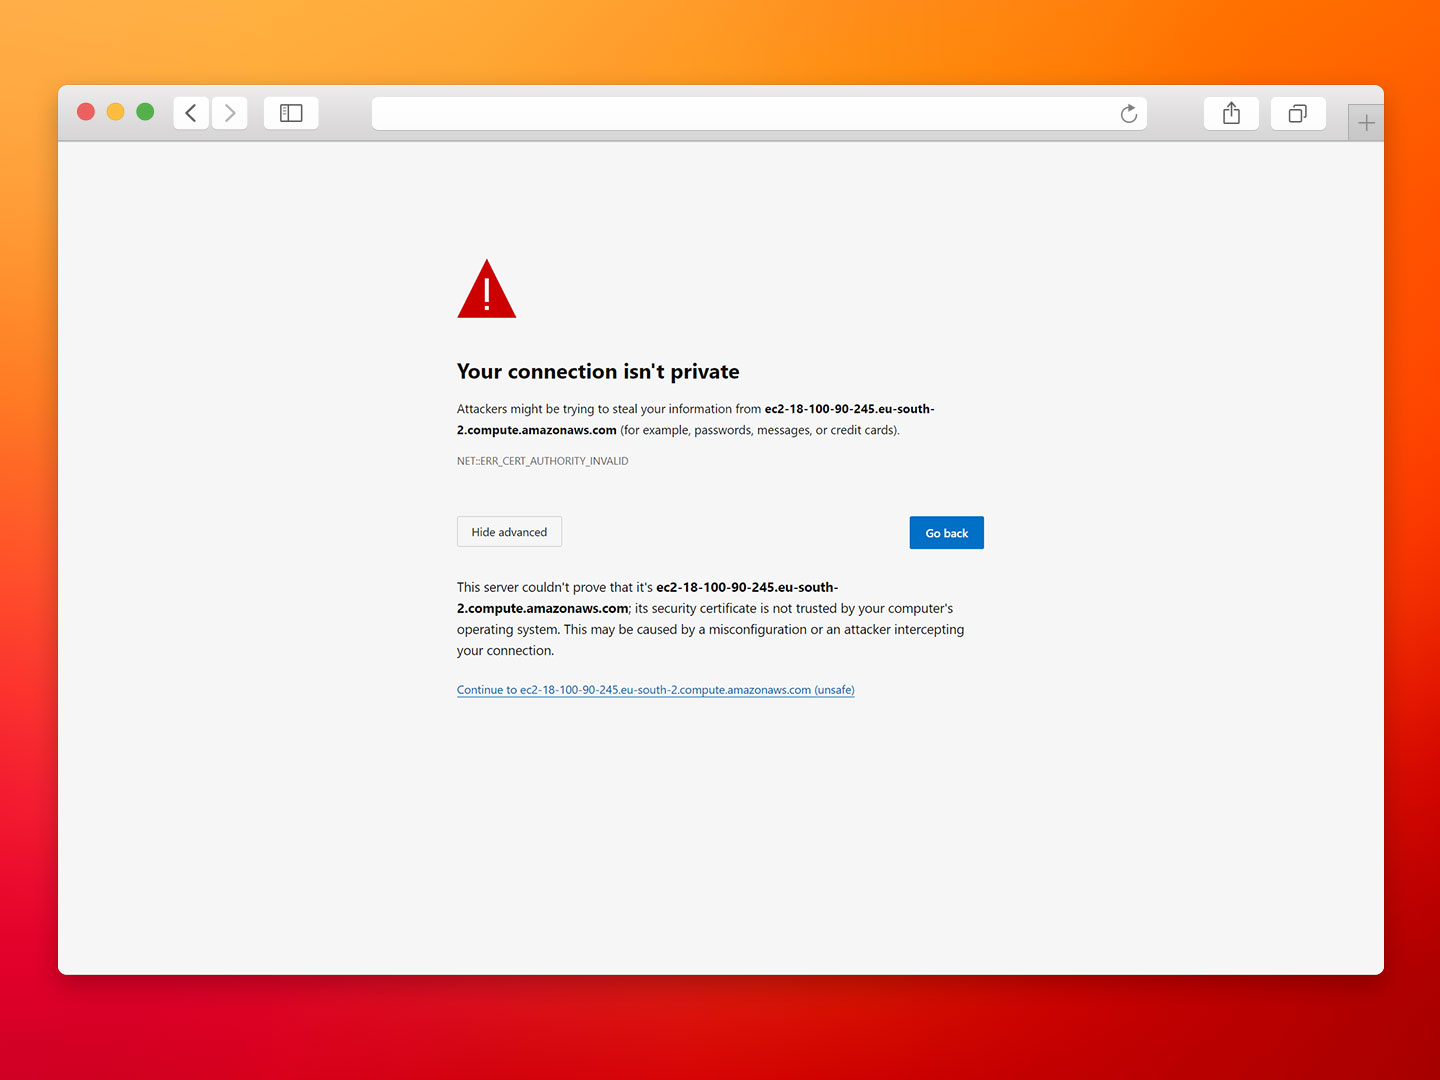
- Step 1: Open your browser and navigate to the n3uron_public_address generated by Terraform. In our case is https://ec2-18-100-198-127.eu-south- 2.compute.amazonaws.com:8443, the default certificate is self-signed by N3uron and you’ll be prompted with a security warning, click on Advanced, then click on Continue to ec2-….
- Step 2: Log in to the WebUI with the default credentials (admin/n3uron).
- Step 3: Go to Config→Modules and create a new module, name it Historian.
-
Step 4: Select Historian as the module type and click on Save. Additionally, you can enable the Pause links while unavailable property to ensure all the incoming events will be historized and prevent any data loss.
- Step 5: Head to the configuration for the newly created Historian module and disable
the embedded database to use an external MongoDB.
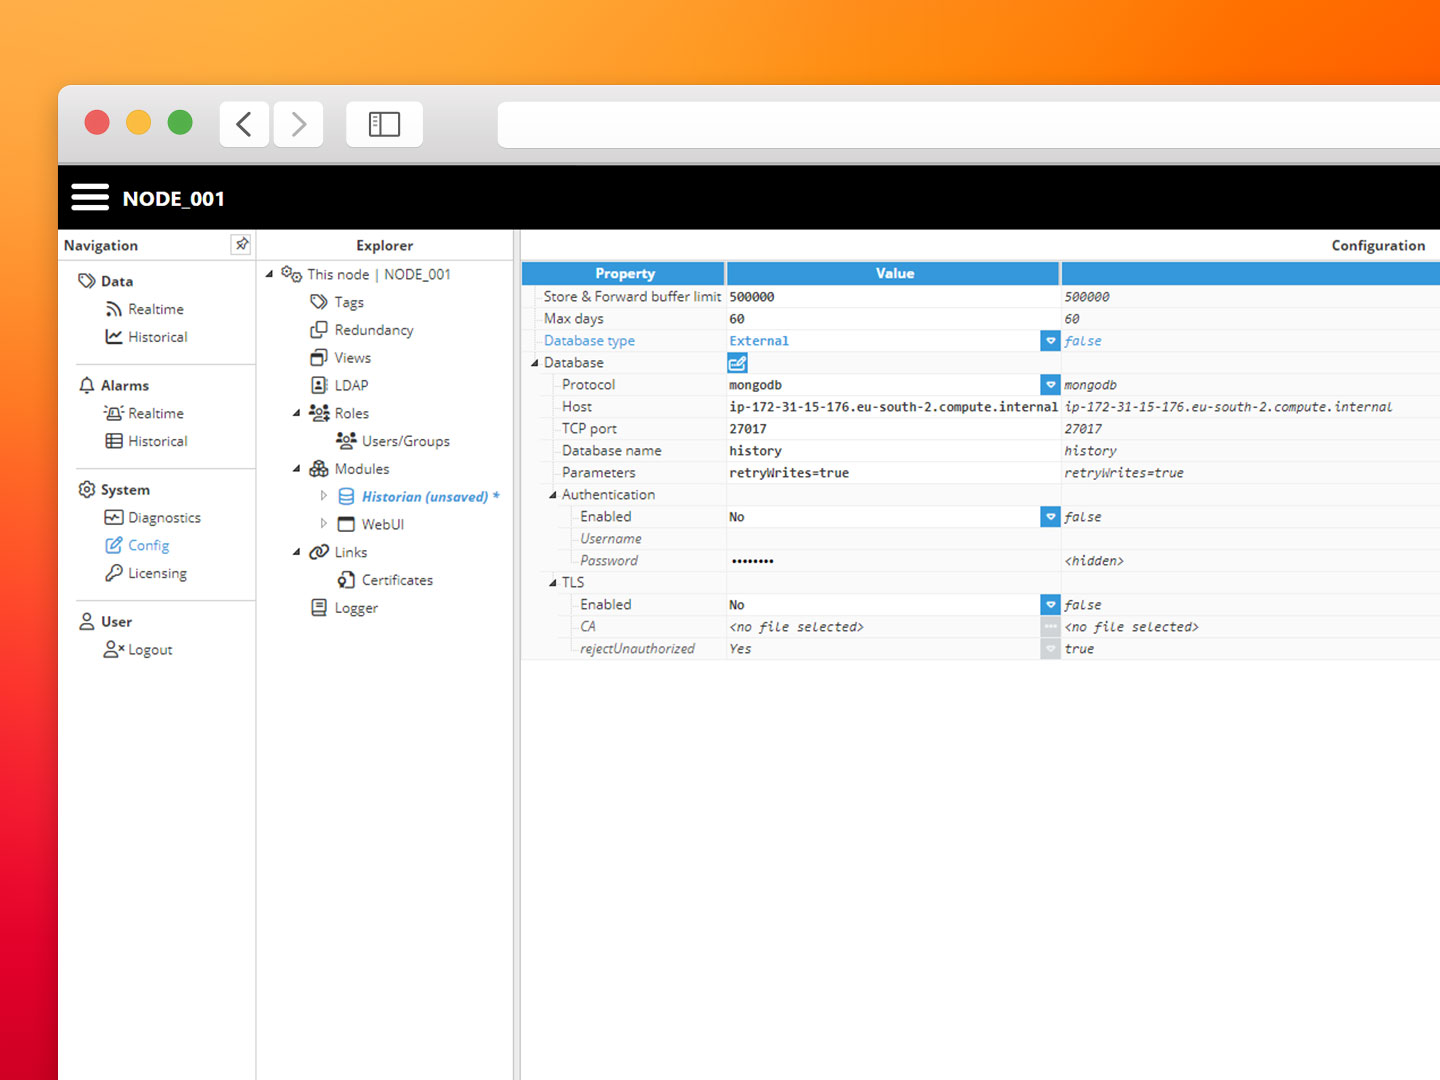
- Step 6: Paste the MongoDB connection URL provided by Terraform and click Apply.
- Step 7: Save changes and reload the module.
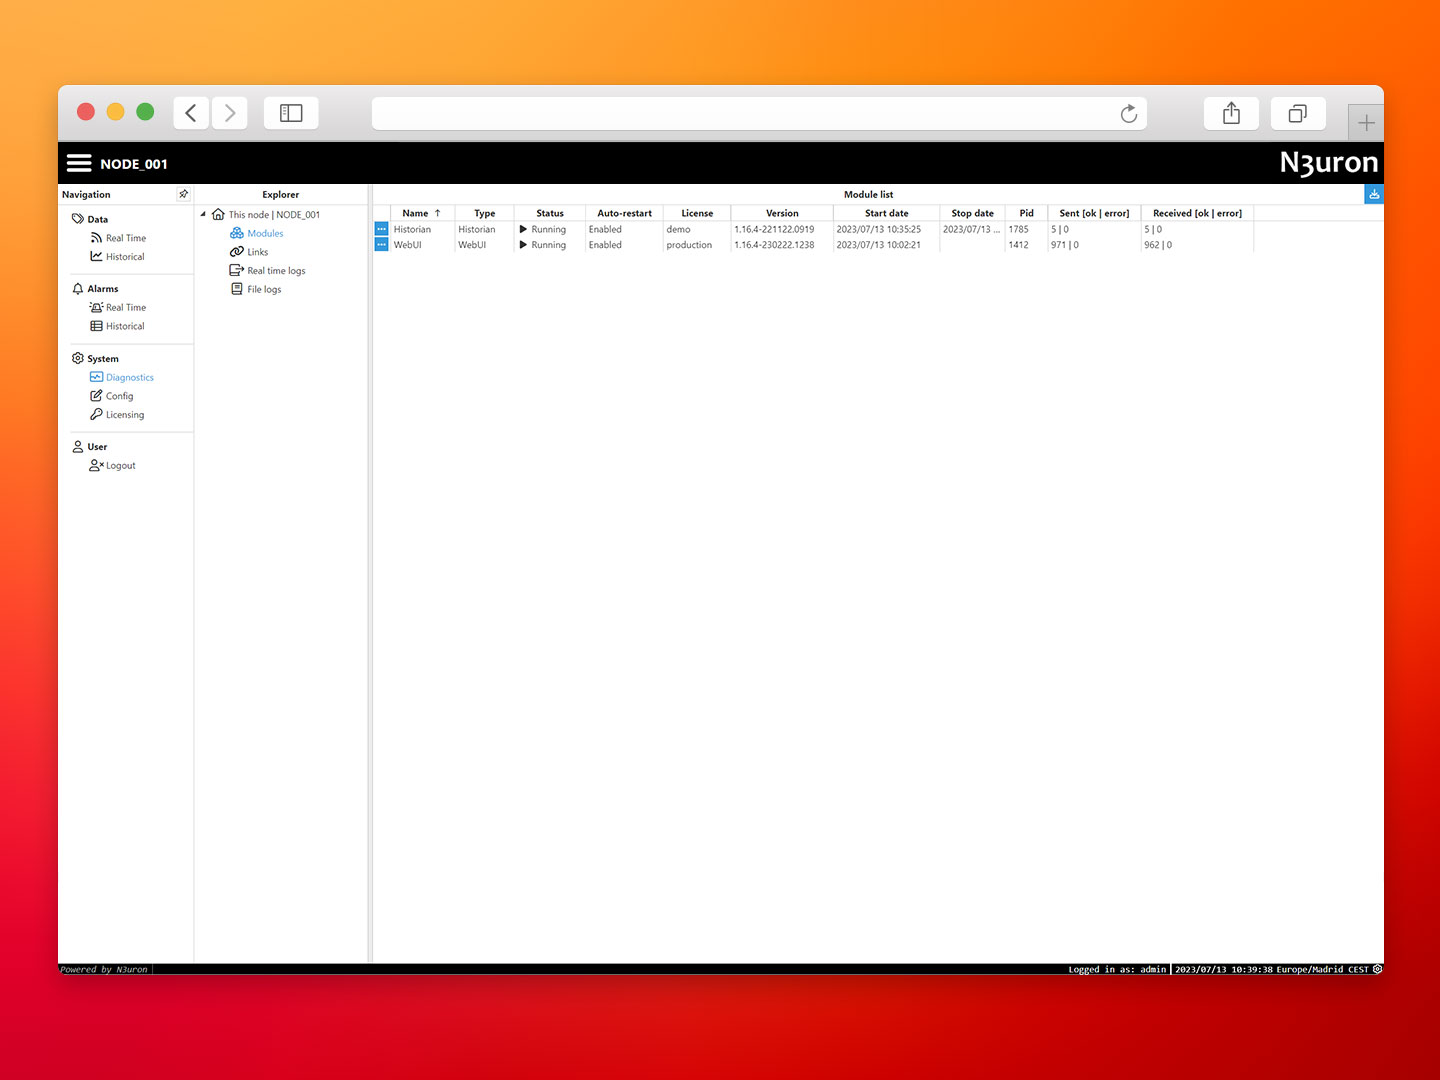
If everything is working as expected, the Historian module will appear as Running in Diagnostics→Modules.
Configure Links
N3uron Links provide a simple, secure and highly reliable data transfer between nodes. Links use mutually authenticated and encrypted TLS 1.3 connections, both nodes exchange and verify each other identities using Digital Certificates thus preventing unauthorized access to your data.
All connections between N3uron nodes include an automatic Store&Forward mechanism, meaning that any data that is not delivered due to a communication outage between nodes is saved locally and automatically sent once the connection is restored.
Inbound
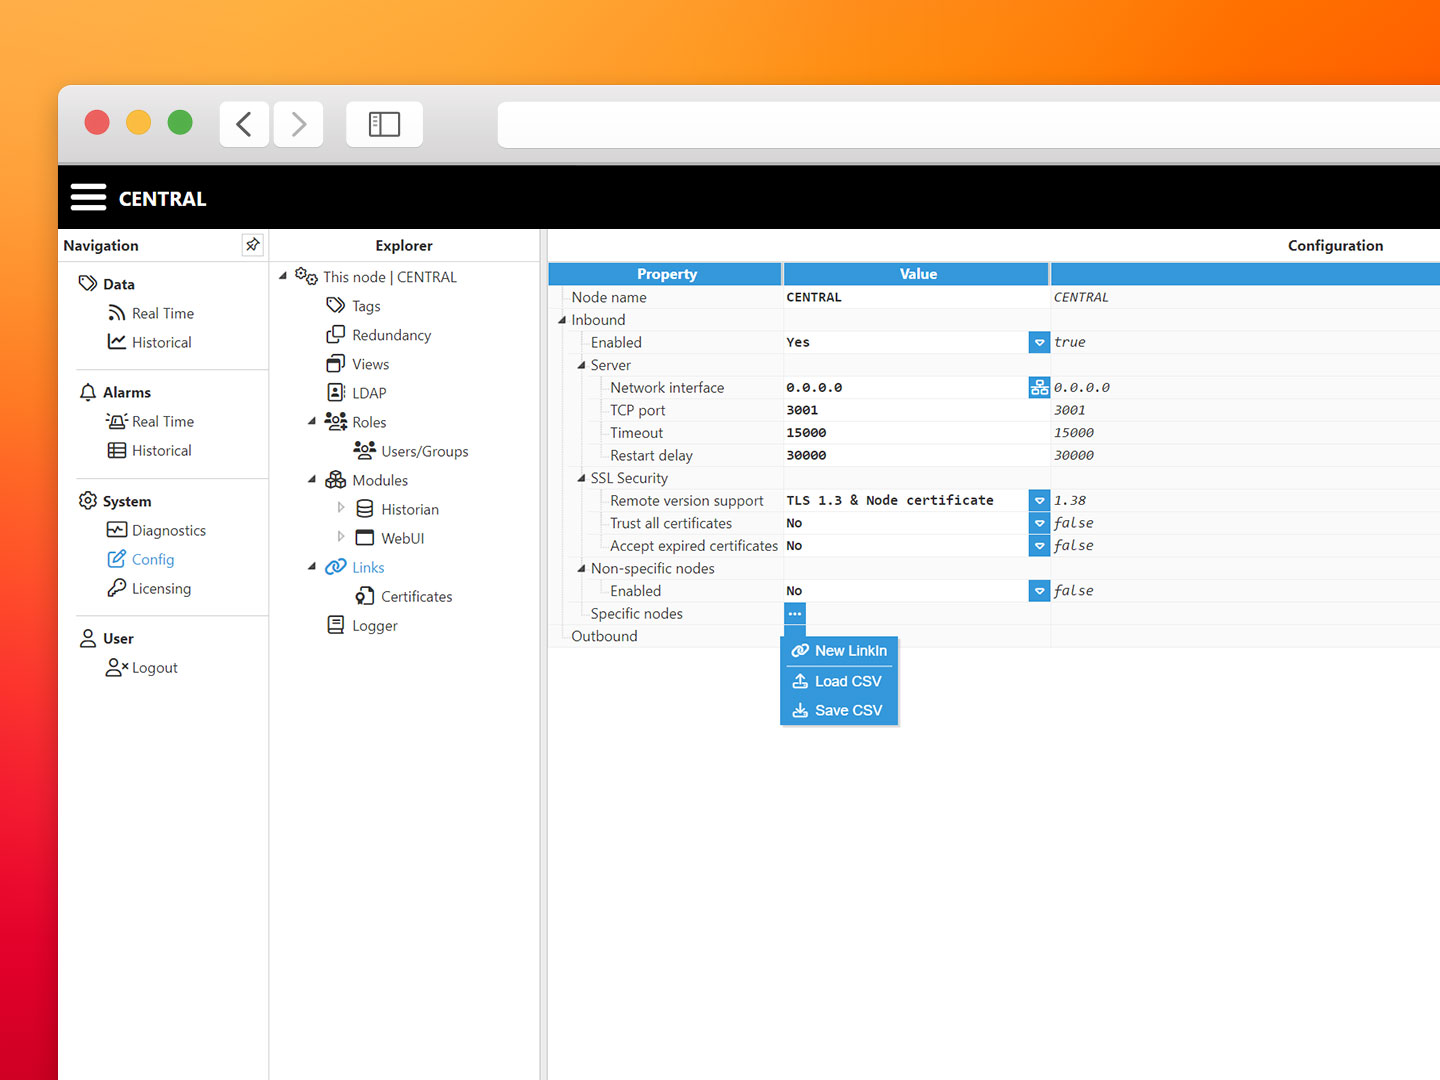
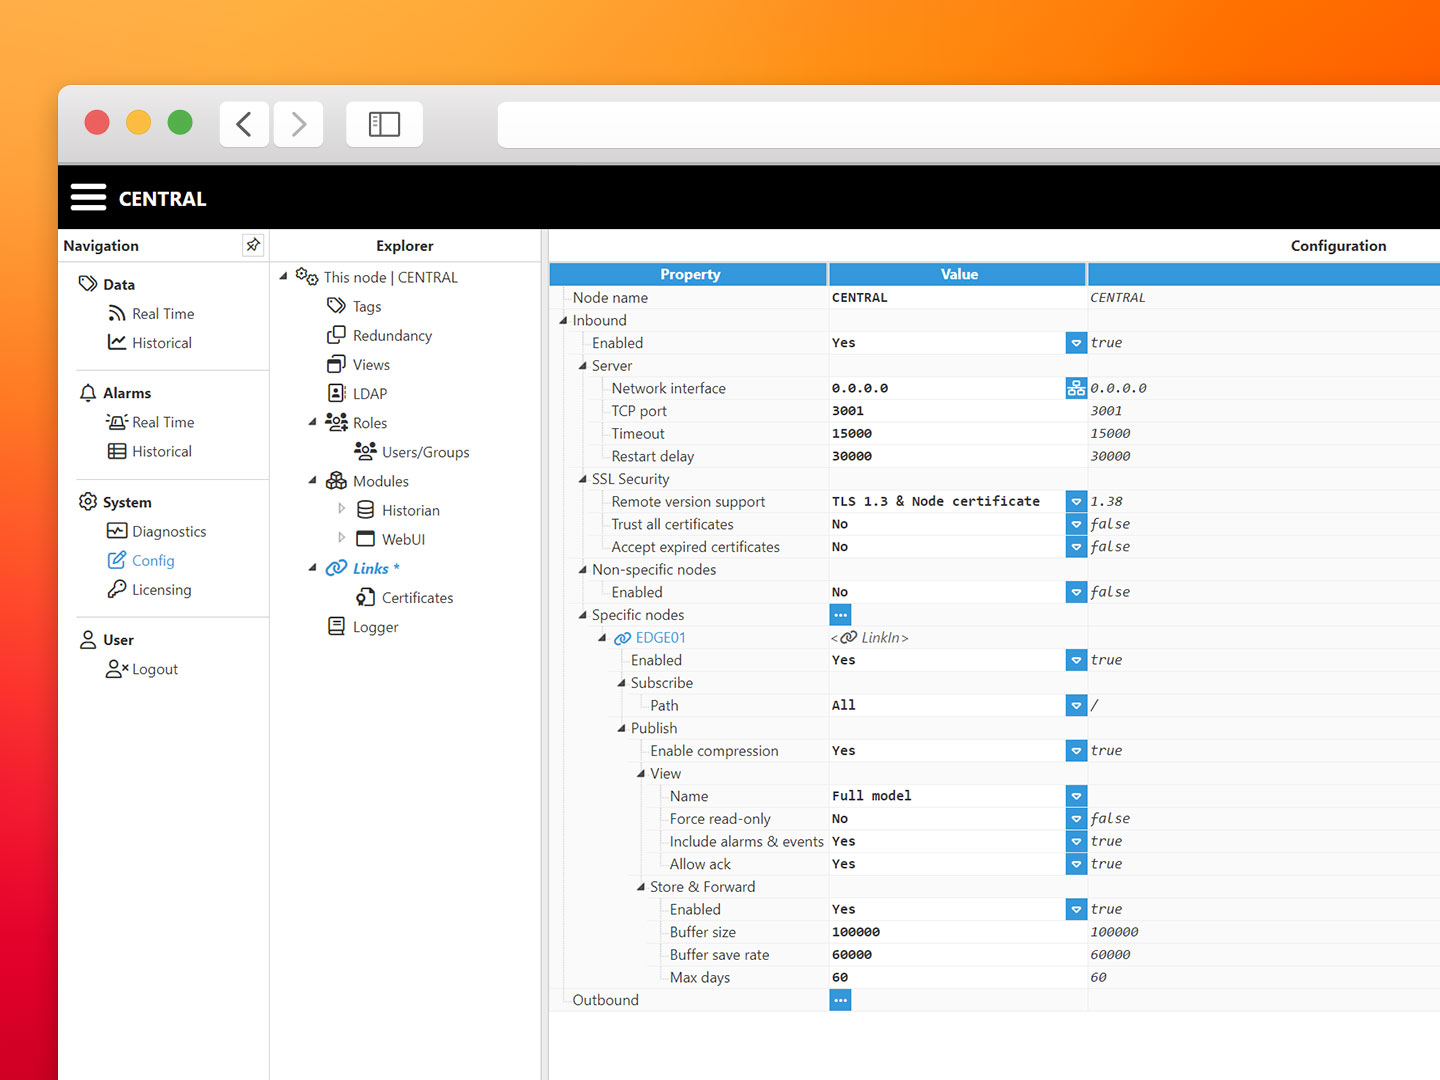
The following steps are for the central node.
- Step 1: Navigate to Config→Links, change the Node name field to CENTRAL and then create a New LinkIn with the name EDGE01 (This name must match the name of the remote node).
- Step 2: Review the settings and click Save.
Outbound
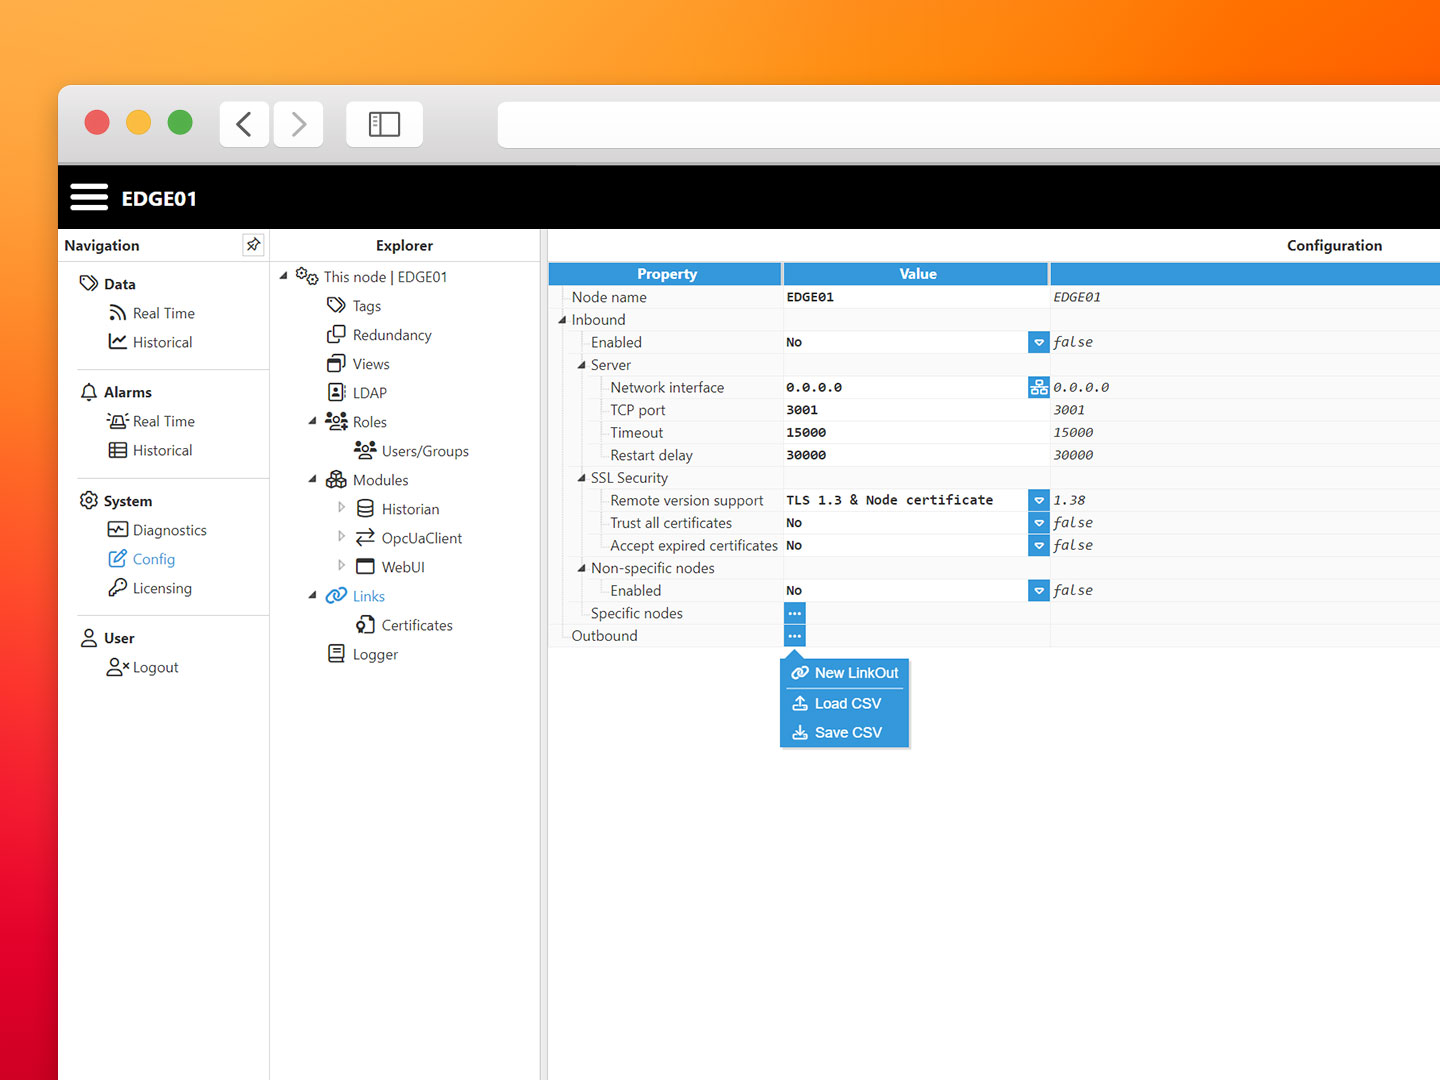
The following steps are for the edge node.
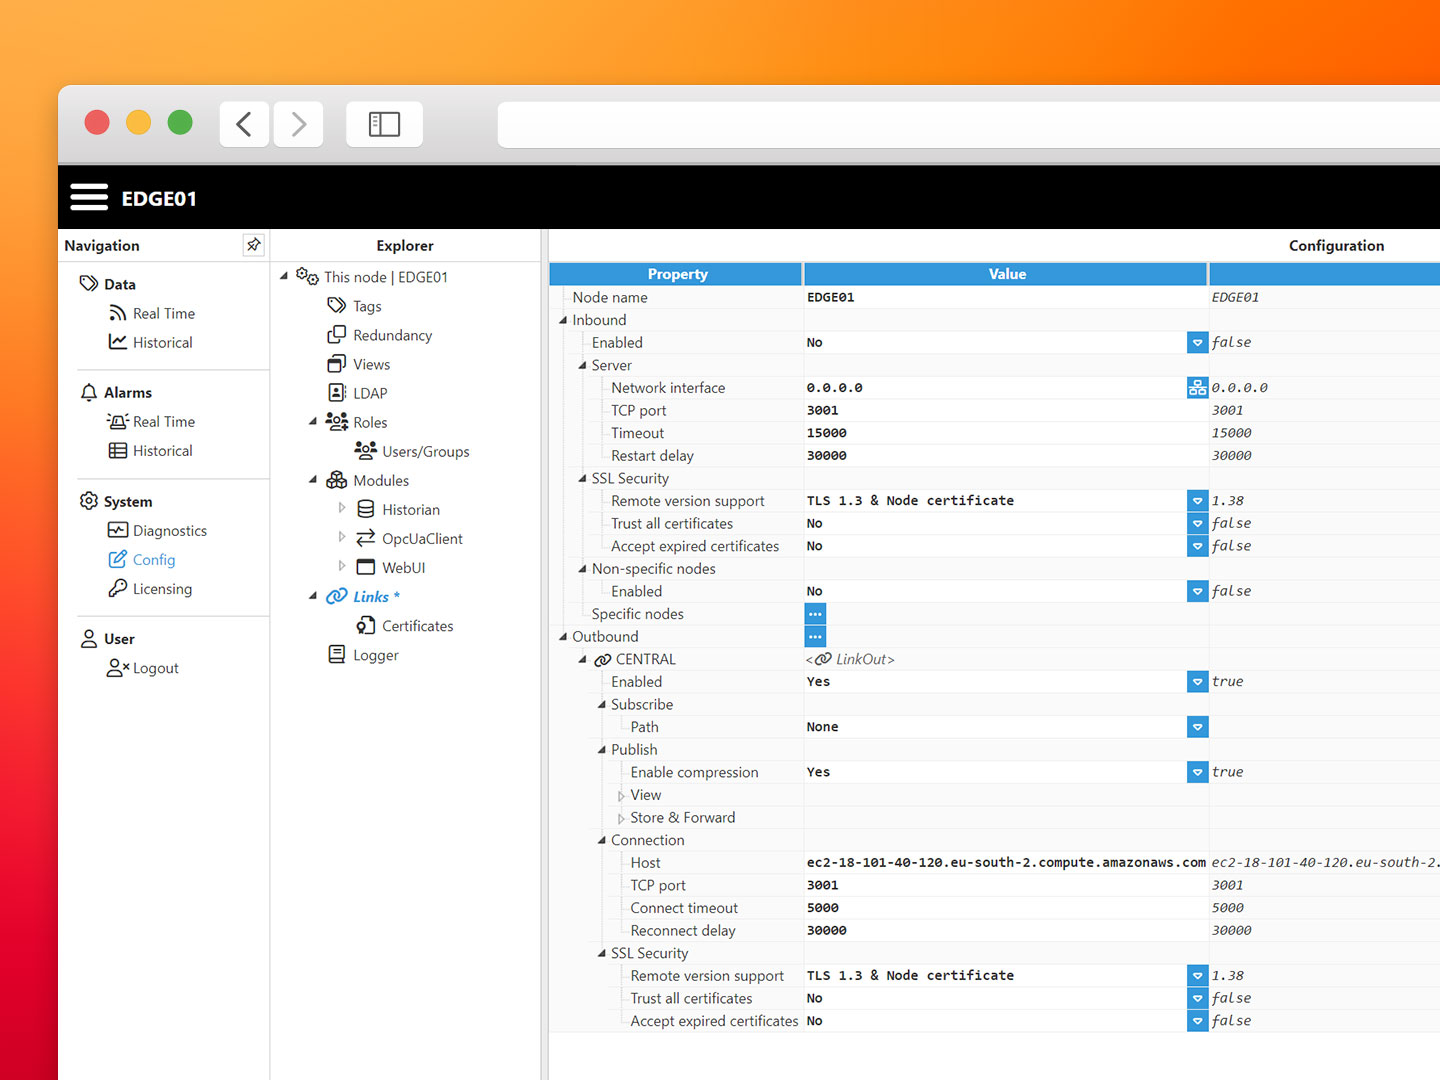
- Step 1: Navigate to Config→Links and set the Node name to EDGE01, then create a New LinkOut, as with the previous steps the name of the link must match the name of the other node, in this case CENTRAL.
- Step 2: Configure the connection and set the Host property to the IP or DNS address of the CENTRAL node, which in our case is ec2-18-101-40-120.eu-south-2.compute.amazonaws.com.
Approve the certificates
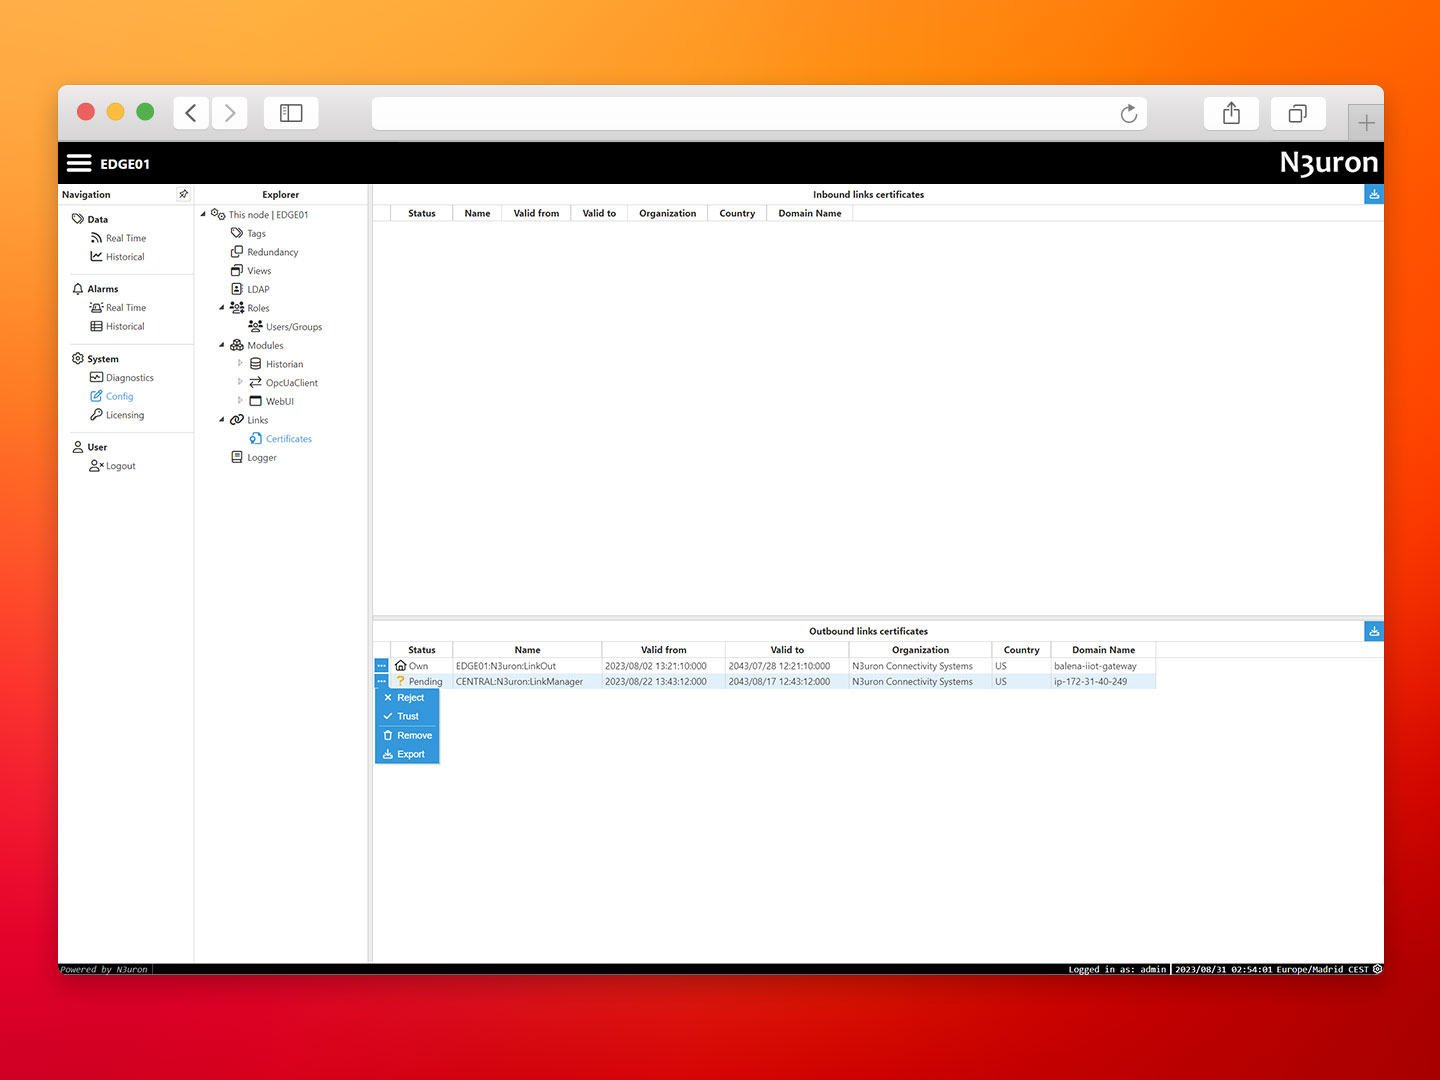
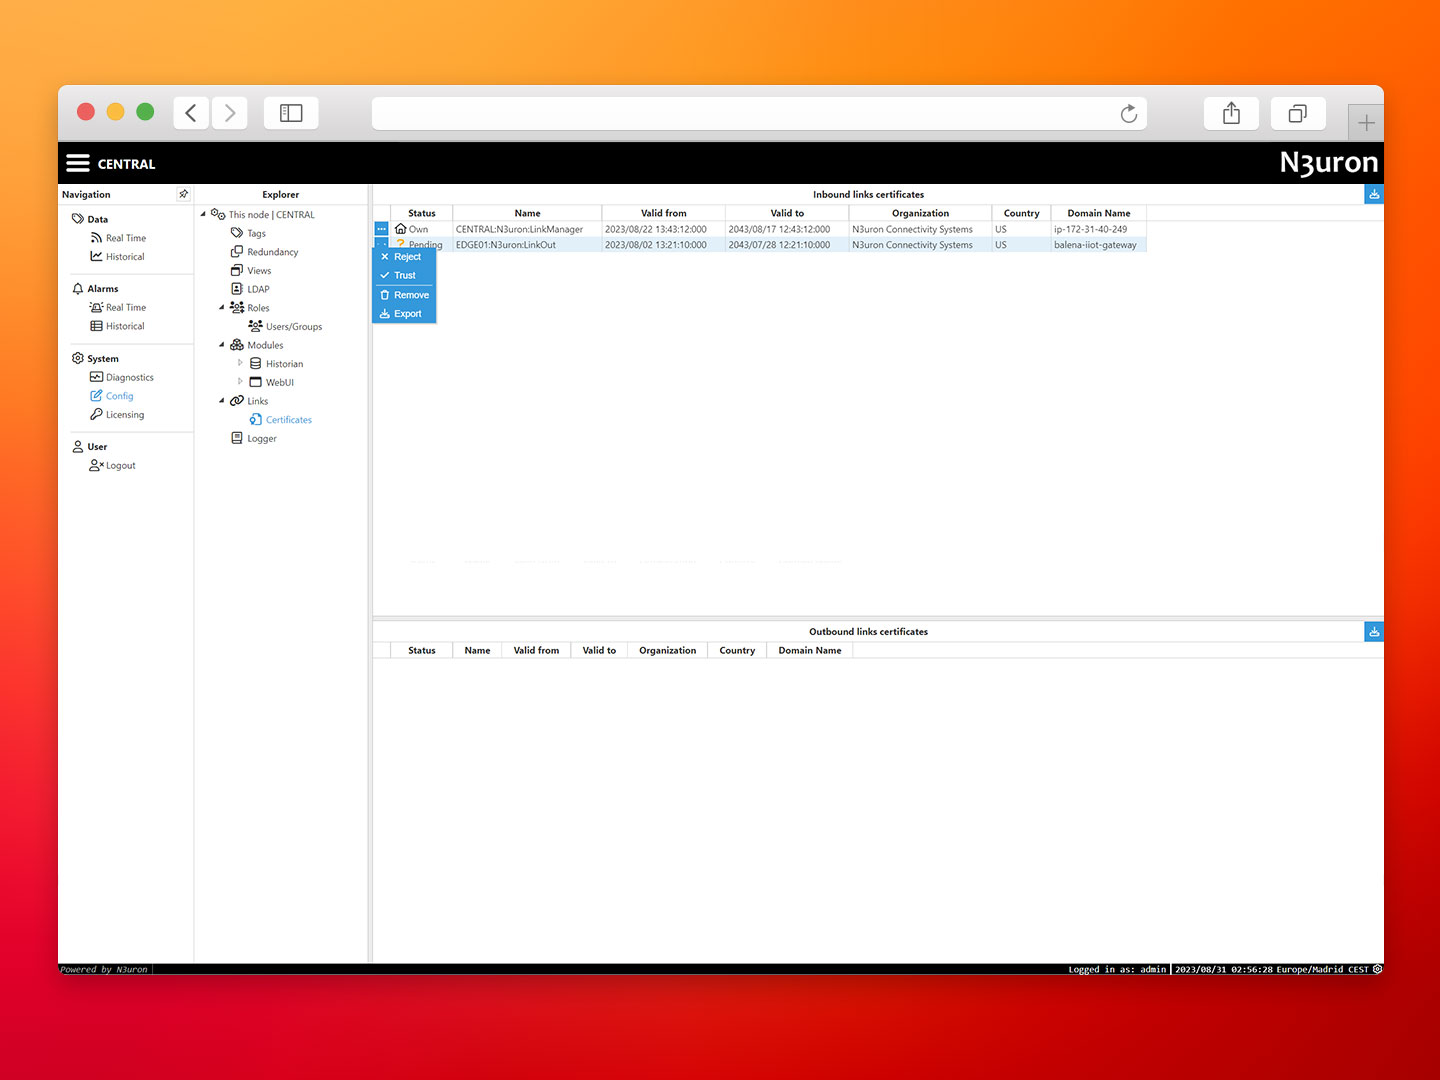
The last step when setting up a Link is to manually approve the certificates that act as a digital identity for each node. For this, navigate to the Certificates section inside Config→Links→Certificates.
- Step 1: At the edge node trust the certificate received from the central N3uron in AWS.
- Step 2: At the central node trust the certificate provided by the edge node, it may take a few seconds for the certificates to be received and displayed in the WebUI.
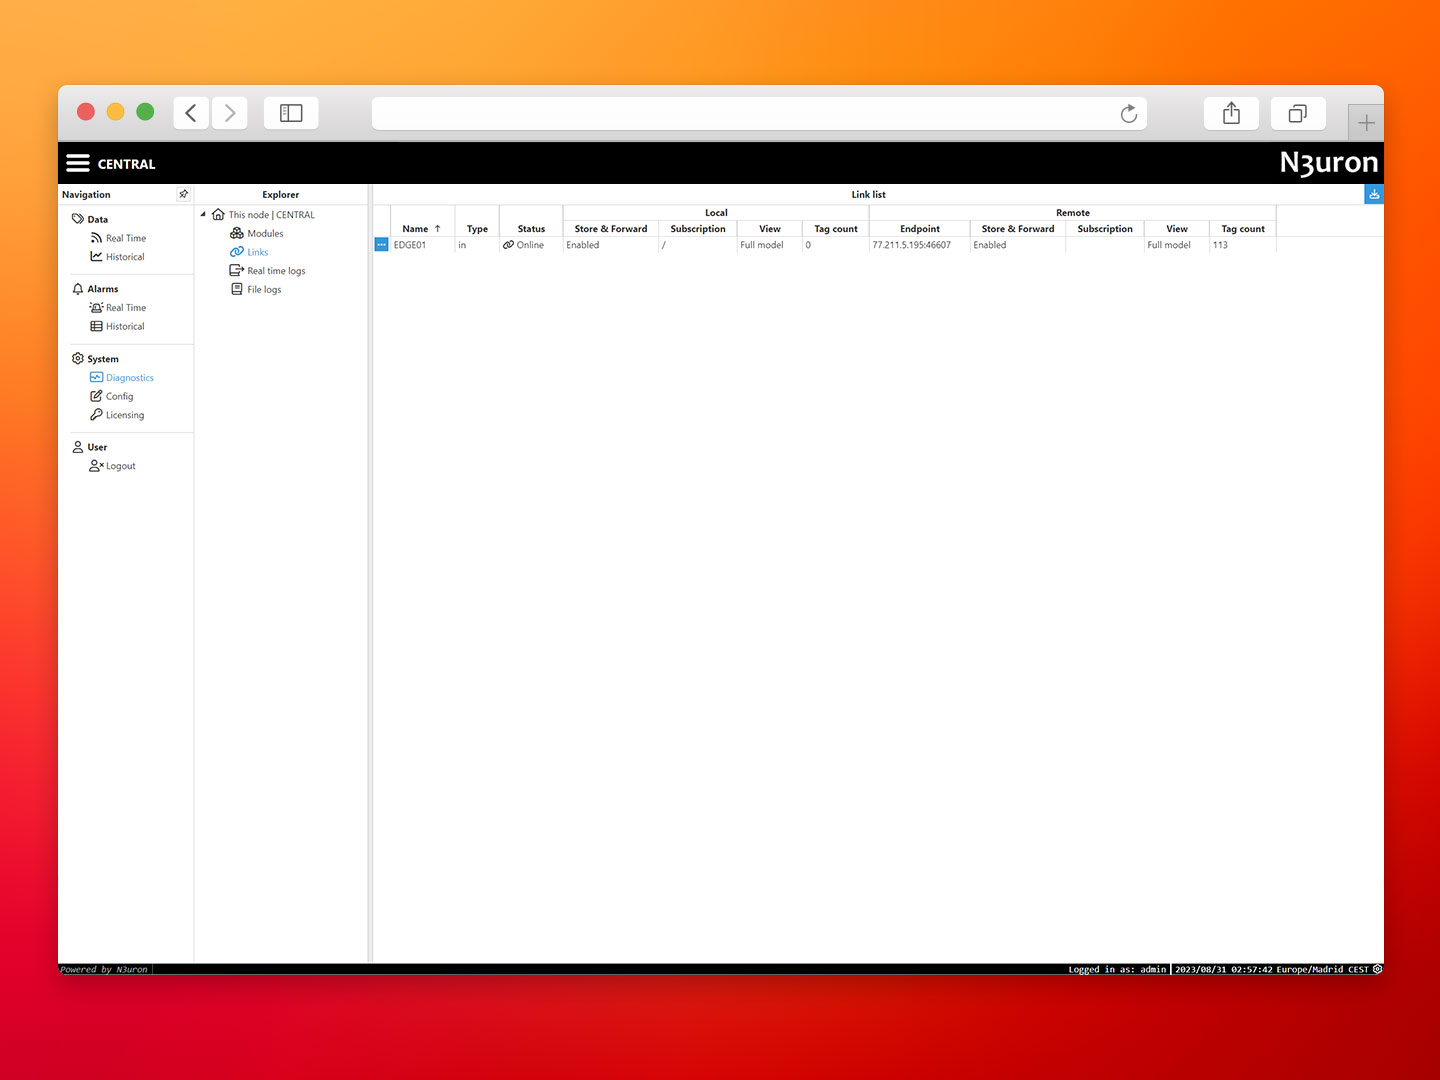
- Step 3: Navigate to Diagnostics→Links and confirm the connection via Links is Online and working.
At this moment you’ll have a central N3uron in AWS with the data model published by the edge gateway and receiving all events via a low bandwidth, secure and reliable connection.
Central Historian at AWS
Once the Links are set up between the edge devices in the field and the central N3uron running in the Cloud, enabling the Historian at both places is as simple as adding the remote Historian in the tag configuration.
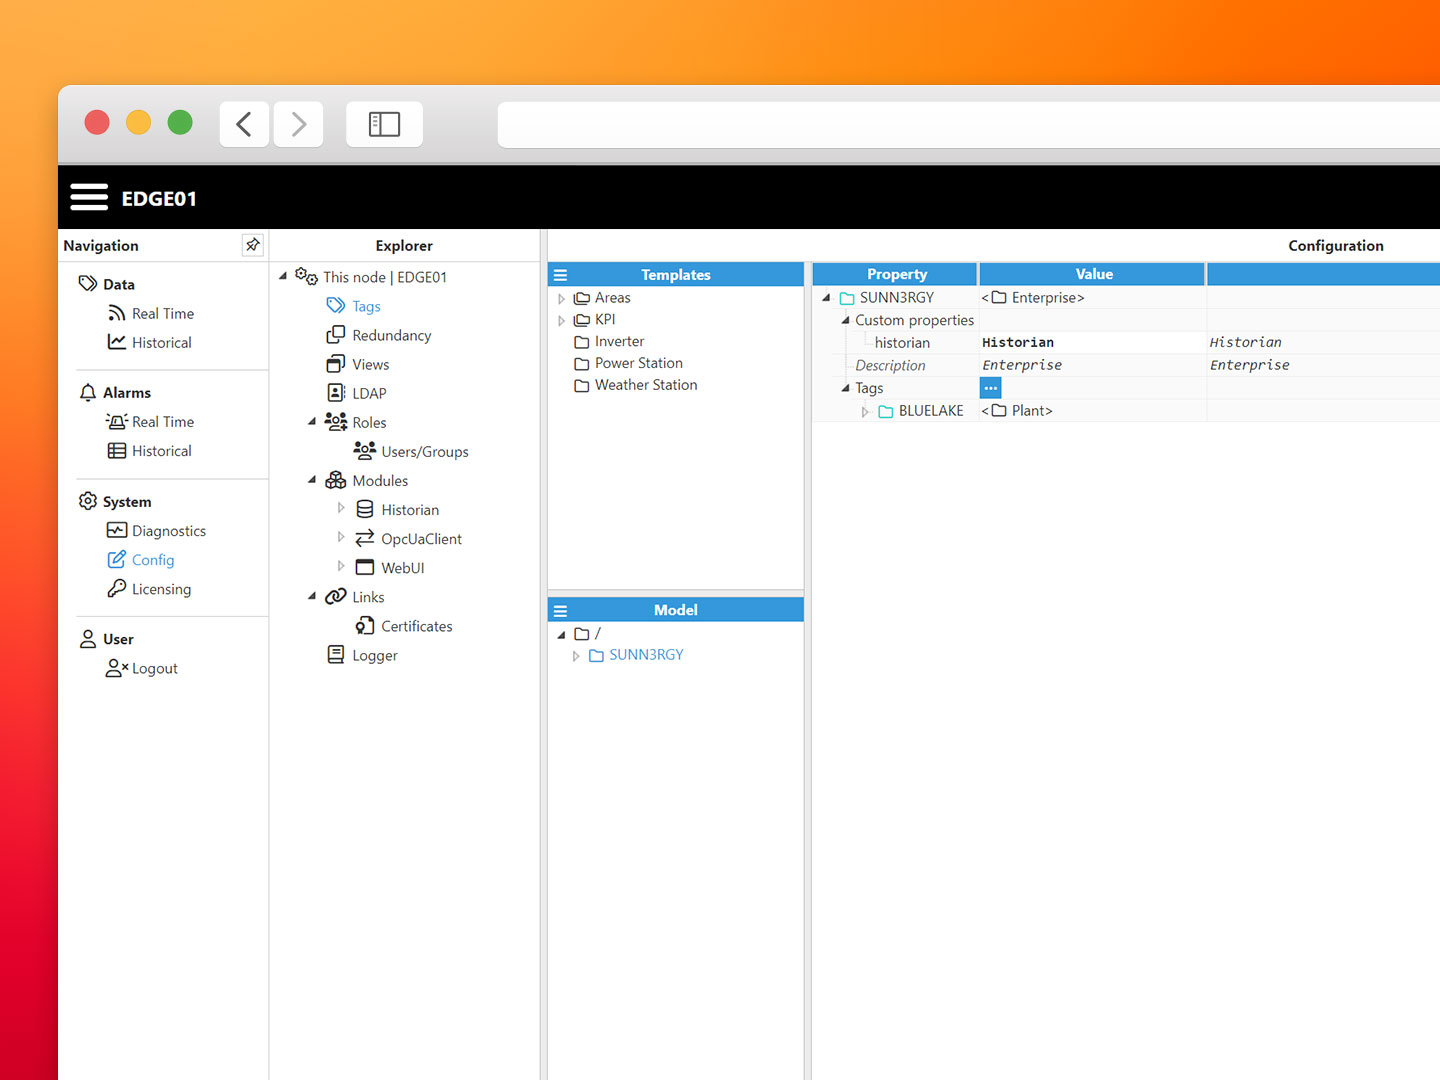
- Step 1: Go to the edge node and navigate to Config→Tags, as you can see, the DataModel we provided earlier in this post contains a Custom Property to configure the history section in each tag.
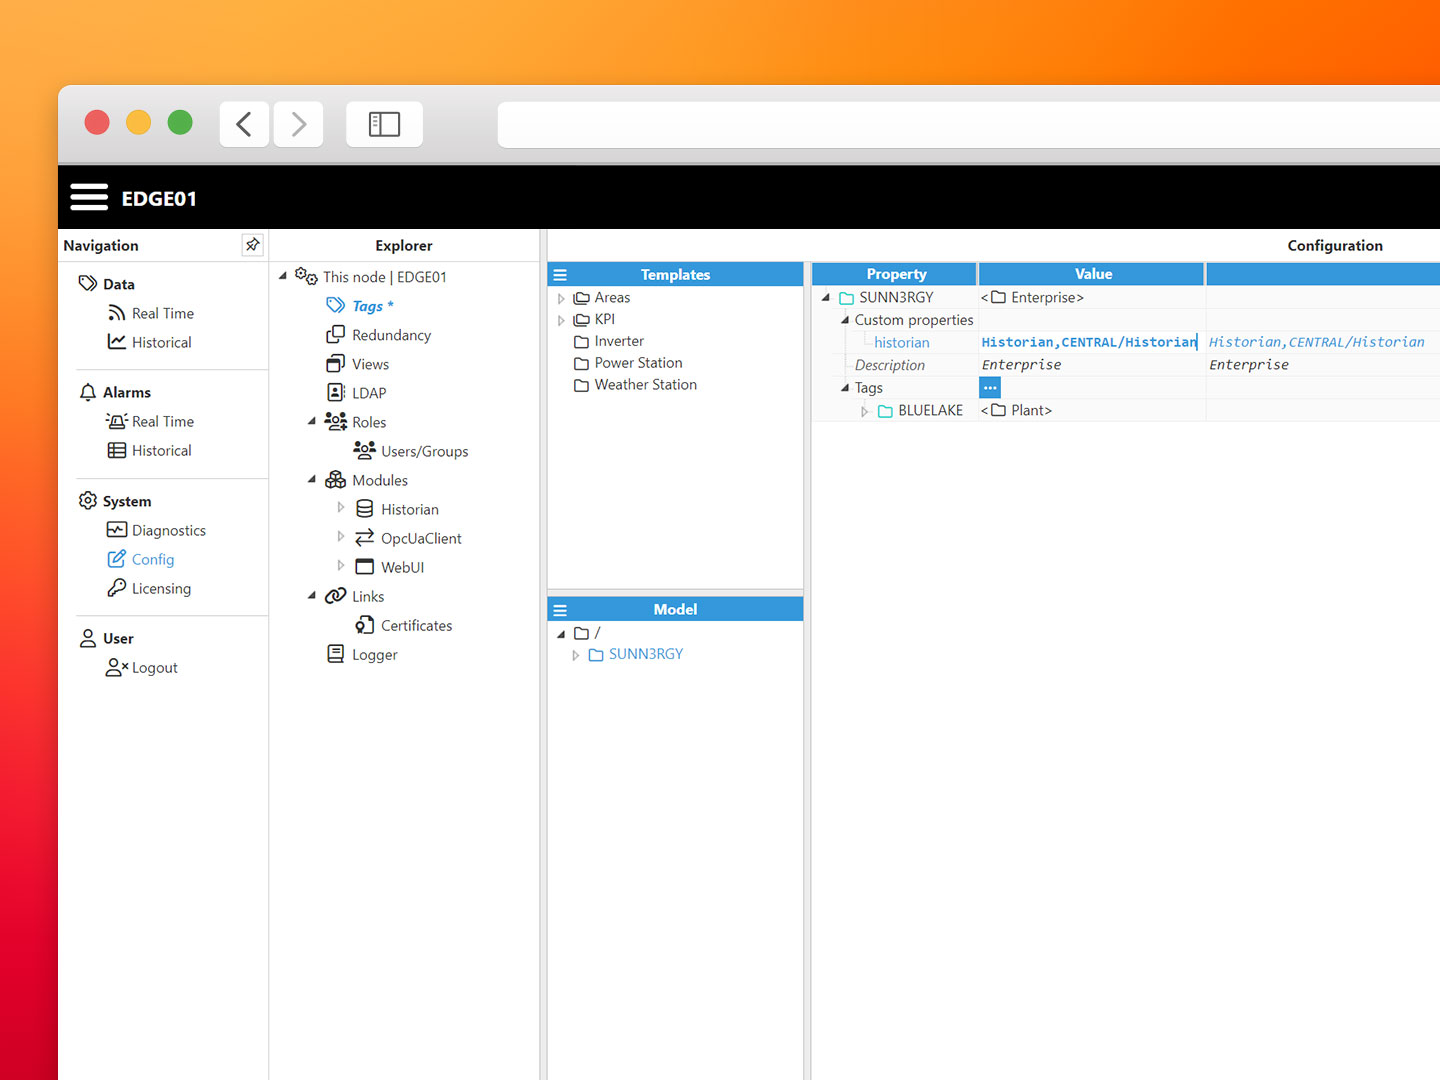
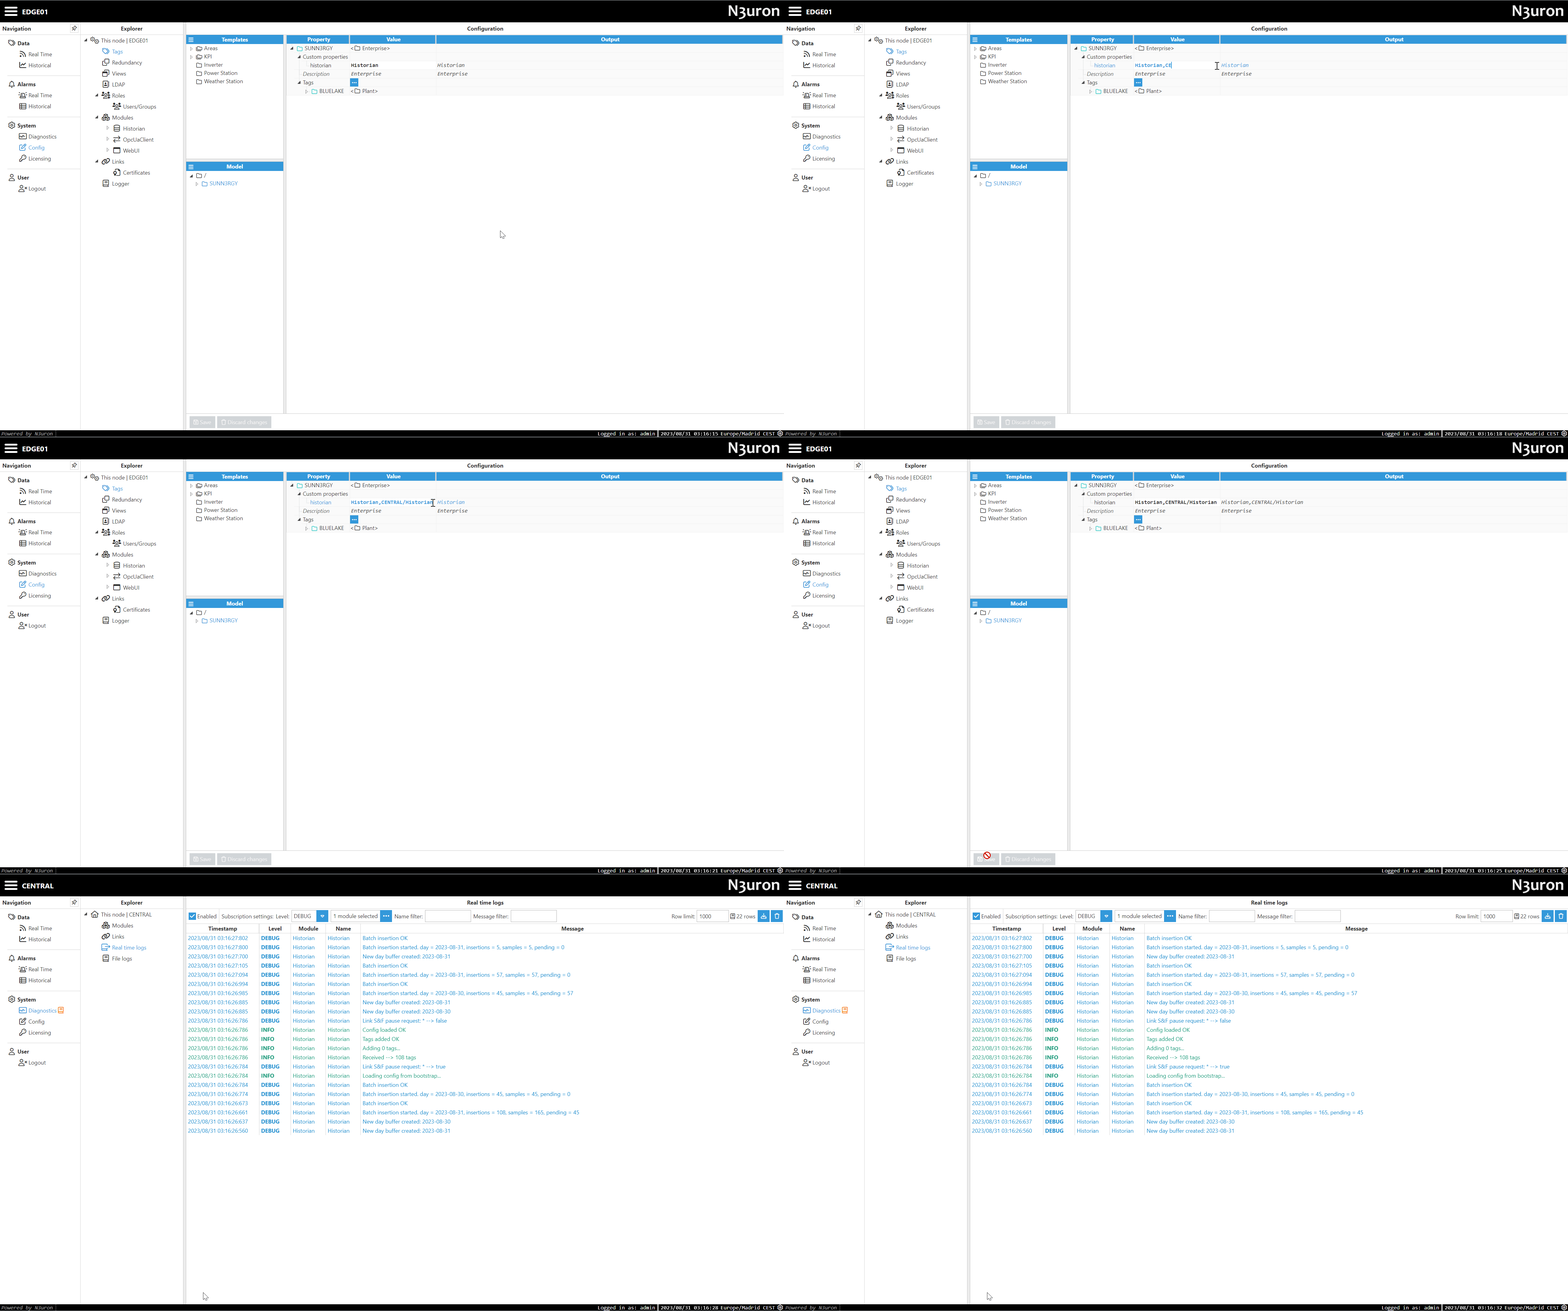
- Step 2: Edit the property to add a new Historian instance, to refer the remote Historian use the following syntax: NodeName/HistorianModuleName
In this case it’s CENTRAL/Historian. With this small change, we enable Tags to be historized both at the local (edge) node and the remote (cloud) node.
- Step 3: Head to the N3uron node in AWS and retrieve historical data in the same way we previously displayed in the Local Historian section of this article.
WebVision
N3uron’s powerful Web Vision module is a web-based, touch-friendly HMI/SCADA solution for data visualization, monitoring and control with built-in functionality to interact with your industrial assets.
With WebVision you can build complex and detailed dashboards to monitor and control your plant in real time with alarms, graphs, historical data and PDF reports.
In this article we will not go into the details of building a WebVision solution, instead, we show you an example project created with WebVision.
Conclusion
In summary, the fusion of the Industrial N3uron platform for IIoT and DataOps, combined with the advanced OS and fleet management capabilities of balena, as well as the versatile framework of Cloud computing, empowers businesses globally to build a comprehensive, reliable and cost-efficient solution for monitoring and controlling virtually any power plant. This seamless integration spans from on-site operations to the cloud, ensuring a sophisticated and efficient approach to overseeing critical assets on a worldwide scale.
Take the next step towards optimizing your energy monitoring solution. Streamline your operations, unlock a new level of efficiency and reliability both at the edge and the cloud, boost your business growth and deliver excellence to your customers. Download N3uron today and transform the way you manage data!
