RESOURCES / ARTICLES
Transforming Industrial Data Access with N3uron, TimescaleDB and GraphQL
Overview
The Unified Namespace (UNS) architectural approach to data management is proving to be a game-changer for industrial companies aiming to establish robust foundations for their digital transformation initiatives. It offers a single source of truth for all data and information of the organization by providing a single, centralized hub for all data sources and consumers to connect through.
Although UNS is an architectural paradigm not tied to any specific technology, MQTT is by far the most commonly used protocol for implementing UNS. MQTT is known for being lightweight, scalable, using an event-driven pub-sub messaging system and efficiently managing data transfers between nodes by implementing report-by-exception.
While the UNS is a great solution for providing access to the current state of the business by making all real-time data and information accessible across the entire organization, it still does not allow data to be used to its full potential as it lacks a simple and frictionless access mechanism to historical data. Therefore, UNS needs to be expanded with a parallel framework to unlock the full potential of operational data and meet the analytical needs of companies to make informed decisions.
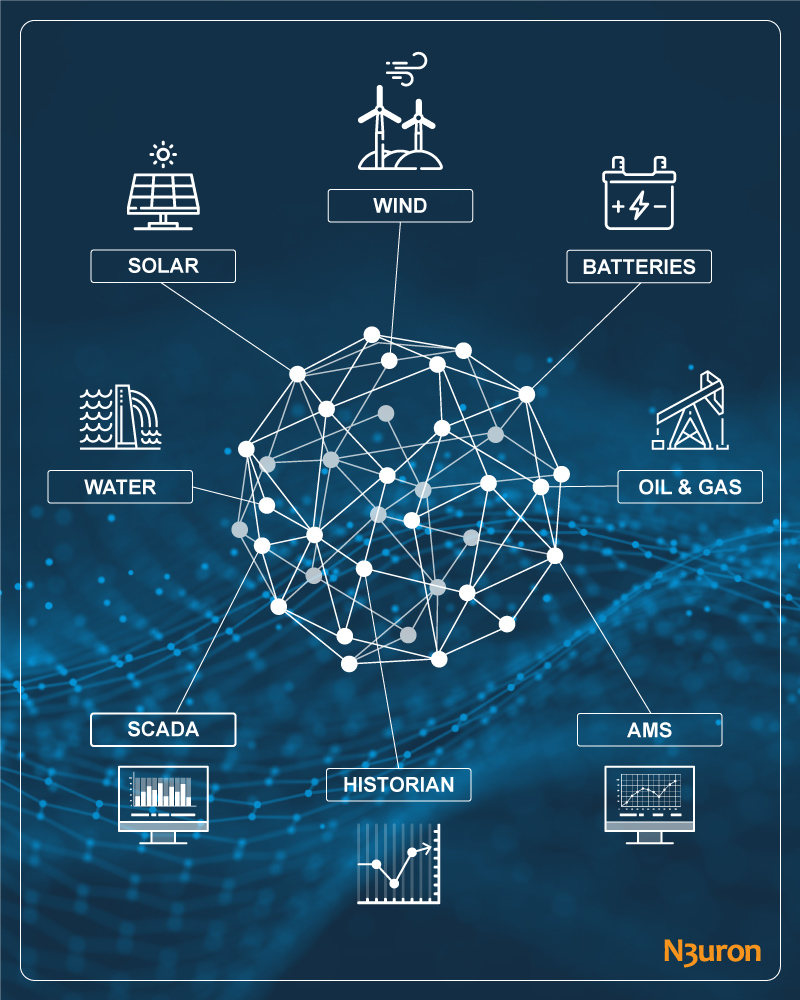
The parallel framework should seamlessly integrate with UNS to enable interoperability among historical data sources and consumers, historize each event in a digital infrastructure to a long-term, durable and scalable storage system and then provide a single endpoint for data retrieval using open and standard protocols. Thus, it would serve as a “historical” data hub for analytics, machine learning and other data-intensive workloads.
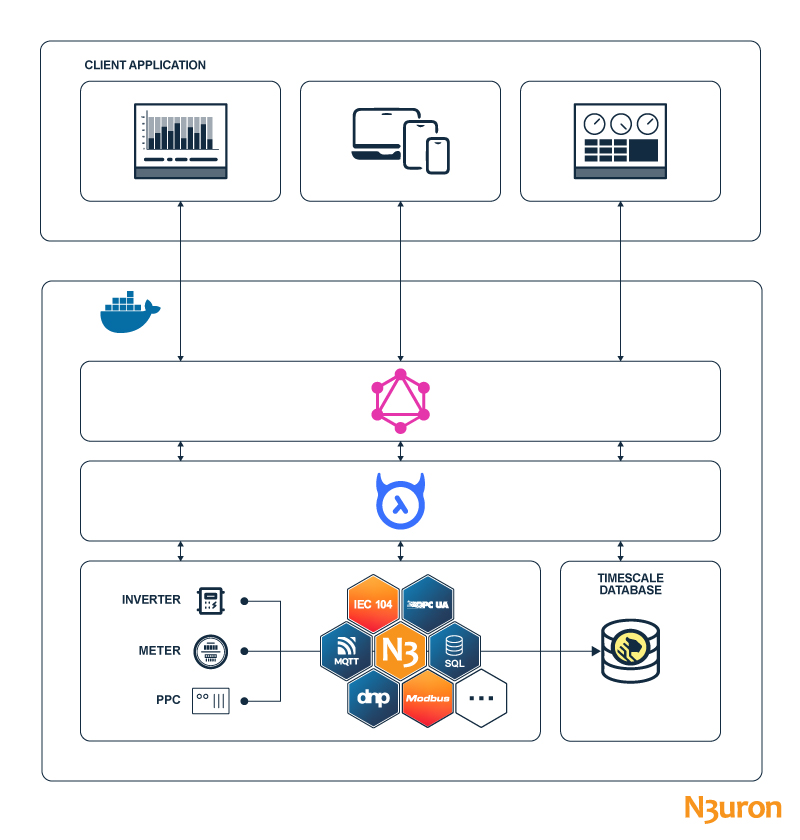
This article explores the details of integrating historical data into the UNS and proposes a solution to address this specific challenge using the N3uron IIoT and DataOps Platform, Timescale and Hasura to build a scalable and cost-efficient “historical data hub” for any UNS , accessible using standard SQL and a GraphQL API.
Getting started
To get started you’ll need a working Docker environment installed on your computer. If you don’t already have Docker installed, you can follow the instructions provided on the official Docker documentation at https://docs.docker.com/get-docker/.
Once you have Docker installed and running, you can proceed to clone our demo repository using Git. If Git is already installed on your computer, you can use the following command to clone the repository to your local machine:
$ git clone https://github.com/n3uron/demos
You’ll find the material for this article at “/2024/02/timescale-graphql” inside the repository.
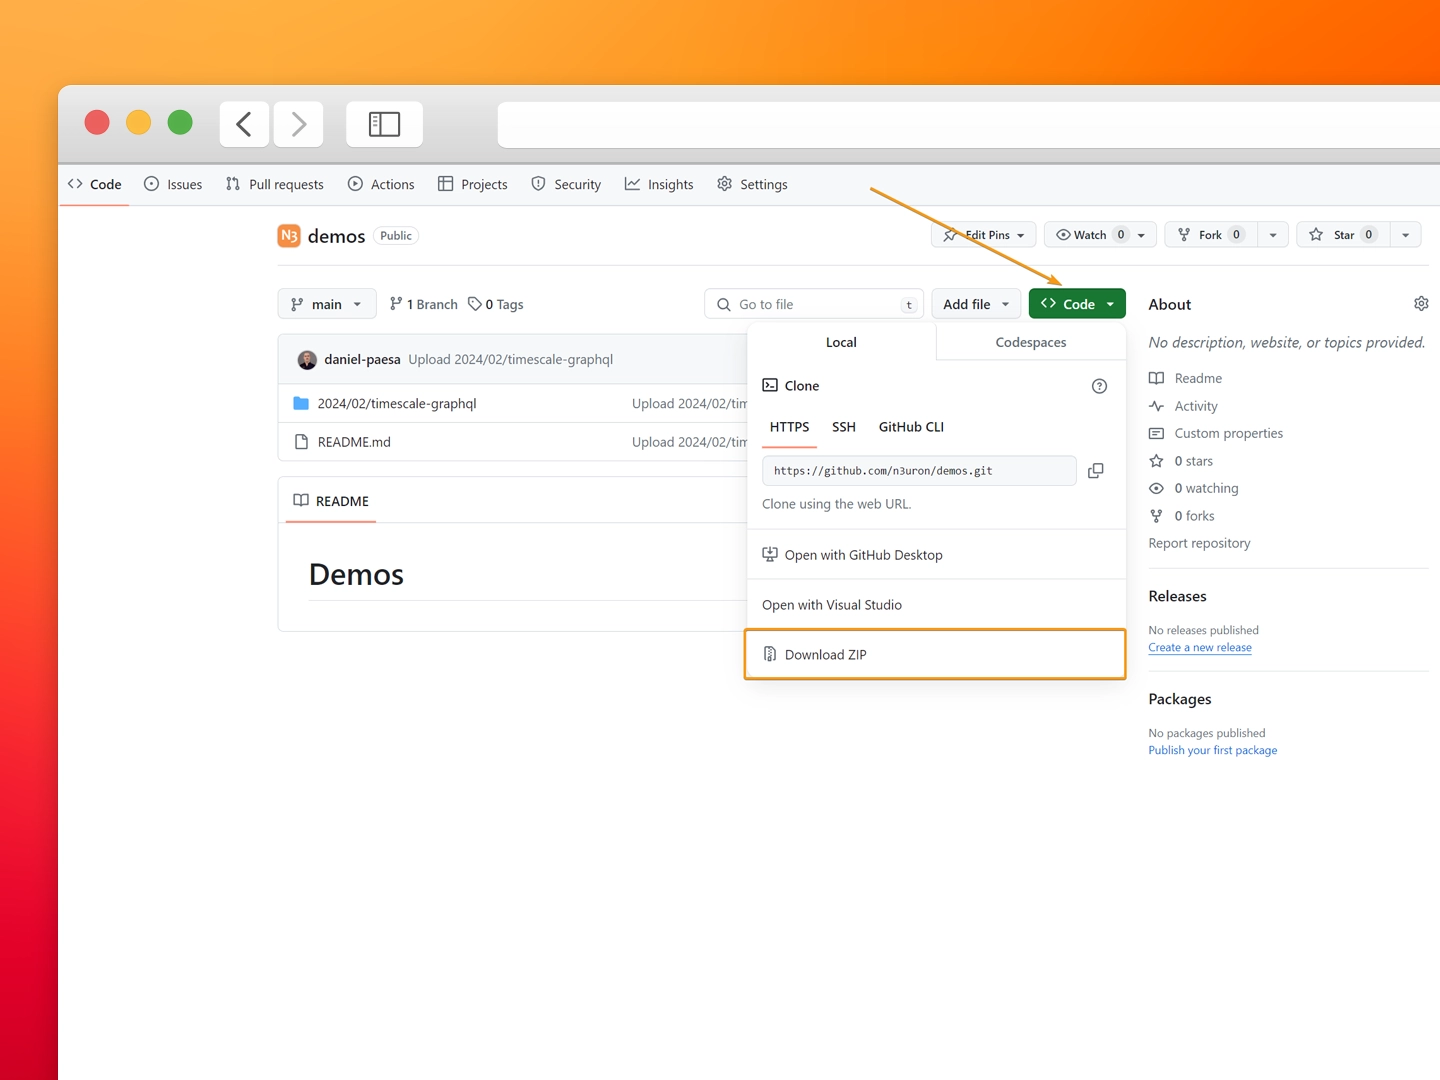
If you don’t have Git installed or prefer to download the repository as a ZIP file, you can do so by visiting the GitHub repository at https://github.com/n3uron/demos and selecting the Download ZIP option from the Code dropdown menu. Once the ZIP file has finished downloading, you can extract its contents to a directory on your local machine.
Introducing the Components
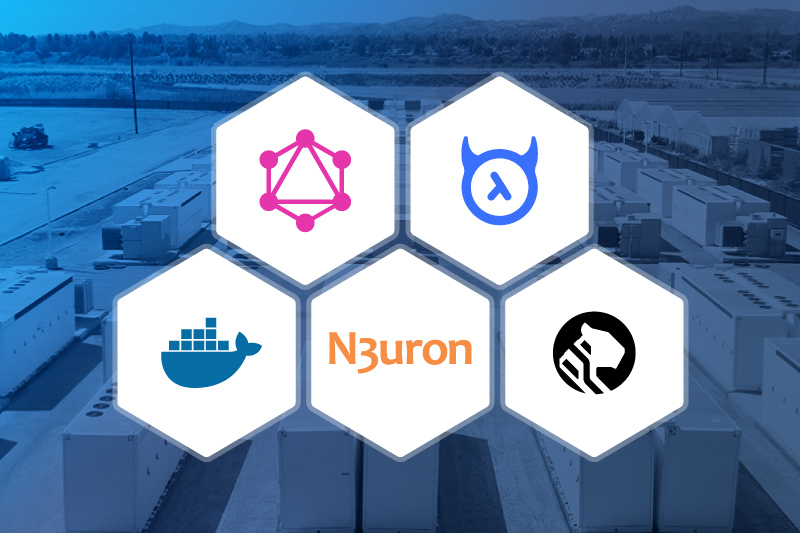
Before we get into the steps, let’s briefly introduce the components comprising our stack:
- N3uron is a lightweight industrial platform for IIot and DataOps that runs on devices at the edge of the network. We’ll use the OPC UA Client and SQL Client modules to collect data from our public datasim.n3uron.com endpoint and store it inside the database.
- TimescaleDB is a PostgreSQL-based time-series database designed to efficiently store and query data. It provides automatic partitioning, data compression and real-time aggregation to scale even the most demanding workloads.
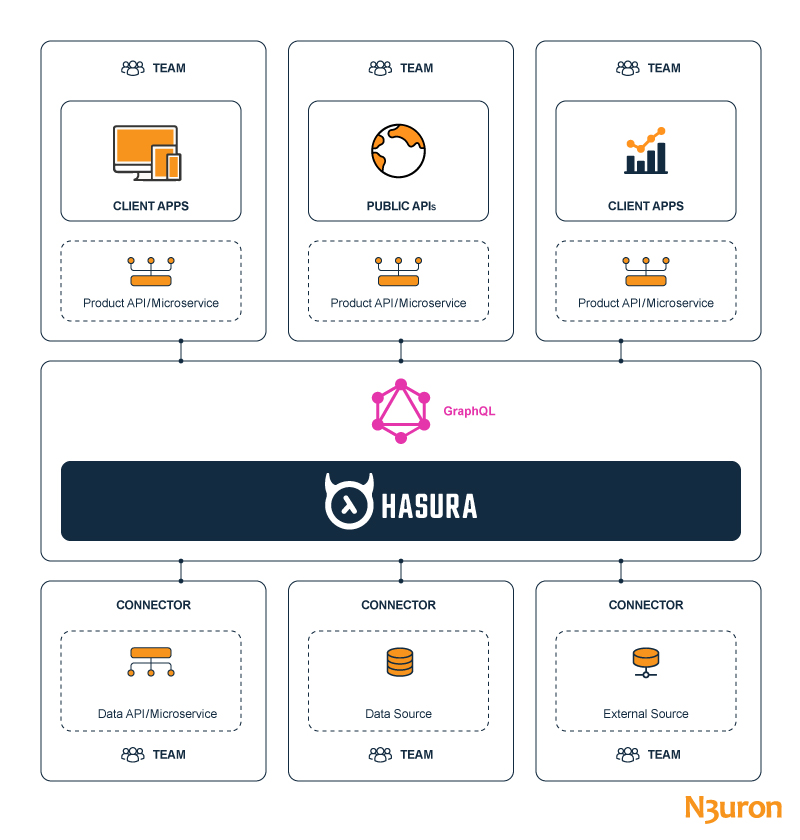
- Hasura is an open-source solution to instantly create a GraphQL API over your data. It connects to the Timescale database, builds the schema and exposes the data through a GraphQL API.
Deploy with Docker
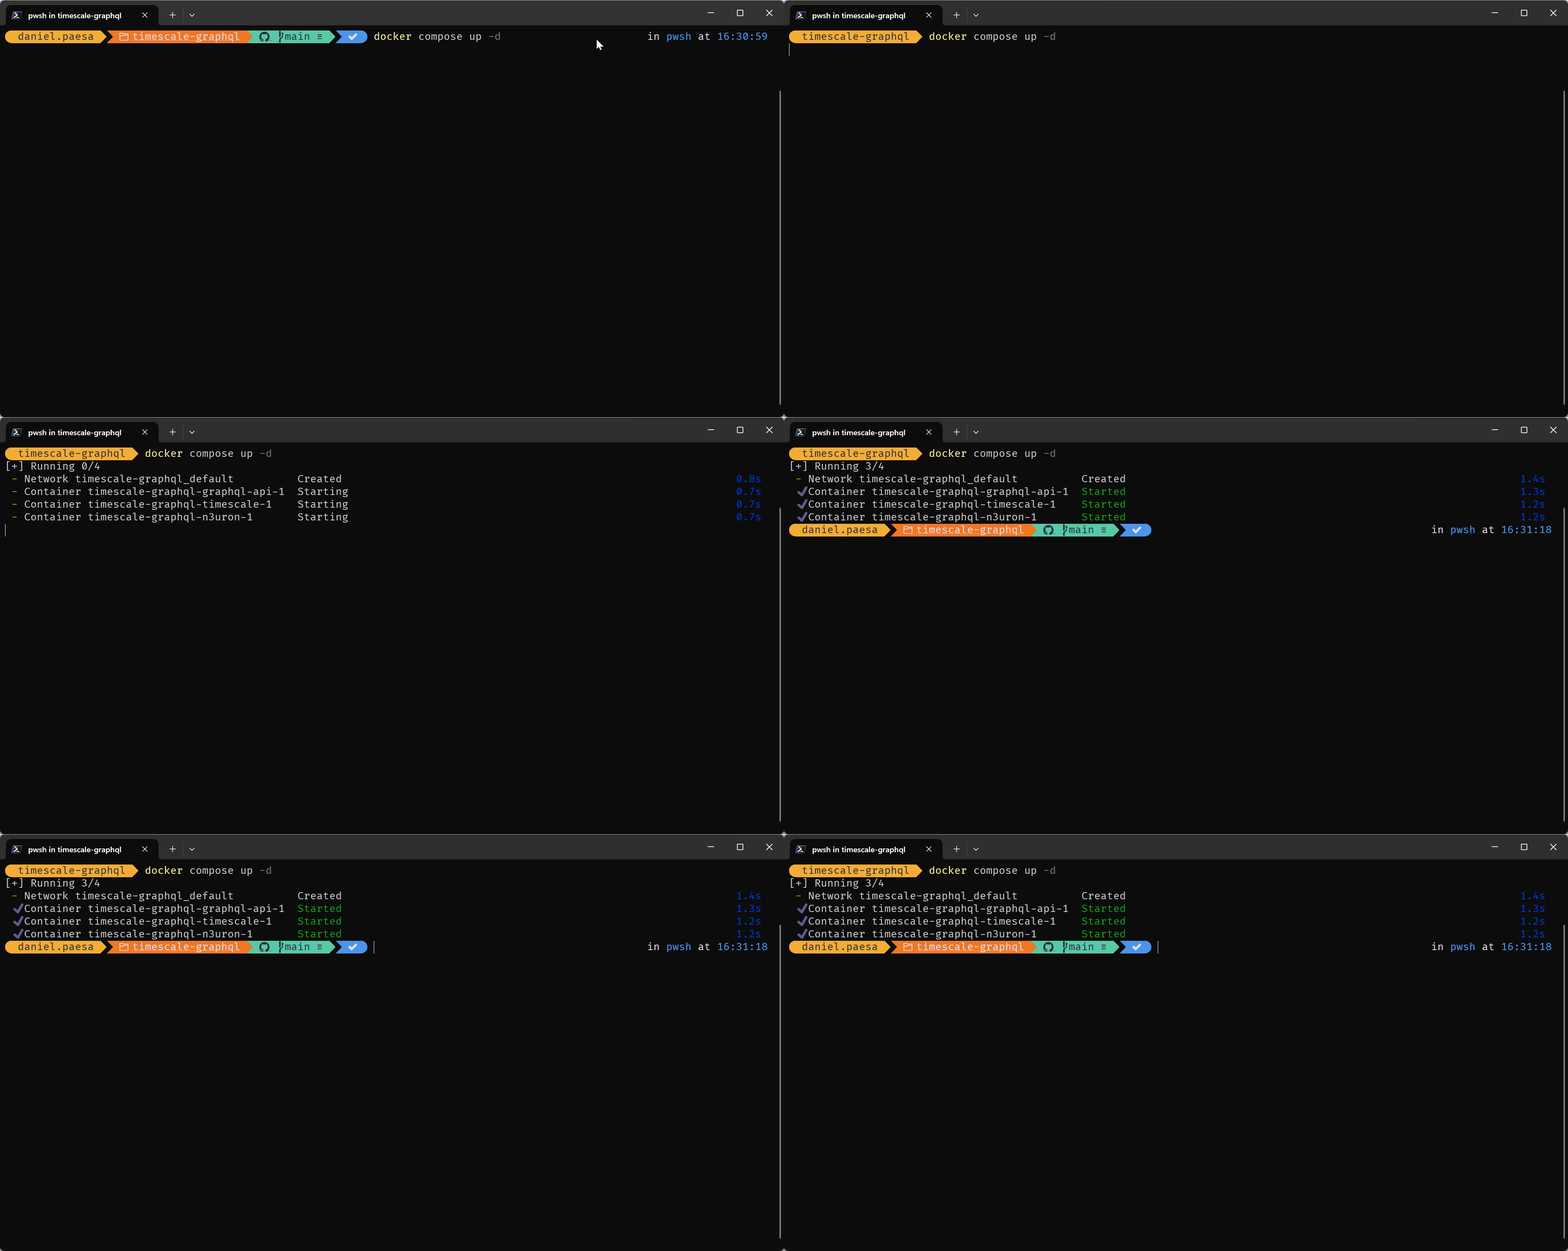
Open a terminal at the timescale-graphql directory inside the repository and deploy the stack using Docker Compose:
$ docker compose up -d
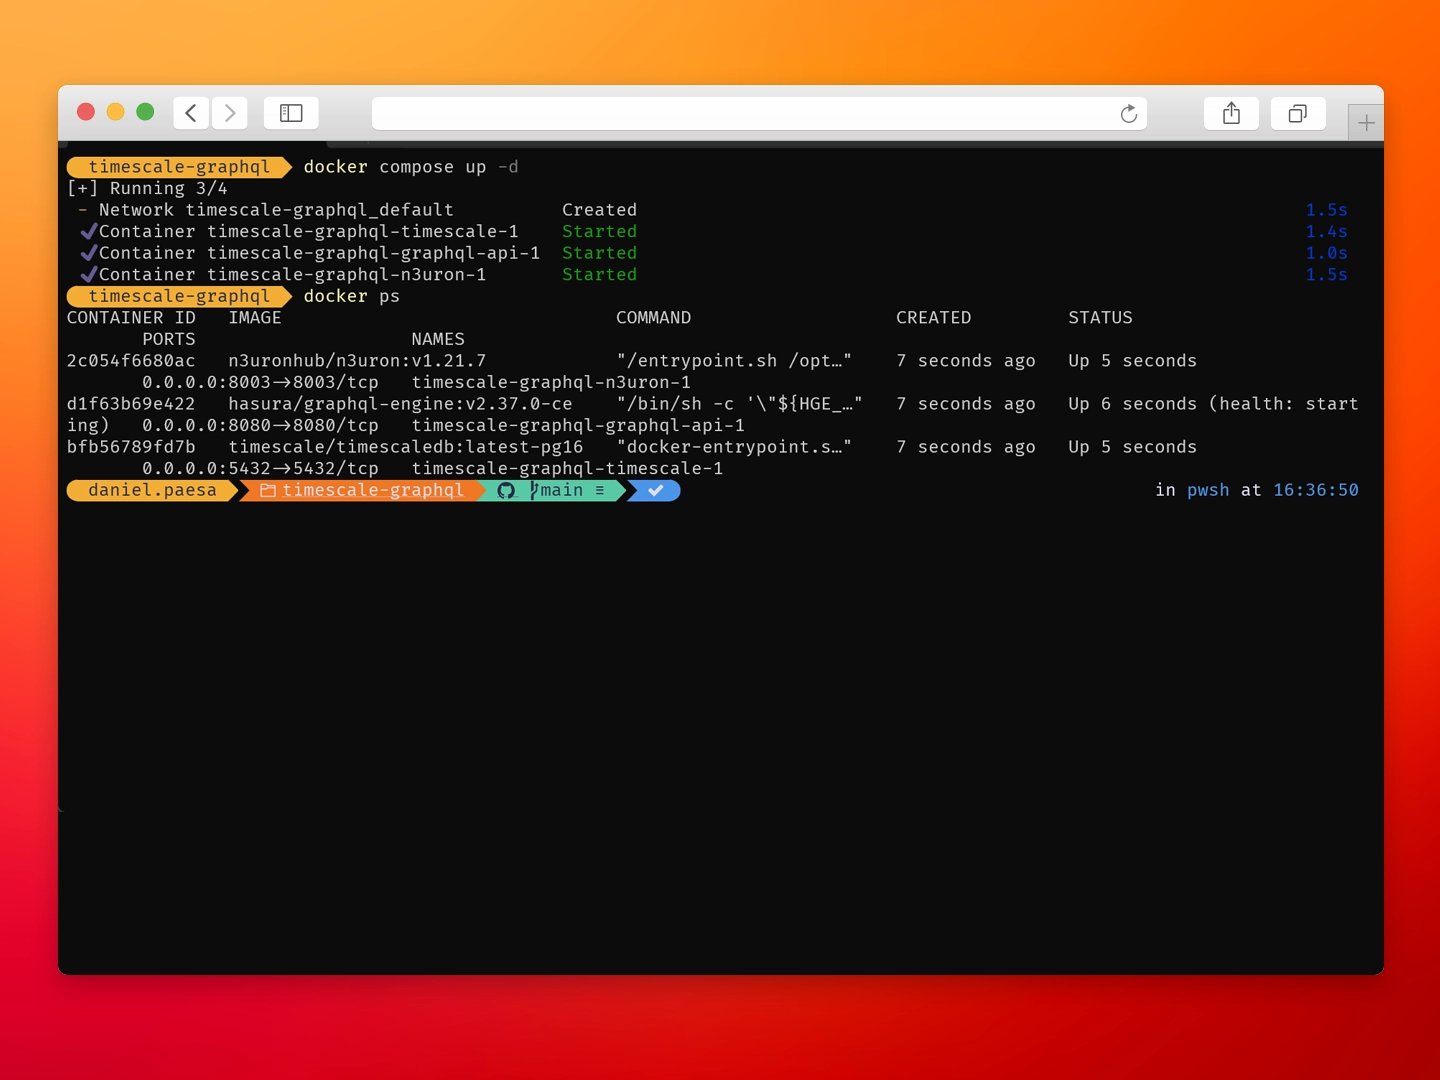
Use the `docker ps` command to display the running containers, their status and exposed ports.
Configure N3uron
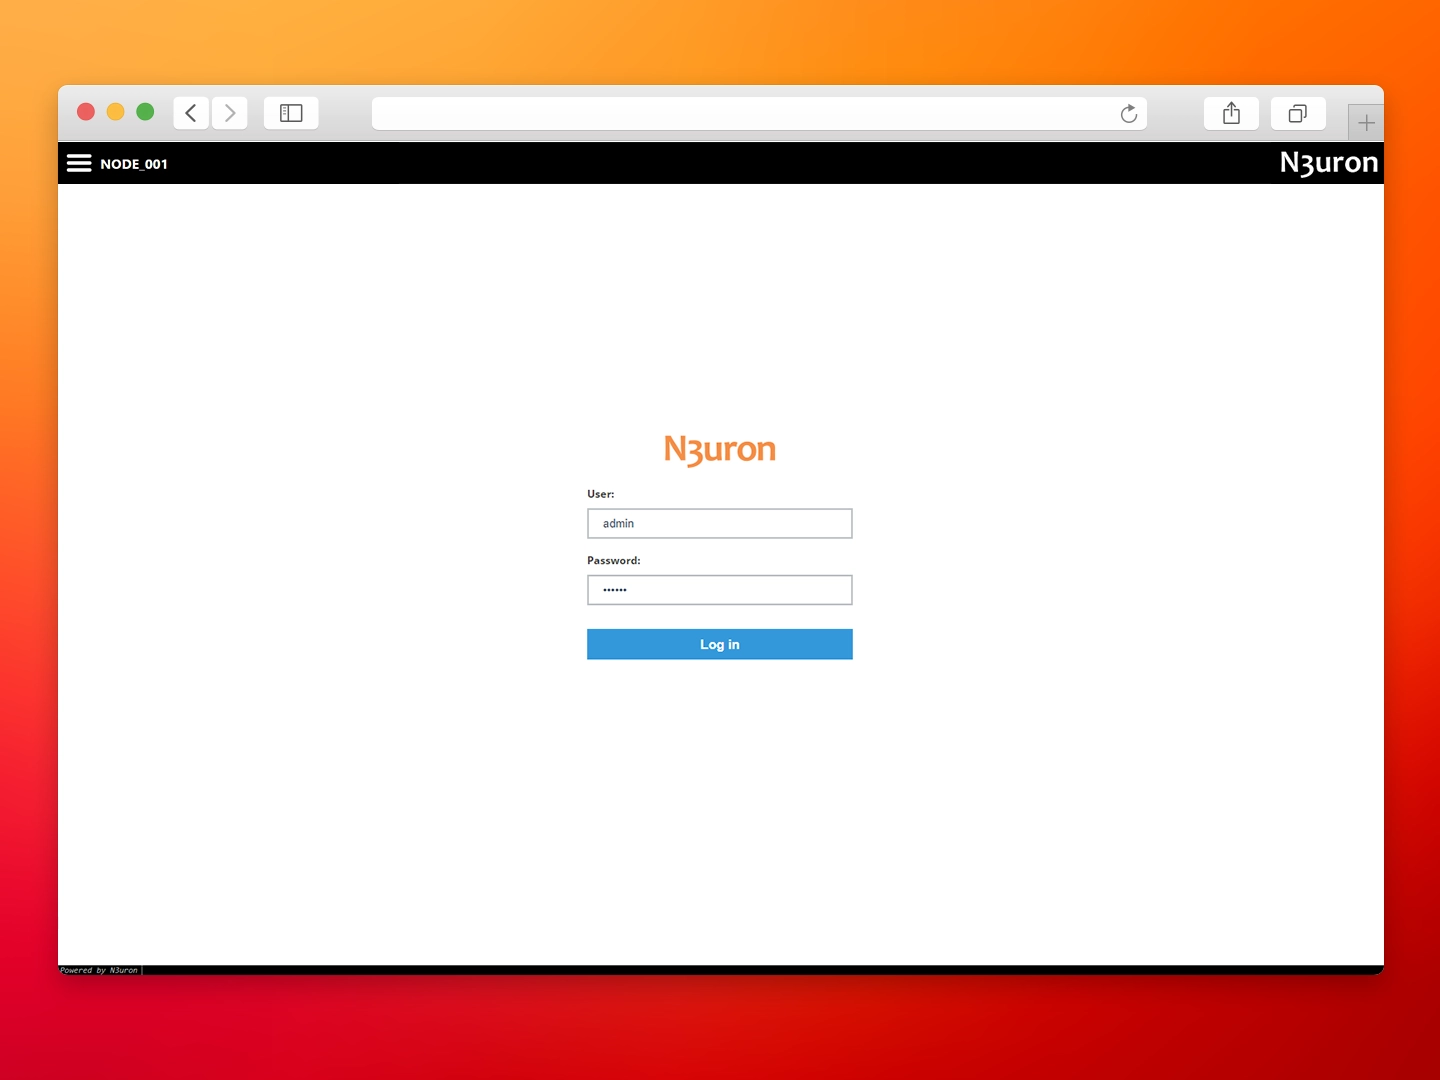
To begin with the configuration, open http://localhost:8003 in your browser to access the N3uron WebUI and proceed to log in with the default credentials:
- Username: admin
- Password: n3uron
Create and configure the OPC UA Client
Once inside N3uron, we’ll create an OPC UA Client module to retrieve the data used for this demo from our public Datasim endpoint, which is an instance of our OPC UA Server.
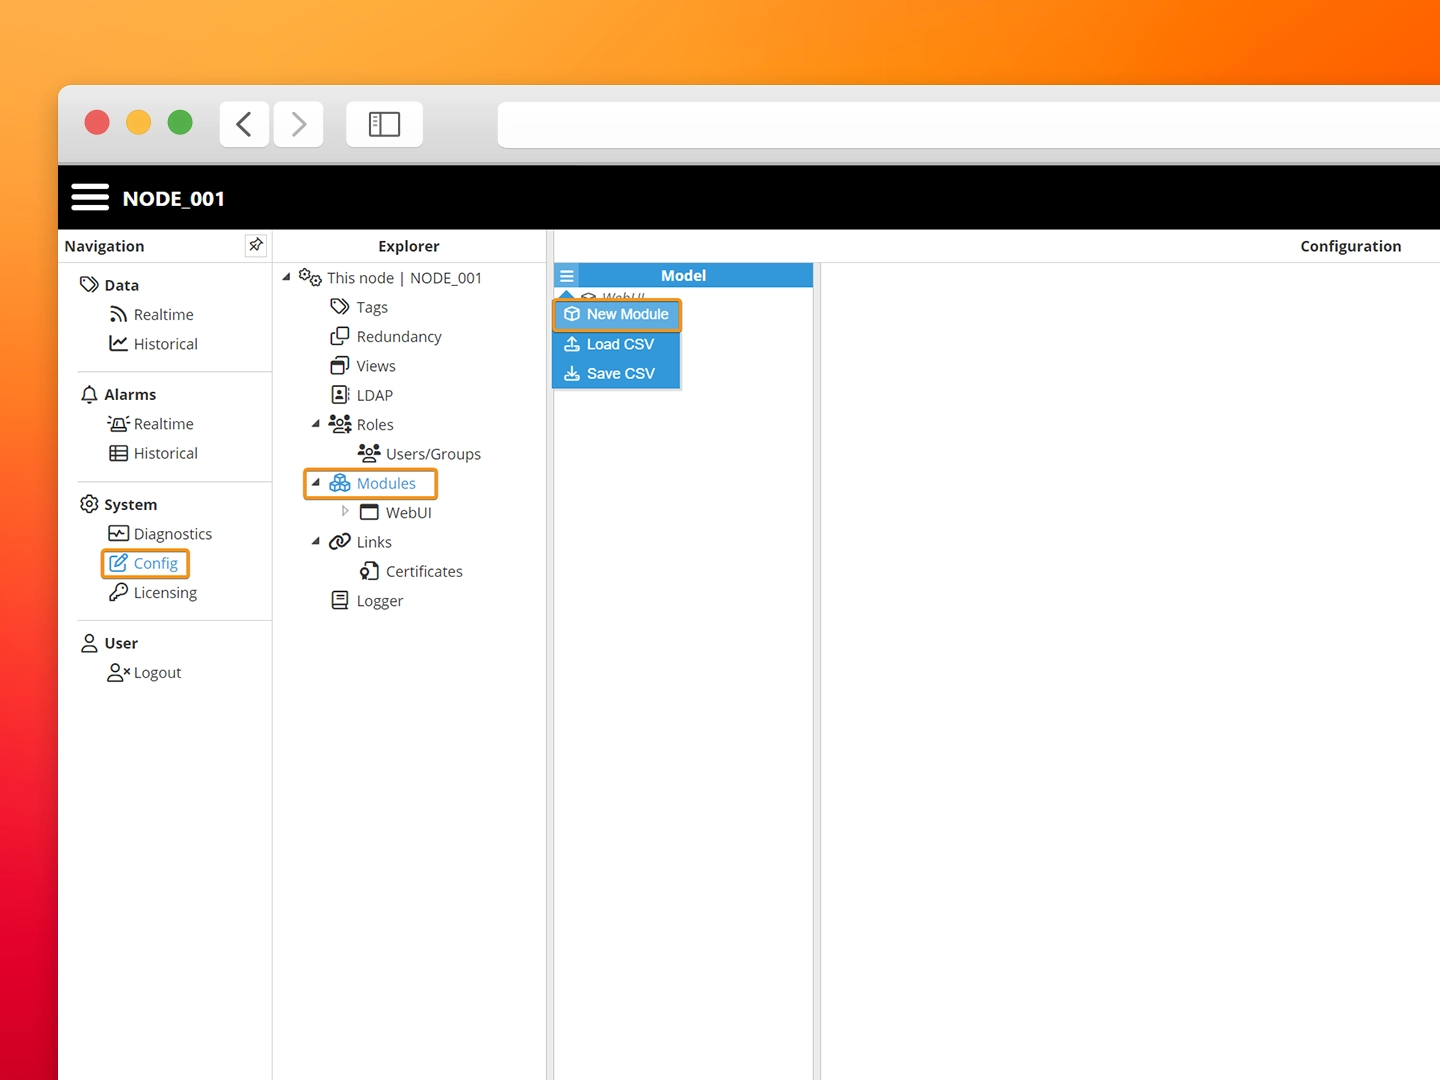
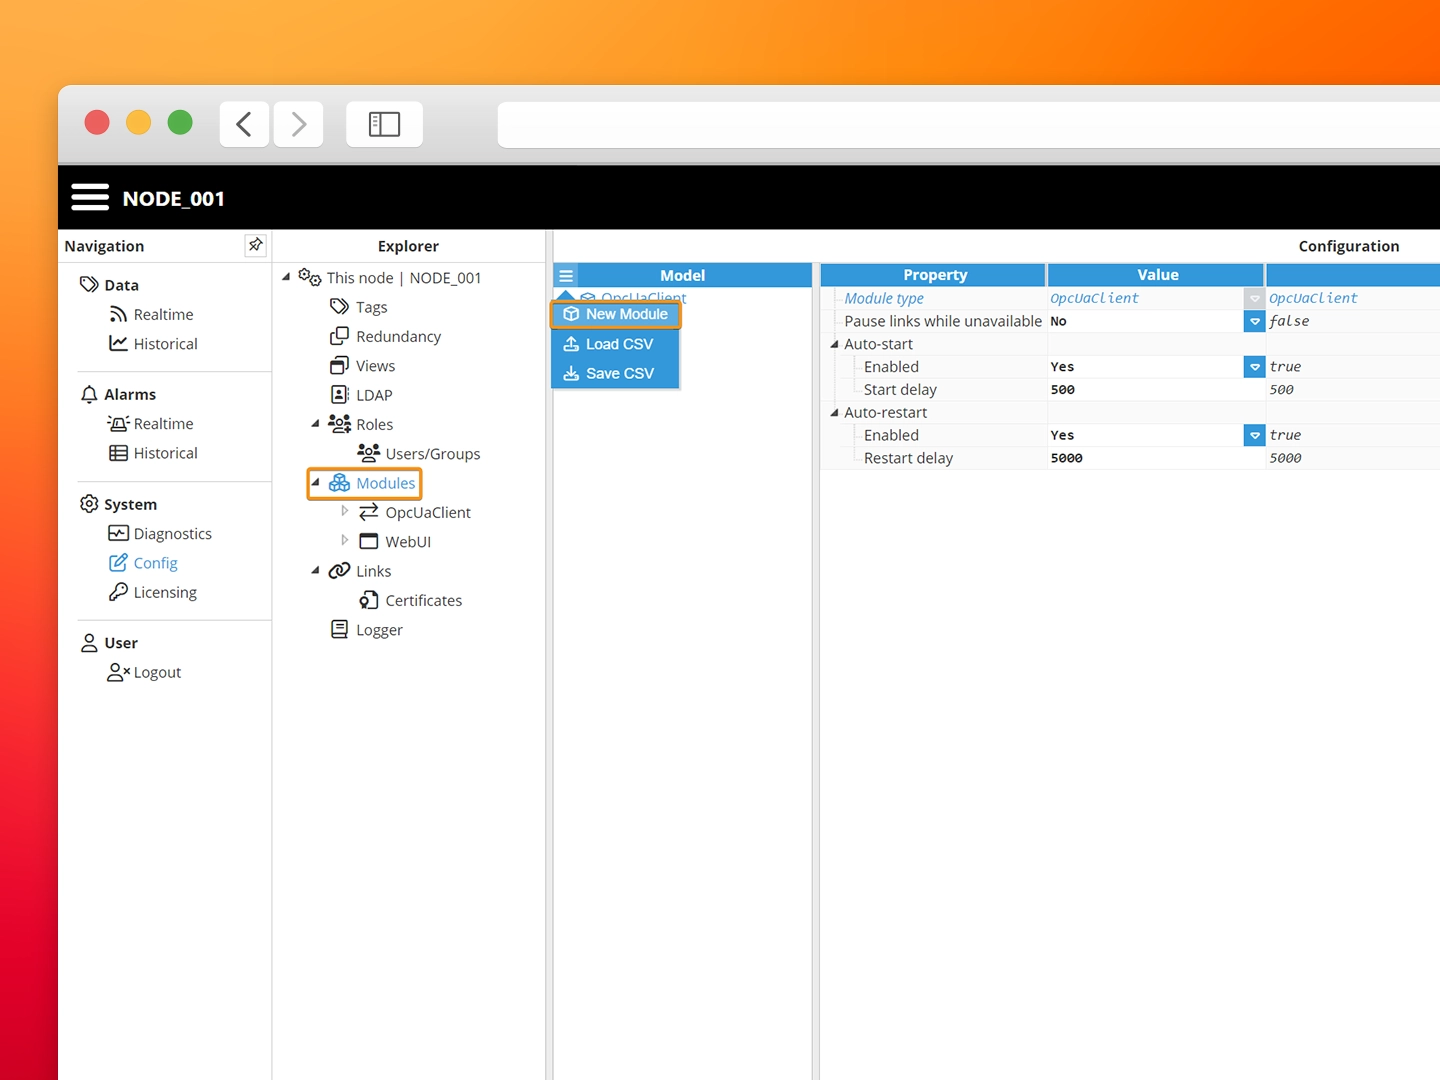
- Step 1: Navigate to Config > Modules and create a new module named OpcUaClient.
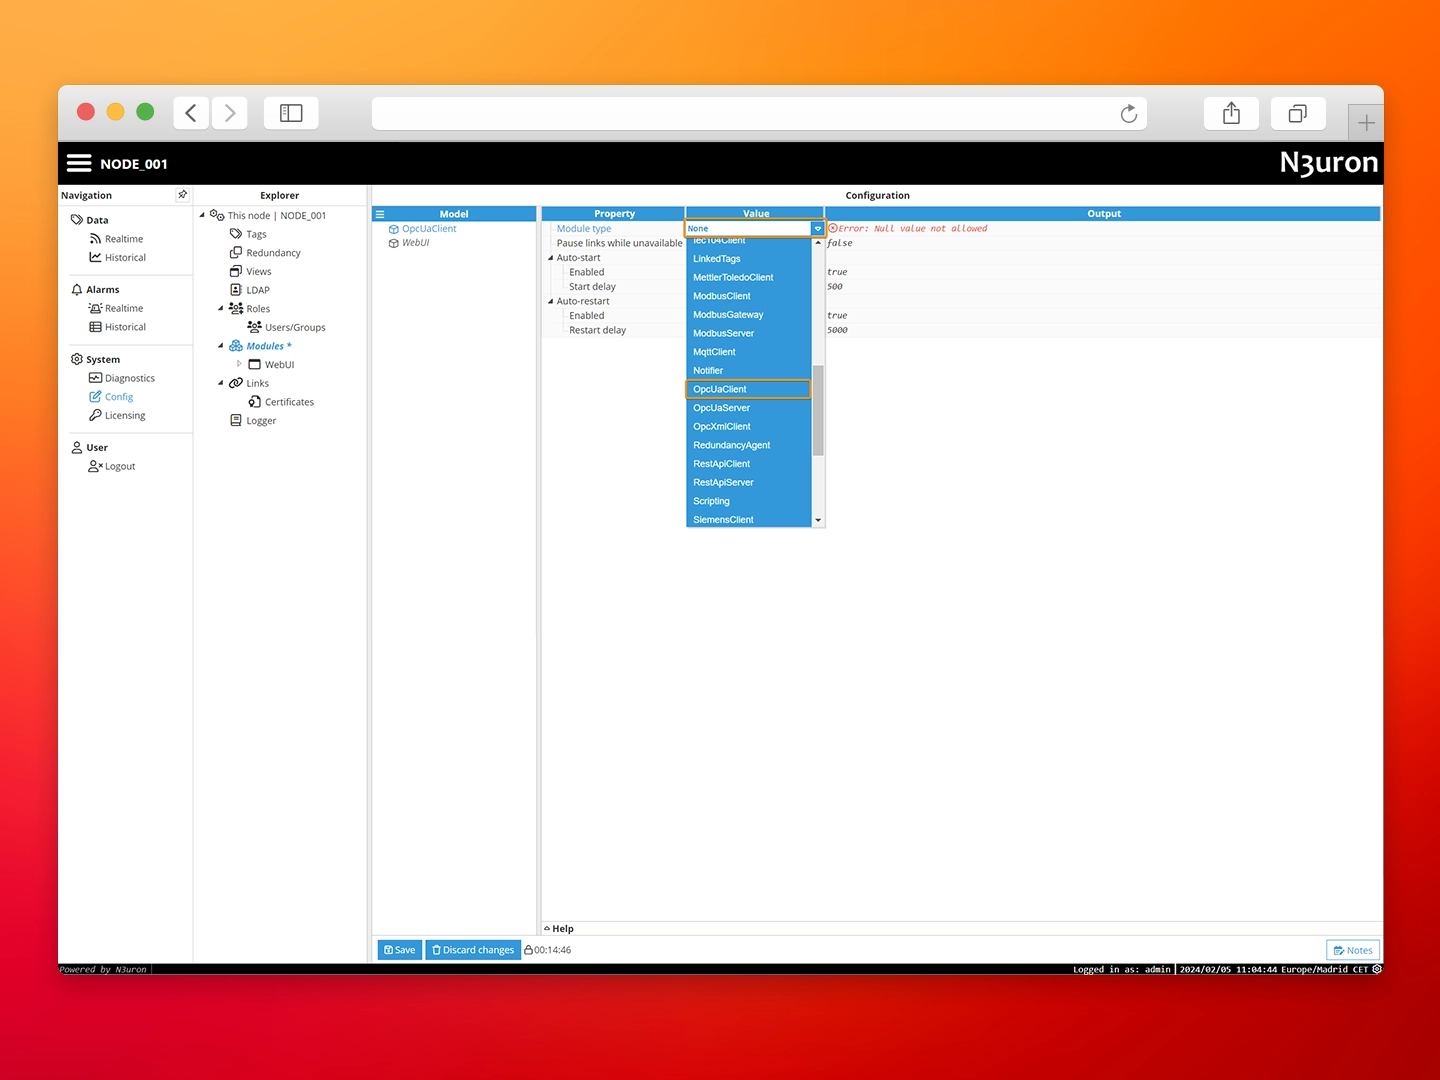
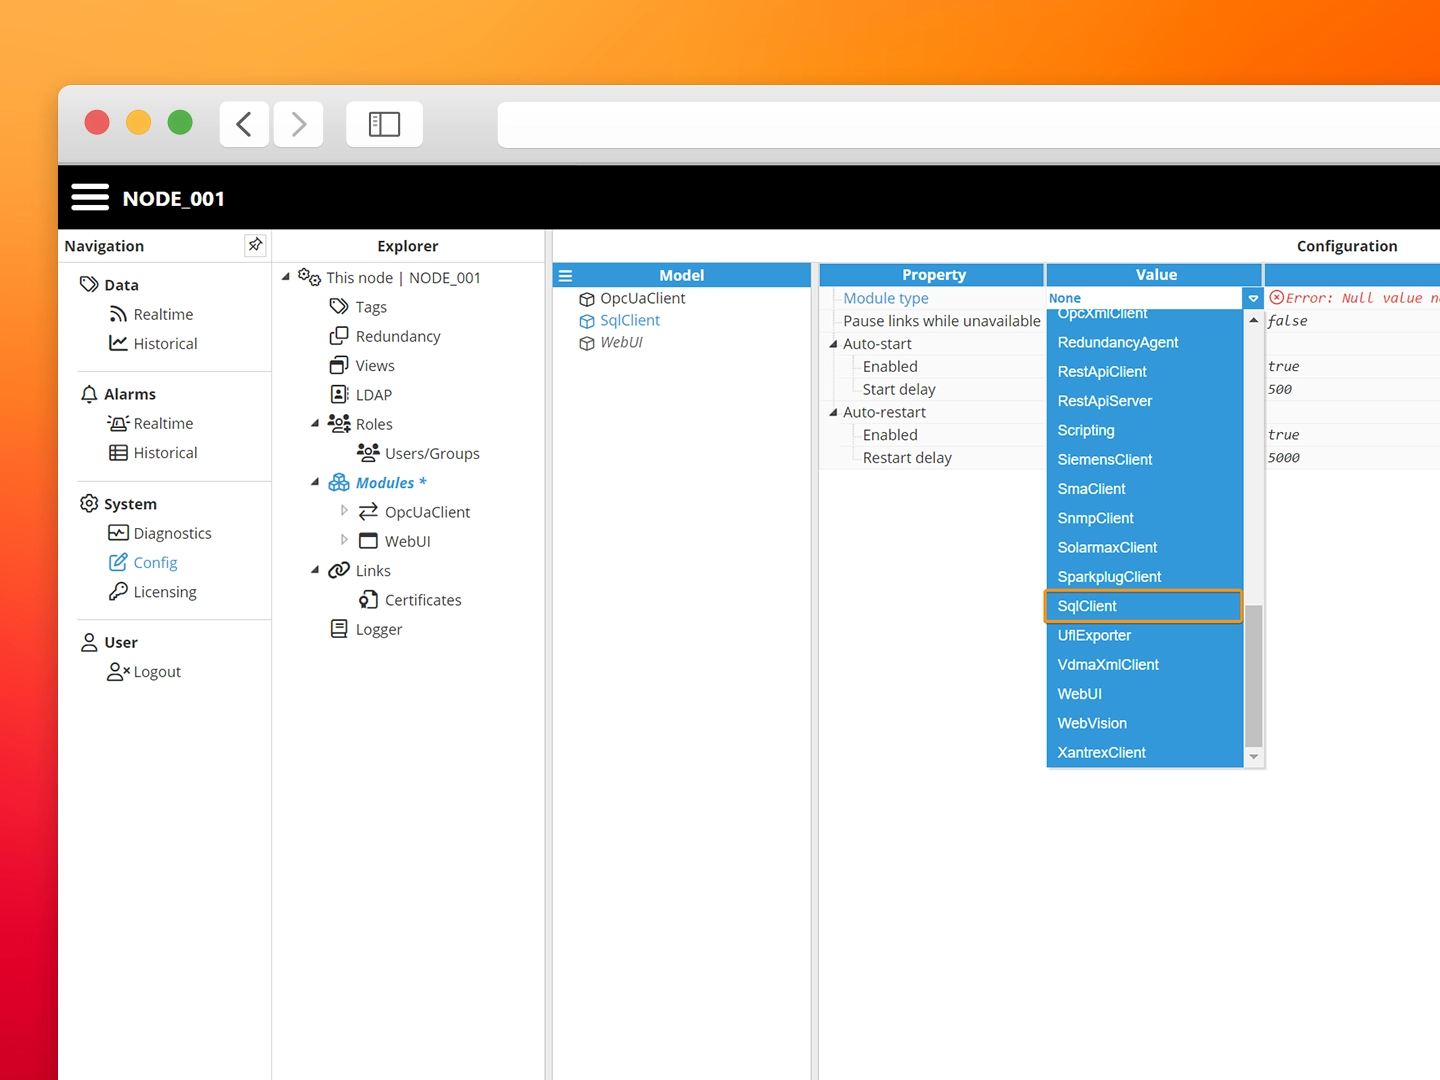
- Step 2: Select OpcUaClient as the module type and click Save to instantiate the new module.
-
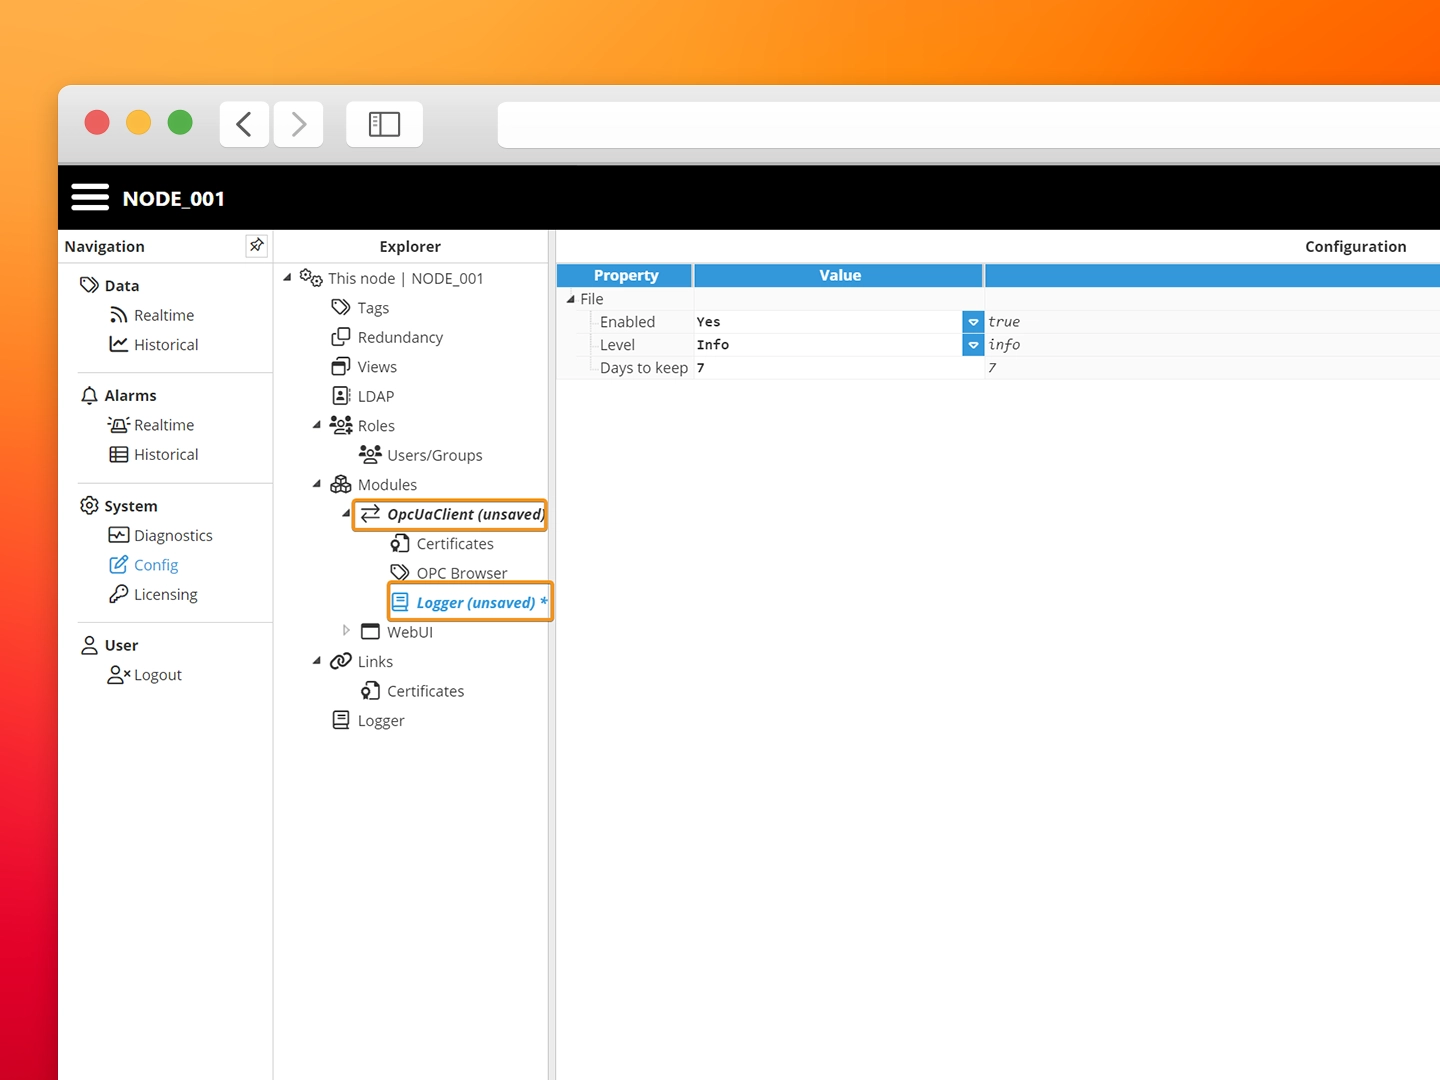
Step 3: Proceed to save both the Logger and Module configuration.
-
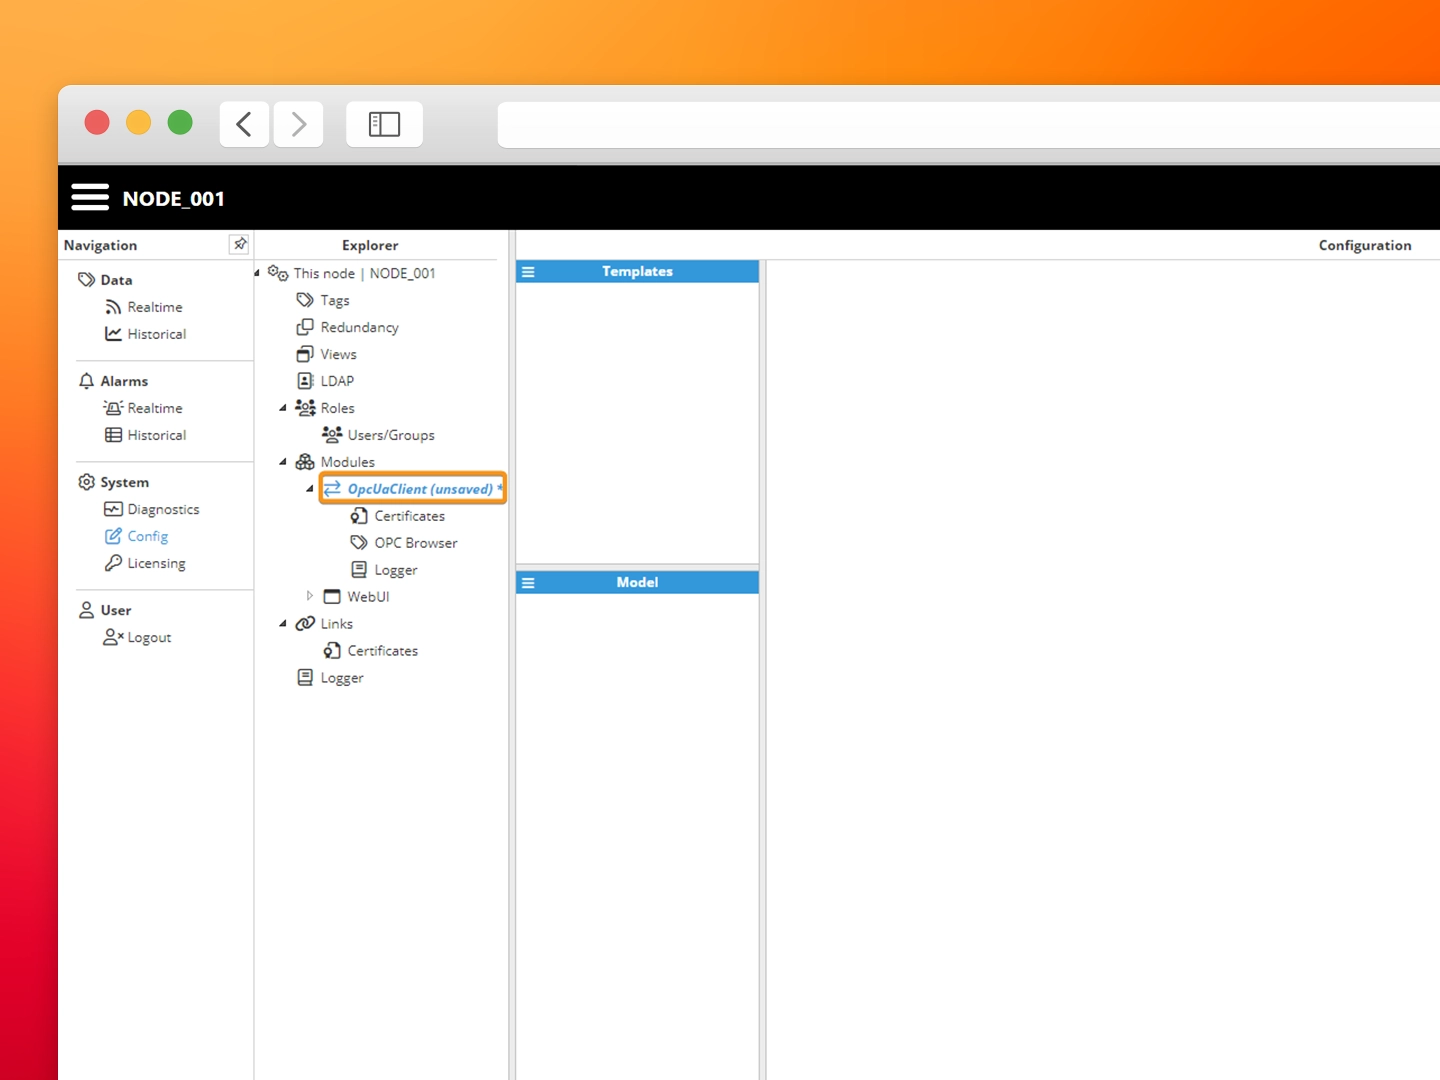
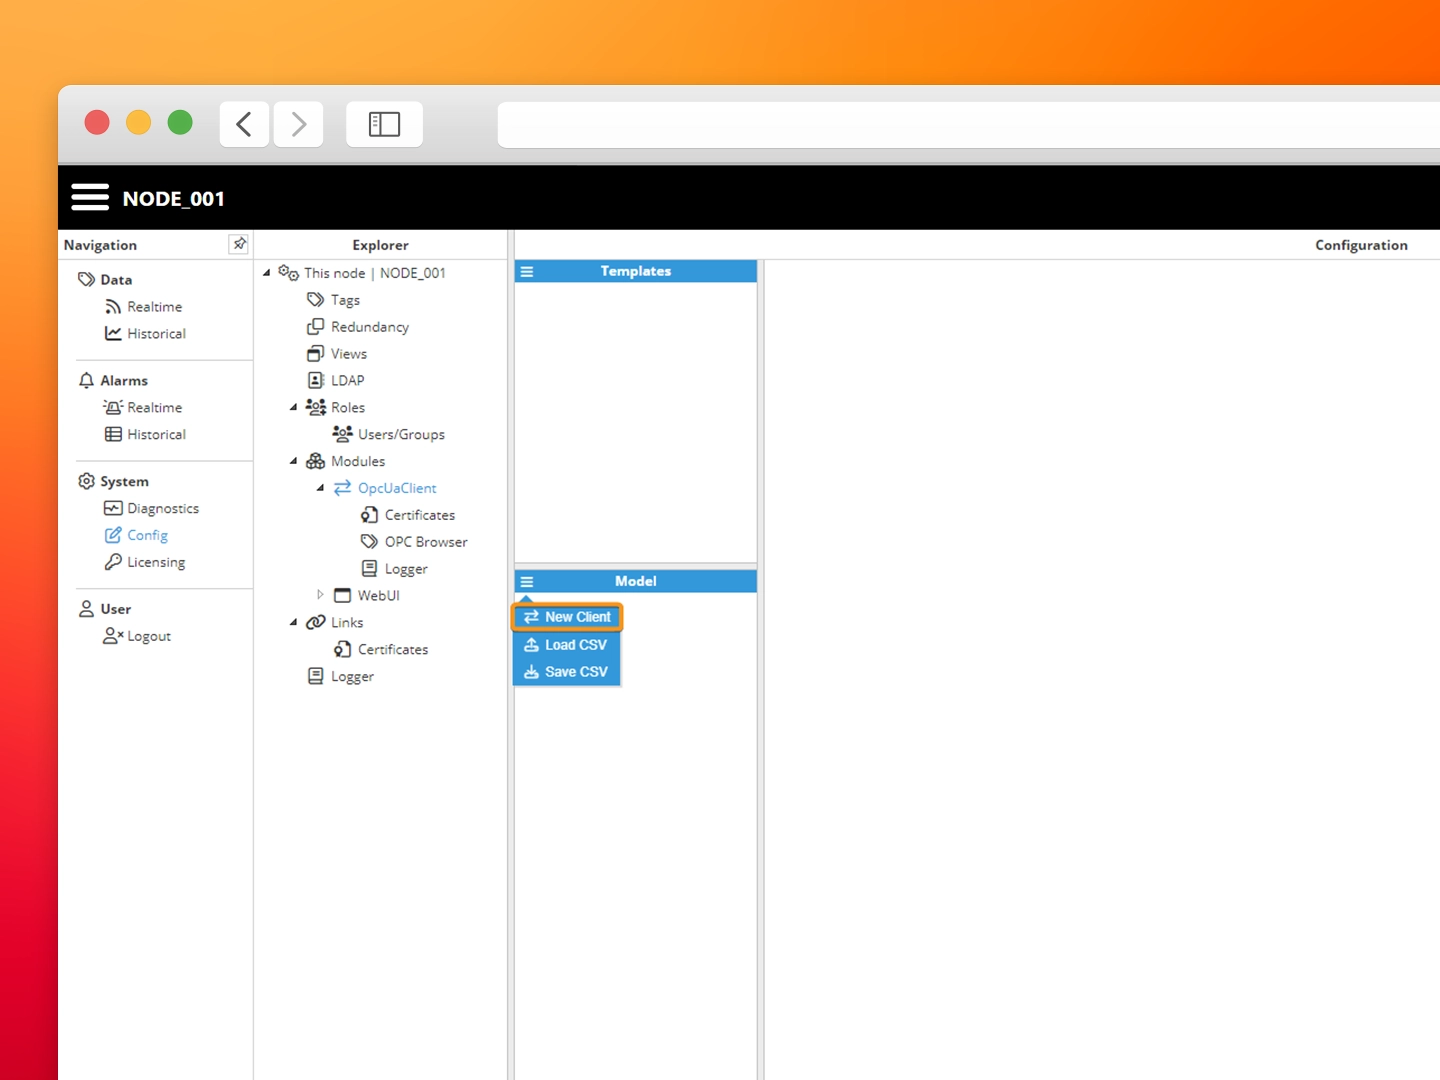
Step 4: To create a new client, click on the burger menu inside Model, then on New Client and name it Datasim.
-
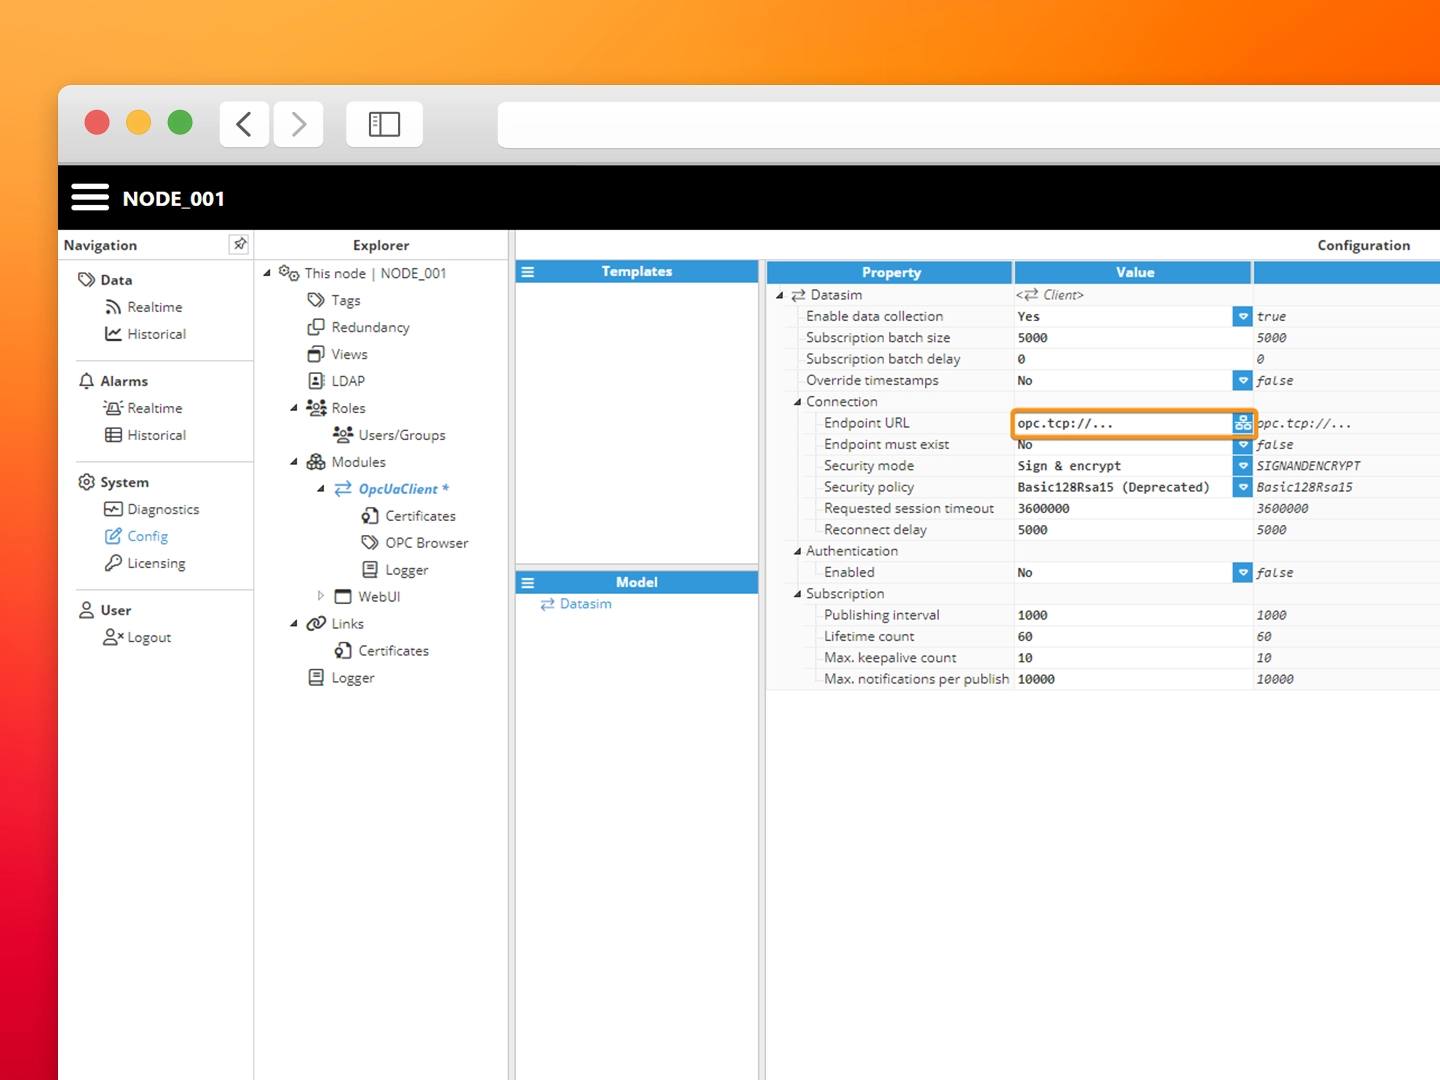
Step 5: Configure the Endpoint URL with the address of our public Datasim server -> datasim.n3uron.com:4840
-
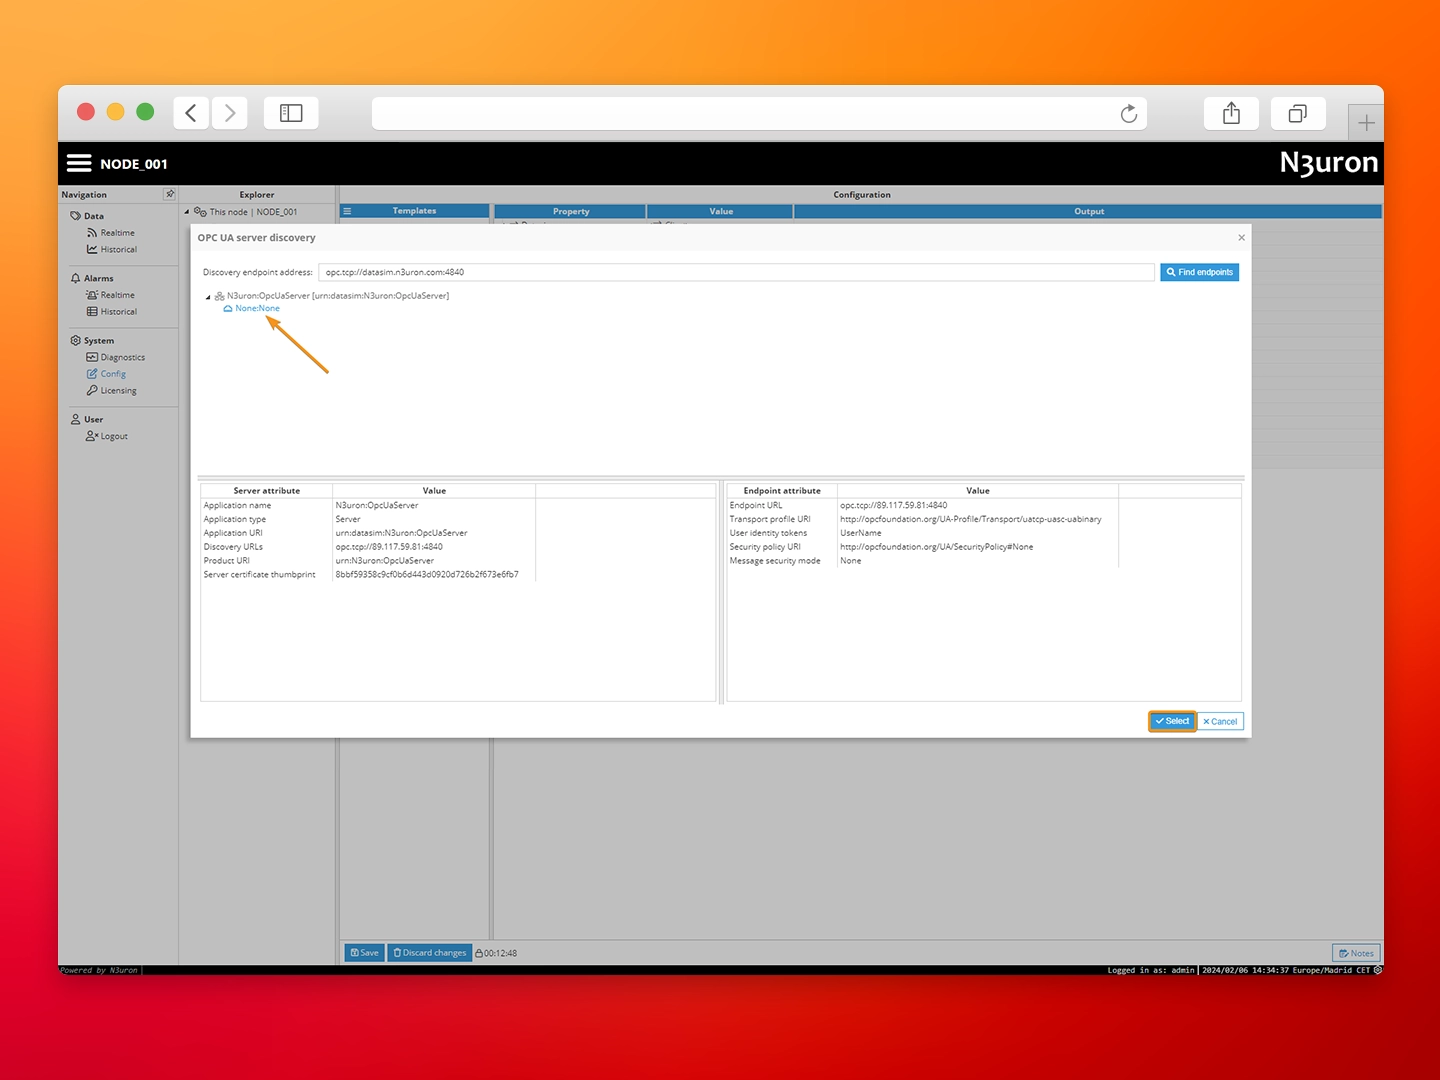
Step 6: Open the “OPC UA server discovery” dialog to explore the remote server and select None:None.
-
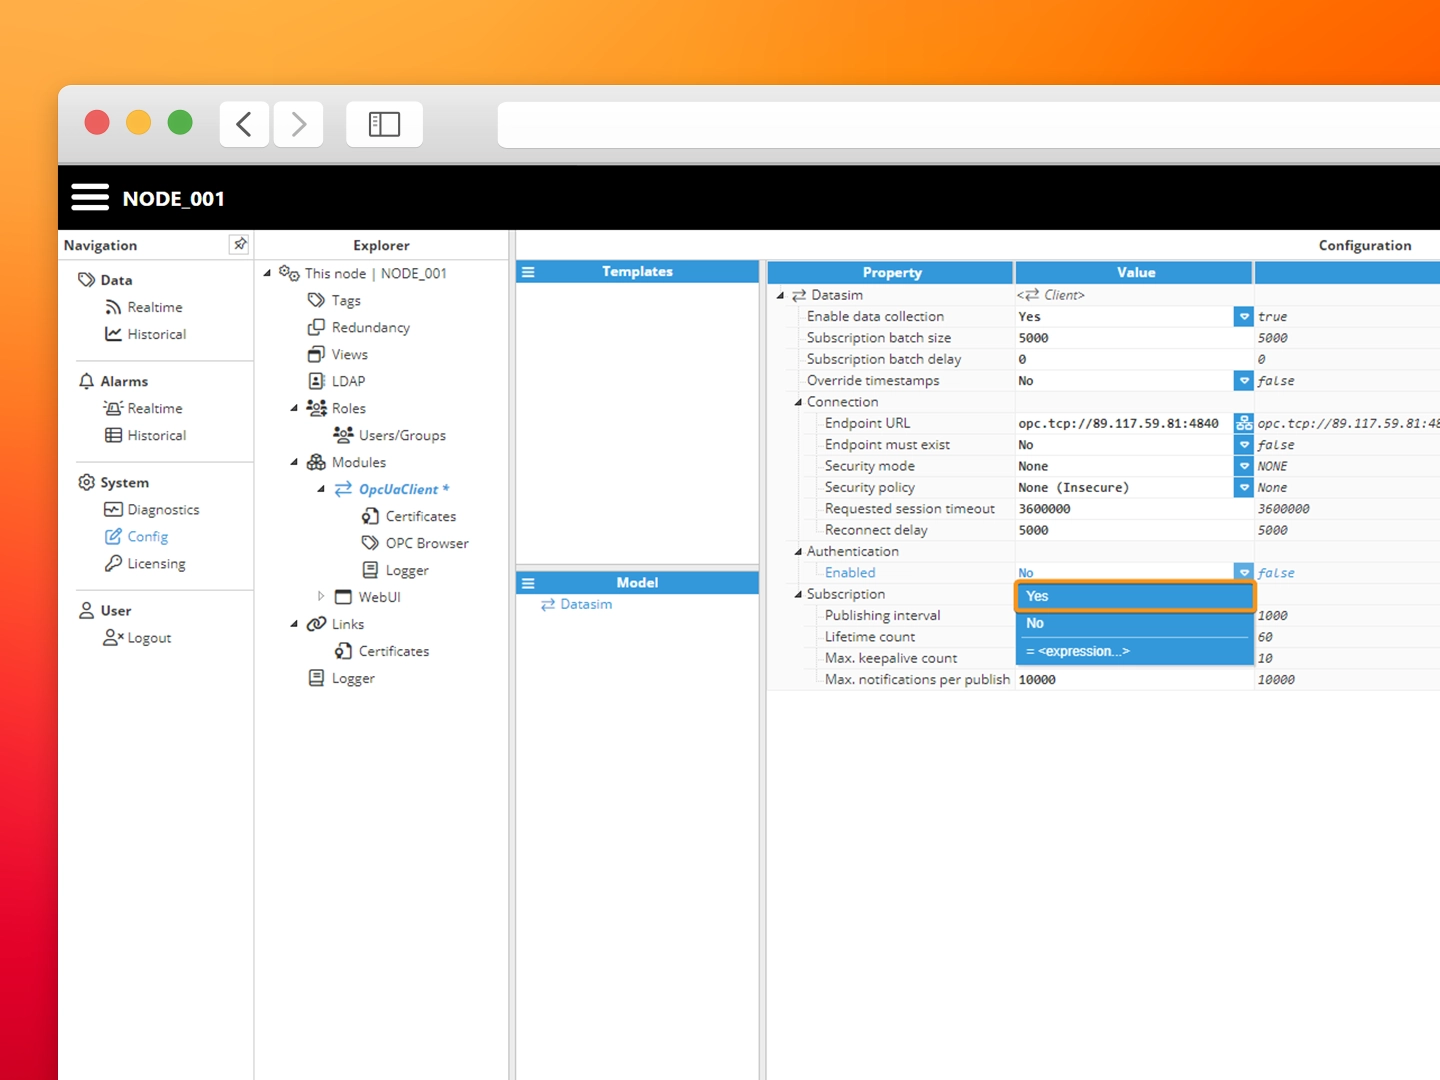
Step 7: Enable and configure authentication with the following credentials:
- User: sunn3rgy
- Password: n3uron
-
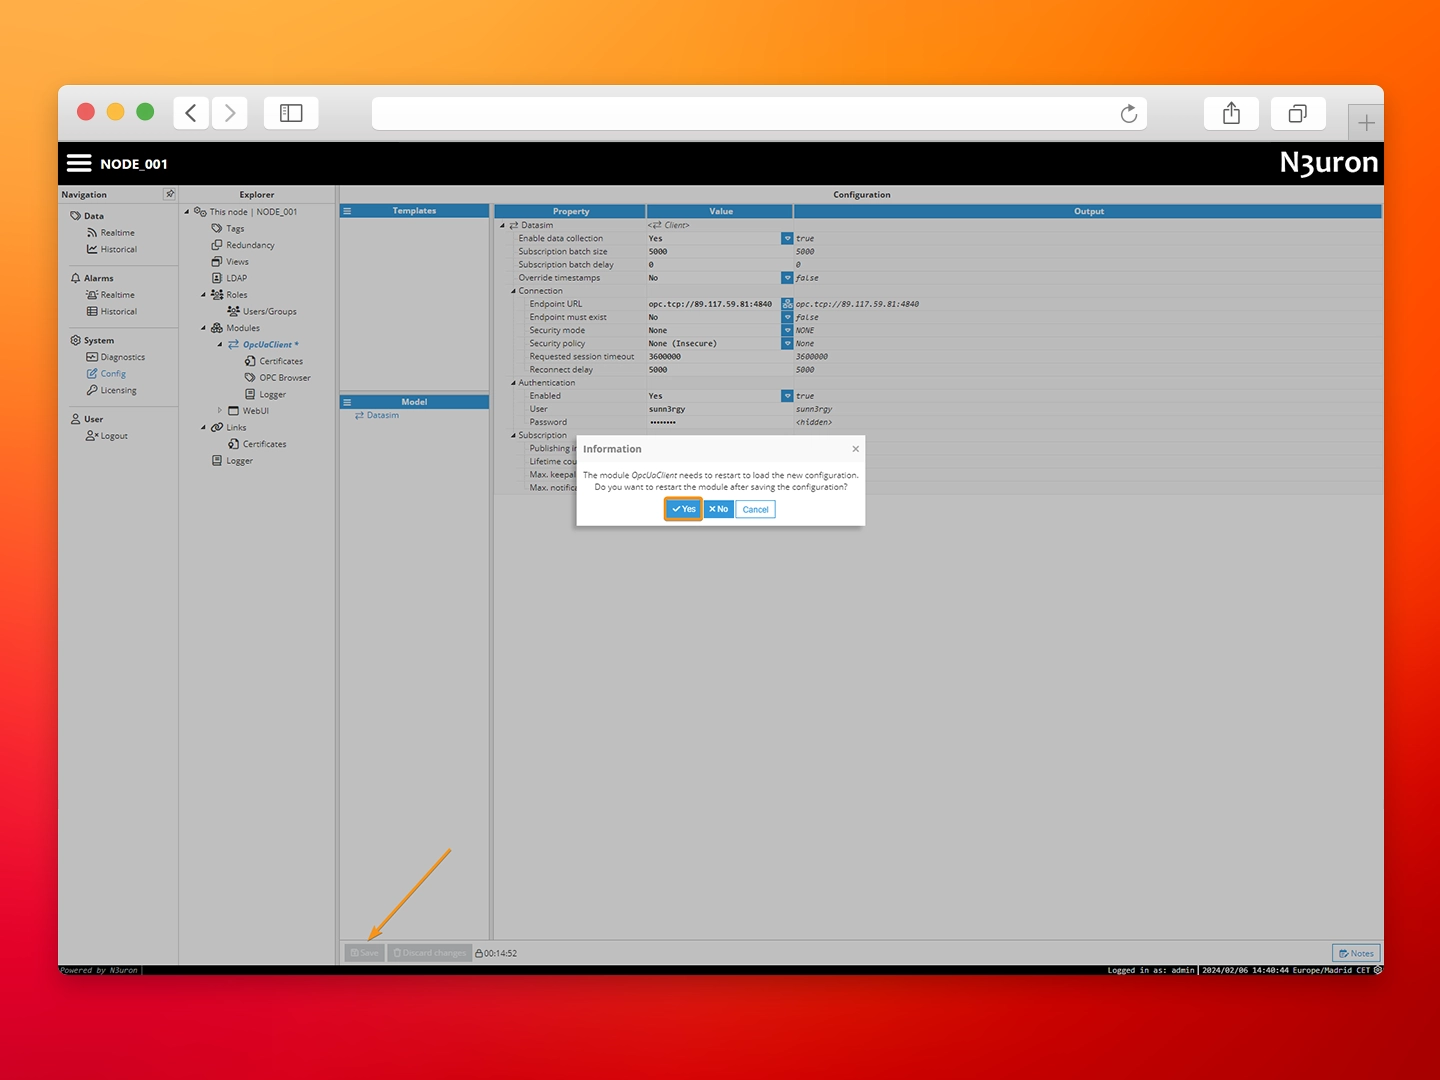
Step 8: Click on Save and reload the module to apply the new configuration.
-
Now we can use the built-in OPC Browser to explore the data model exposed by the OPC server.
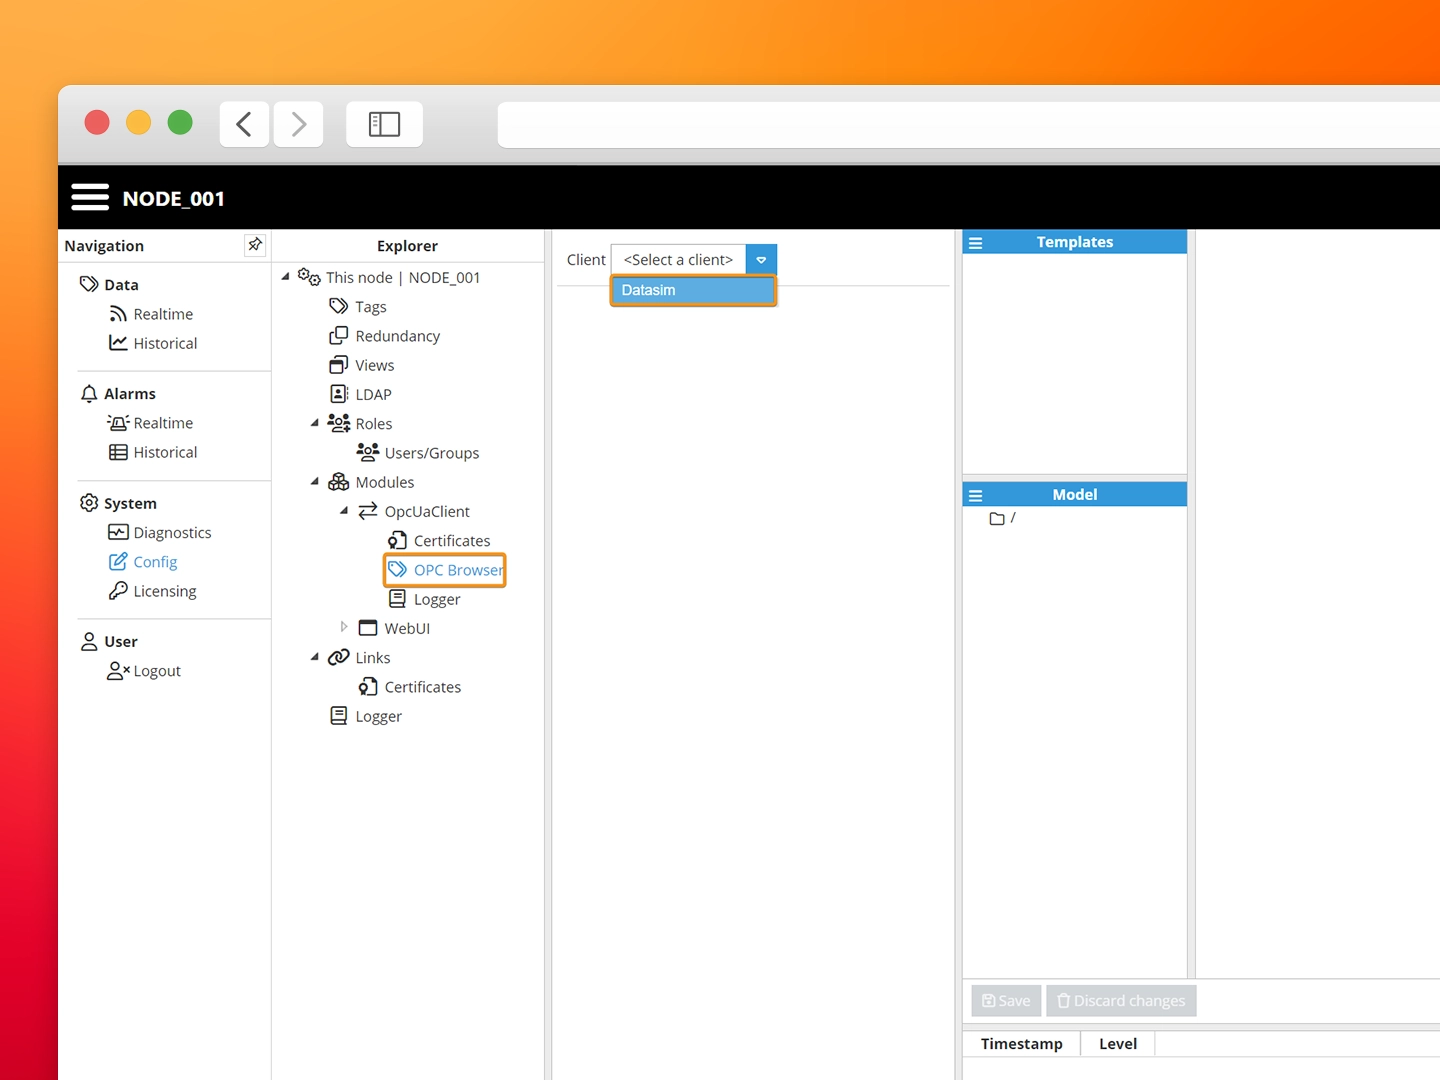
Step 9: Navigate to OpcUaClient->OPC Browser and select the previously configured Datasim client.
-
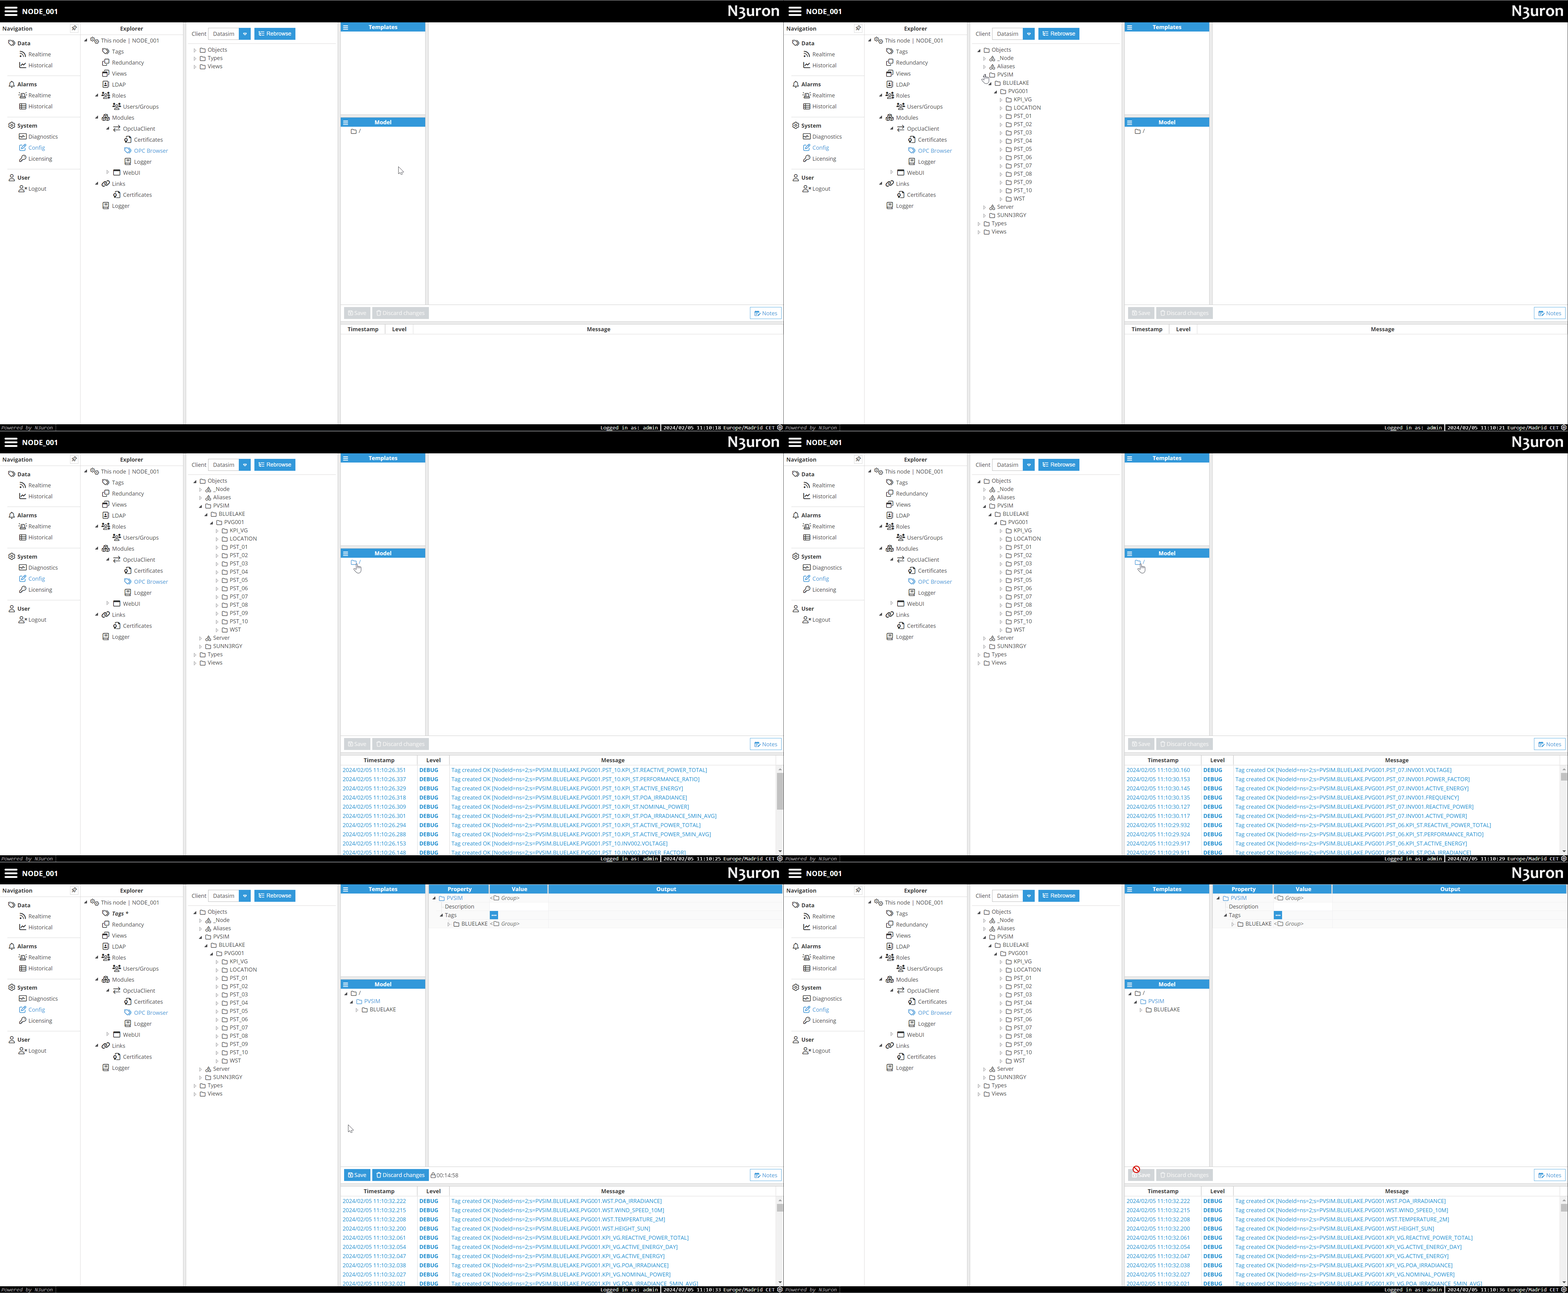
Step 10: Use drag-and-drop to create tags in N3uron from the data available at the OPC UA server. The GIF below displays the process.
-
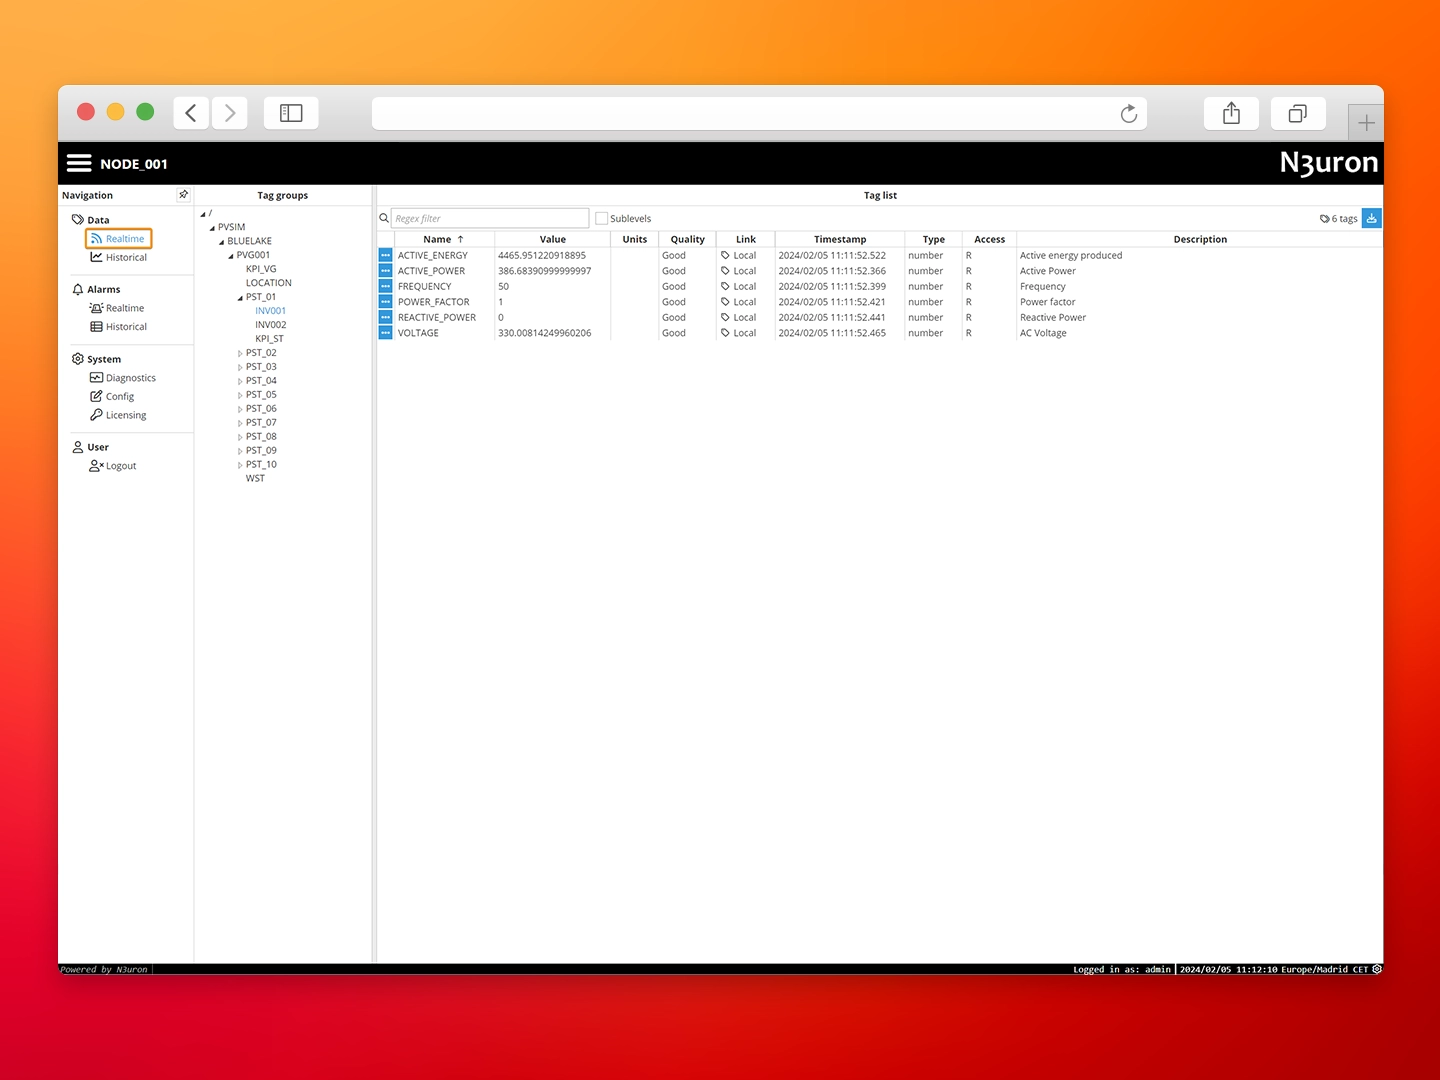
Step 11: Go back to the Real-Time section to visualize all the data signals received (and changing) from the remote server.
Integrate TimescaleDB with the SQL Client
In this section, we’ll create a SQL Client module to historize everything in the TimescaleDB instance running in a separate container.
Our SQL Client has preset configurations for TimescaleDB, leveraging the power of Hypertables with built-in partitioning and data compression for time-series data to efficiently scale our historian.
- Step 1: Go back to Config->Modules and create a new module, name it SqlClient.
- Step 2: Select SqlClient as the module type and save its default configuration as shown in the first section of this article.
-
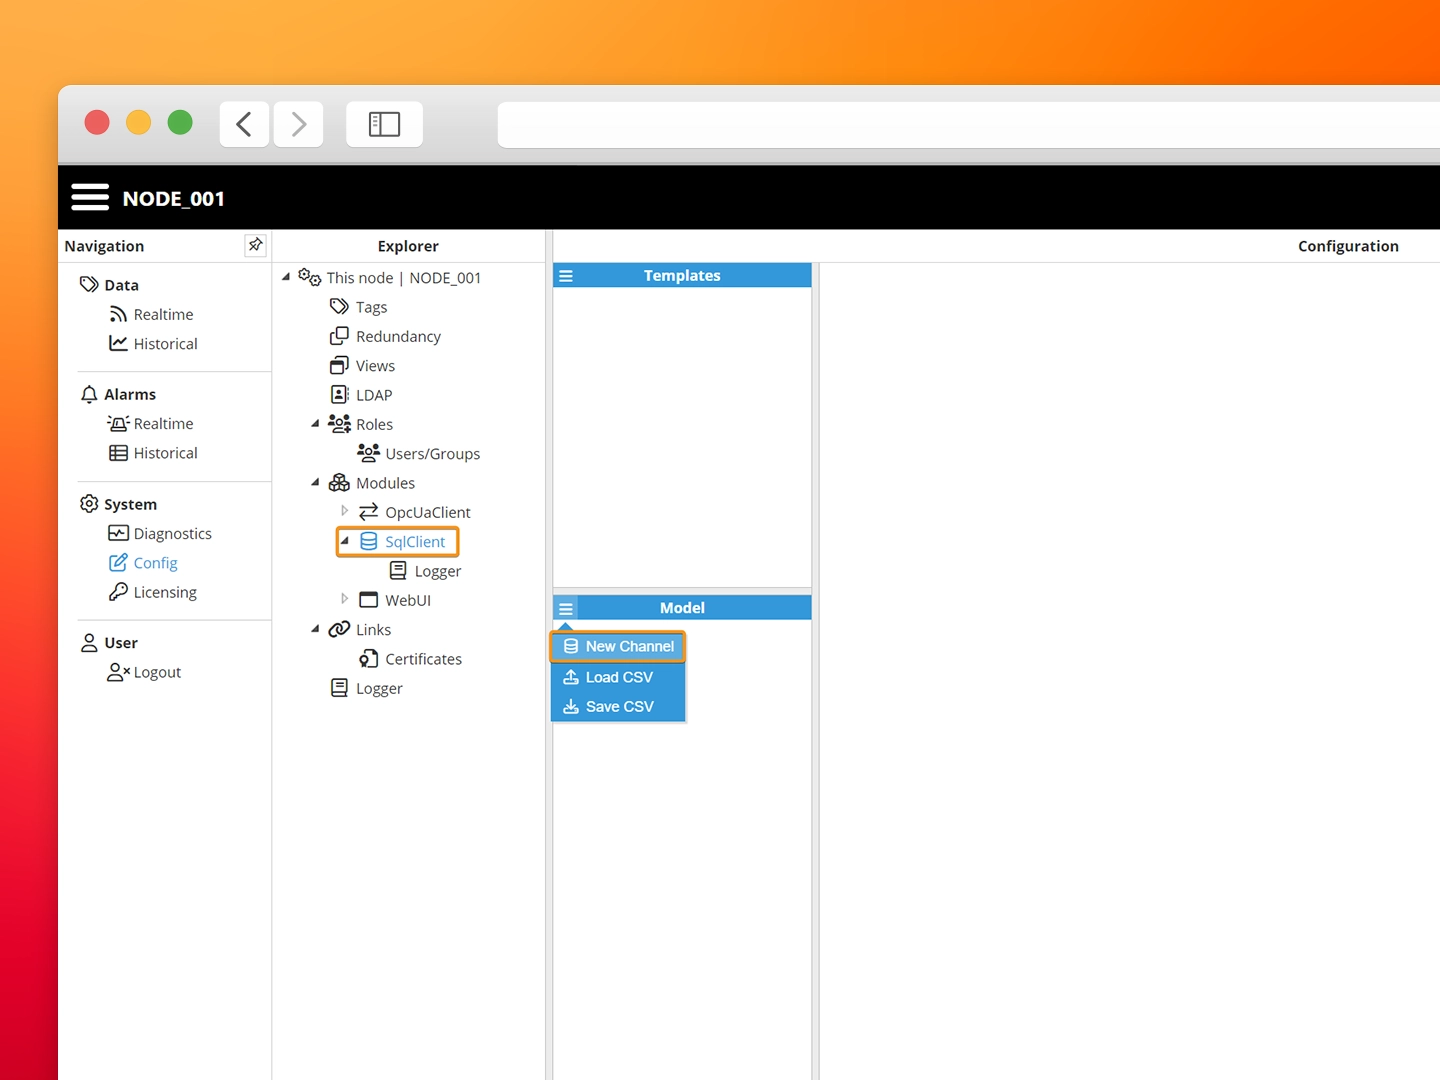
Step 3: Create a New Channel and name it TimescaleDB
-
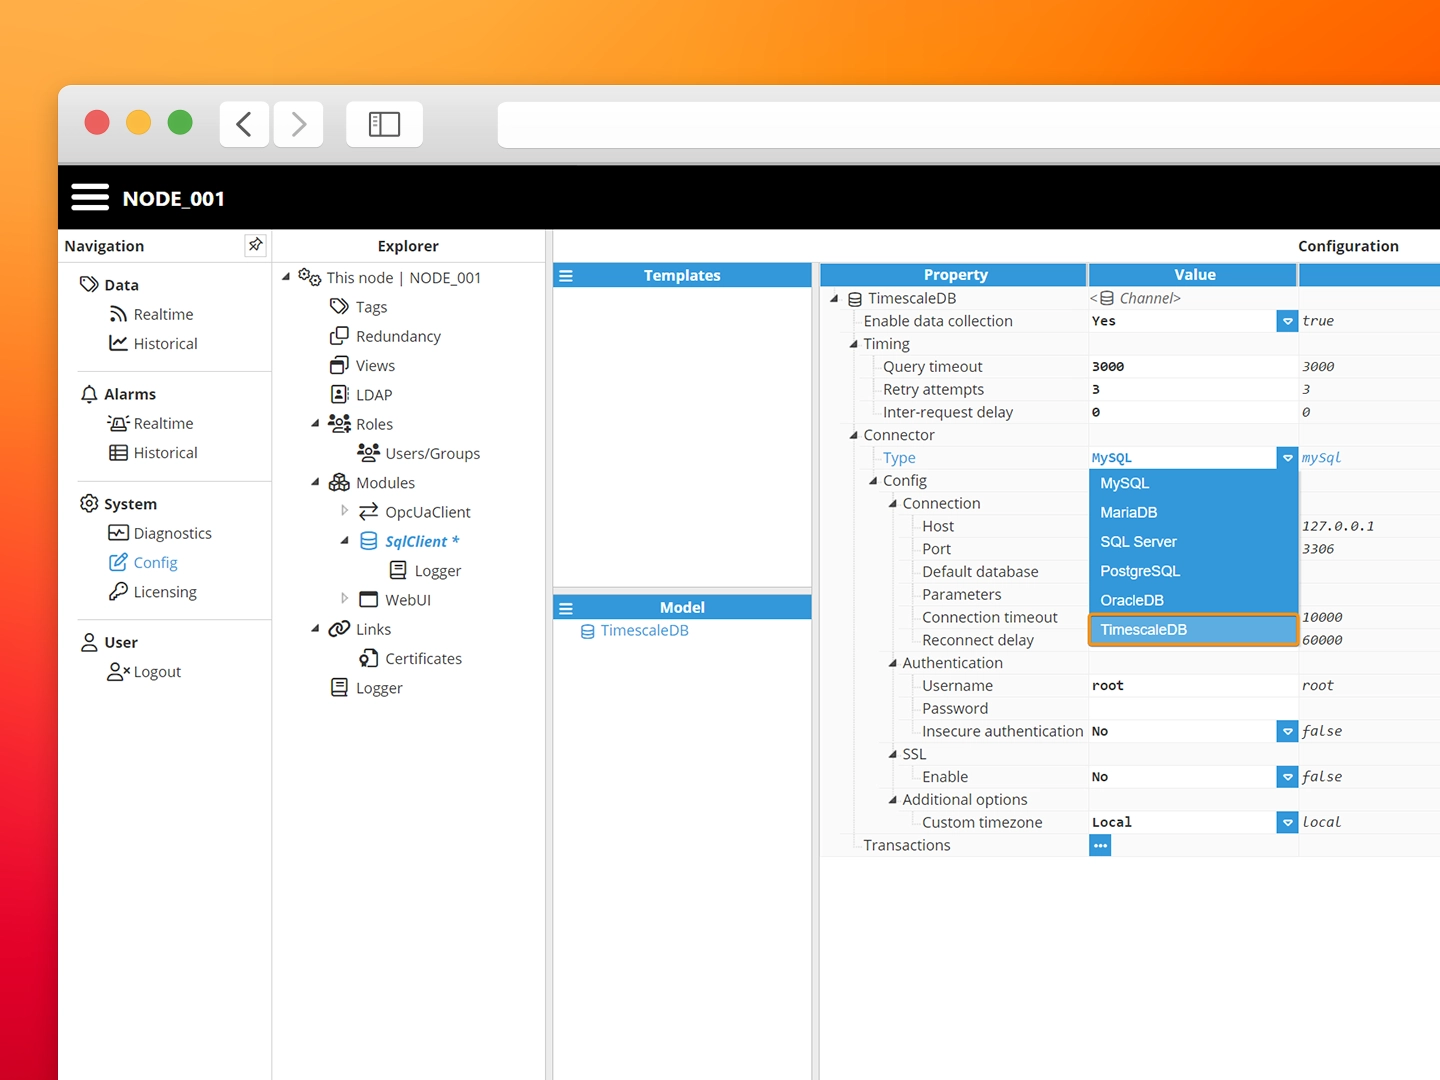
Step 4: Proceed to configure the database connection, first, select TimescaleDB as the database type.
-
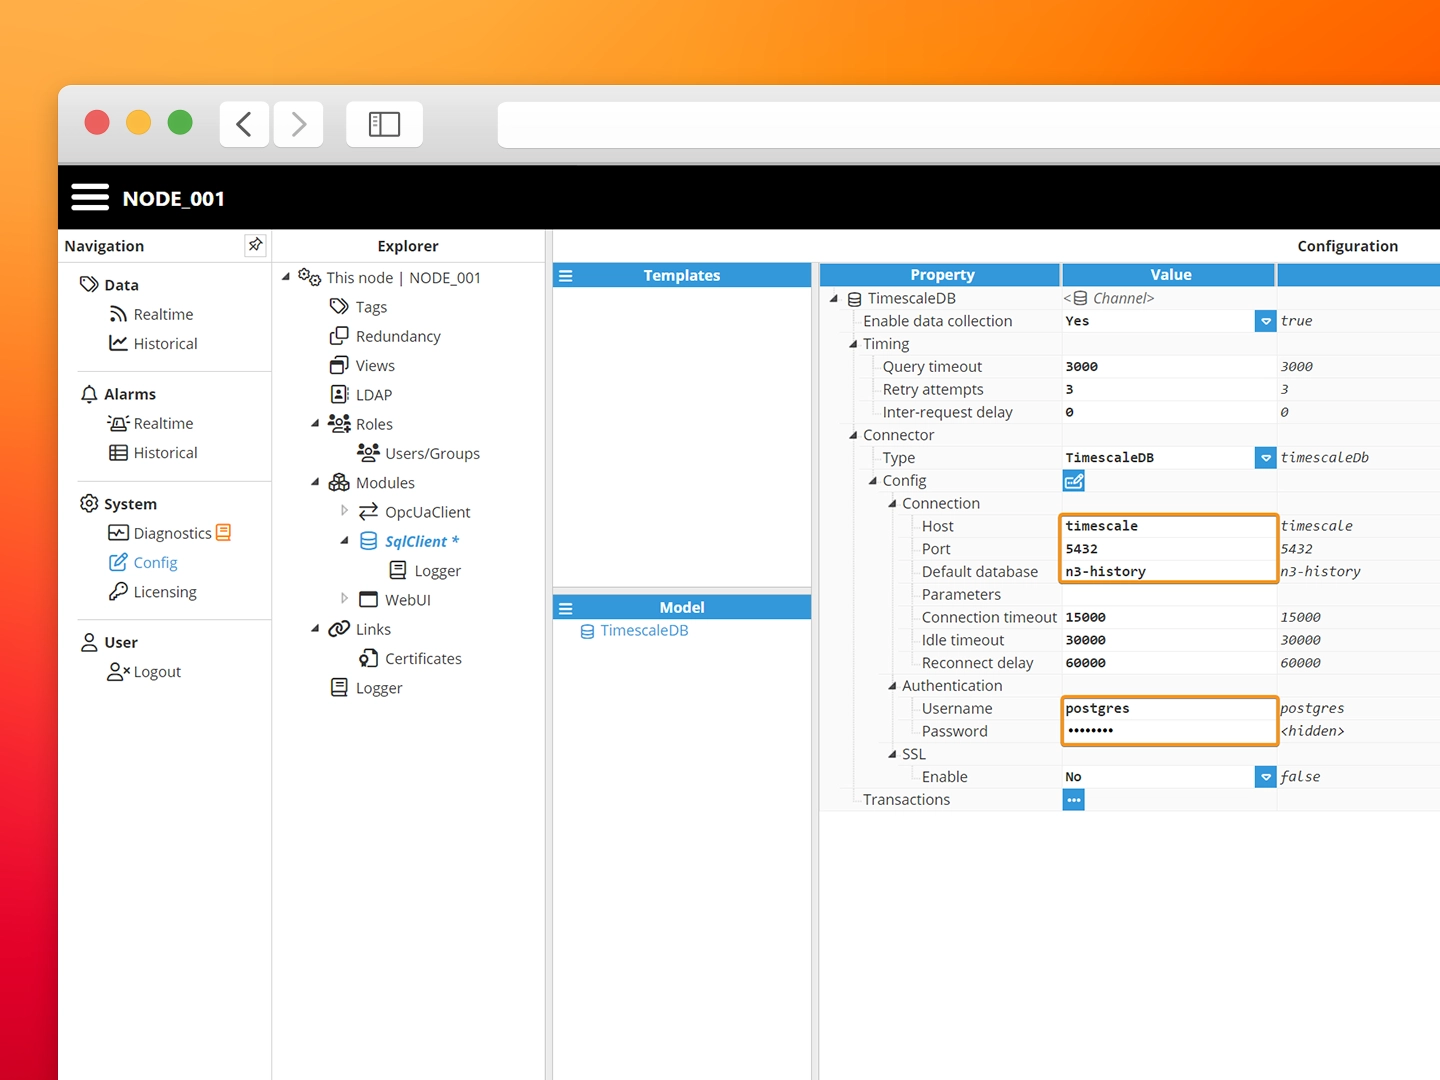
Step 5: Set the following property fields as follows:
- Connection:
- Host: timescale
- Port: 5432
- Default database: n3-history
- Authentication:
- Username: postgres
- Password: n3uron
- Connection:
-
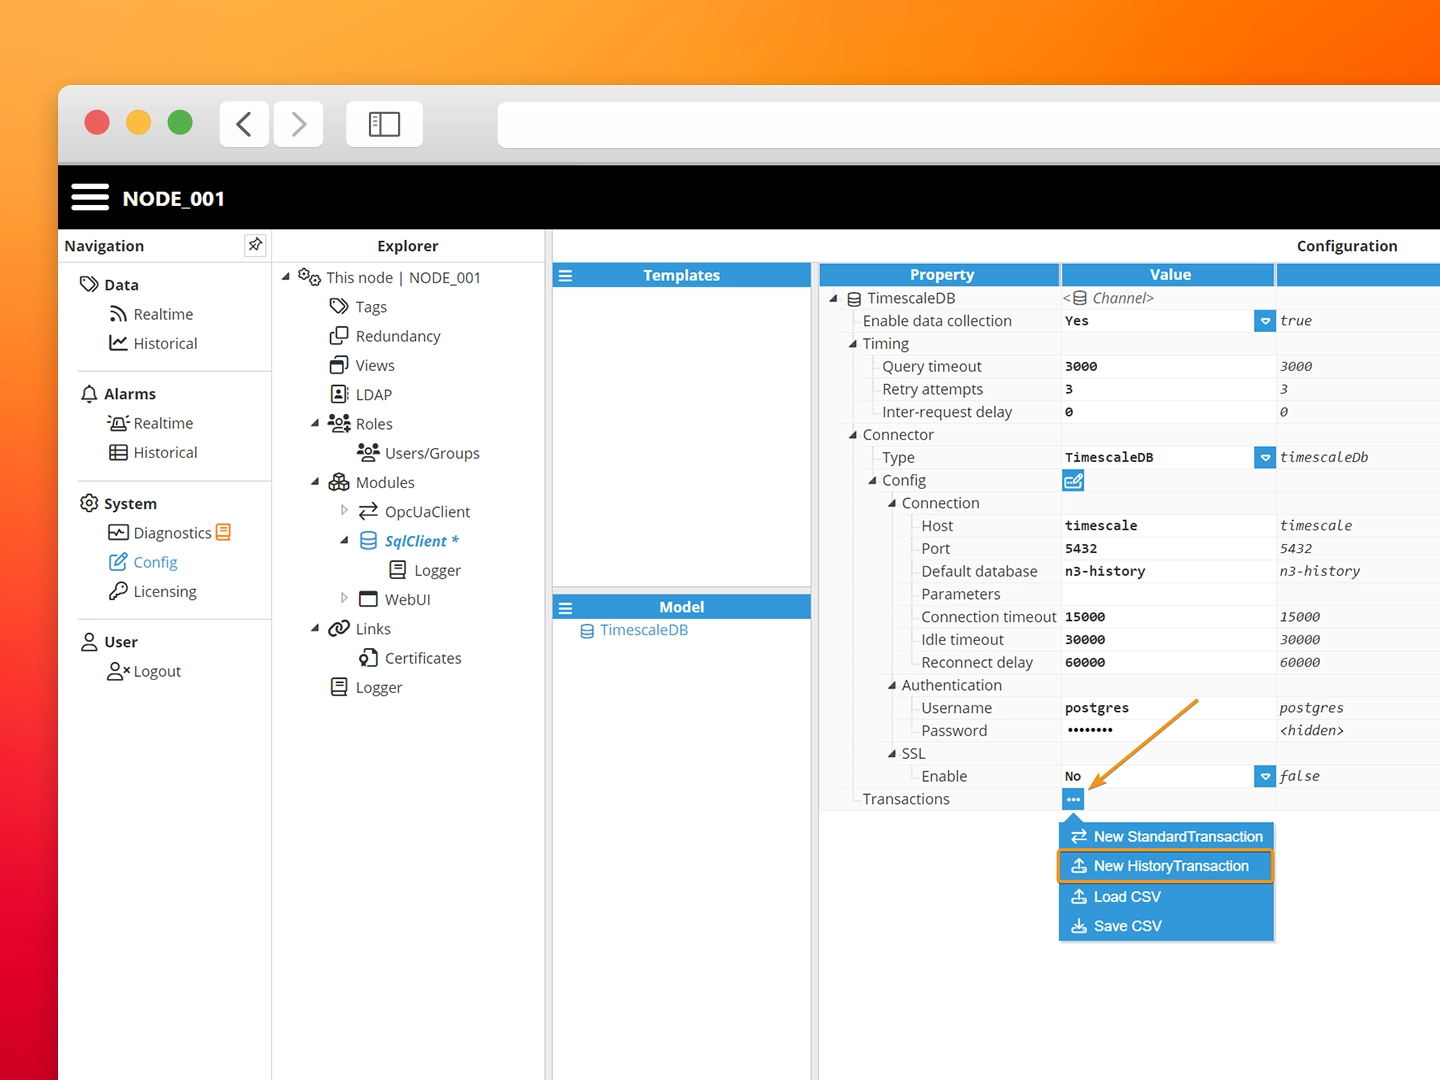
Step 6: Click on Transactions and select New HistoryTransaction. A HistoryTransaction transforms any SQL database into a data historian, it subscribes to all events at the configured path, buffers them in memory and inserts them in batches to the target database.
-
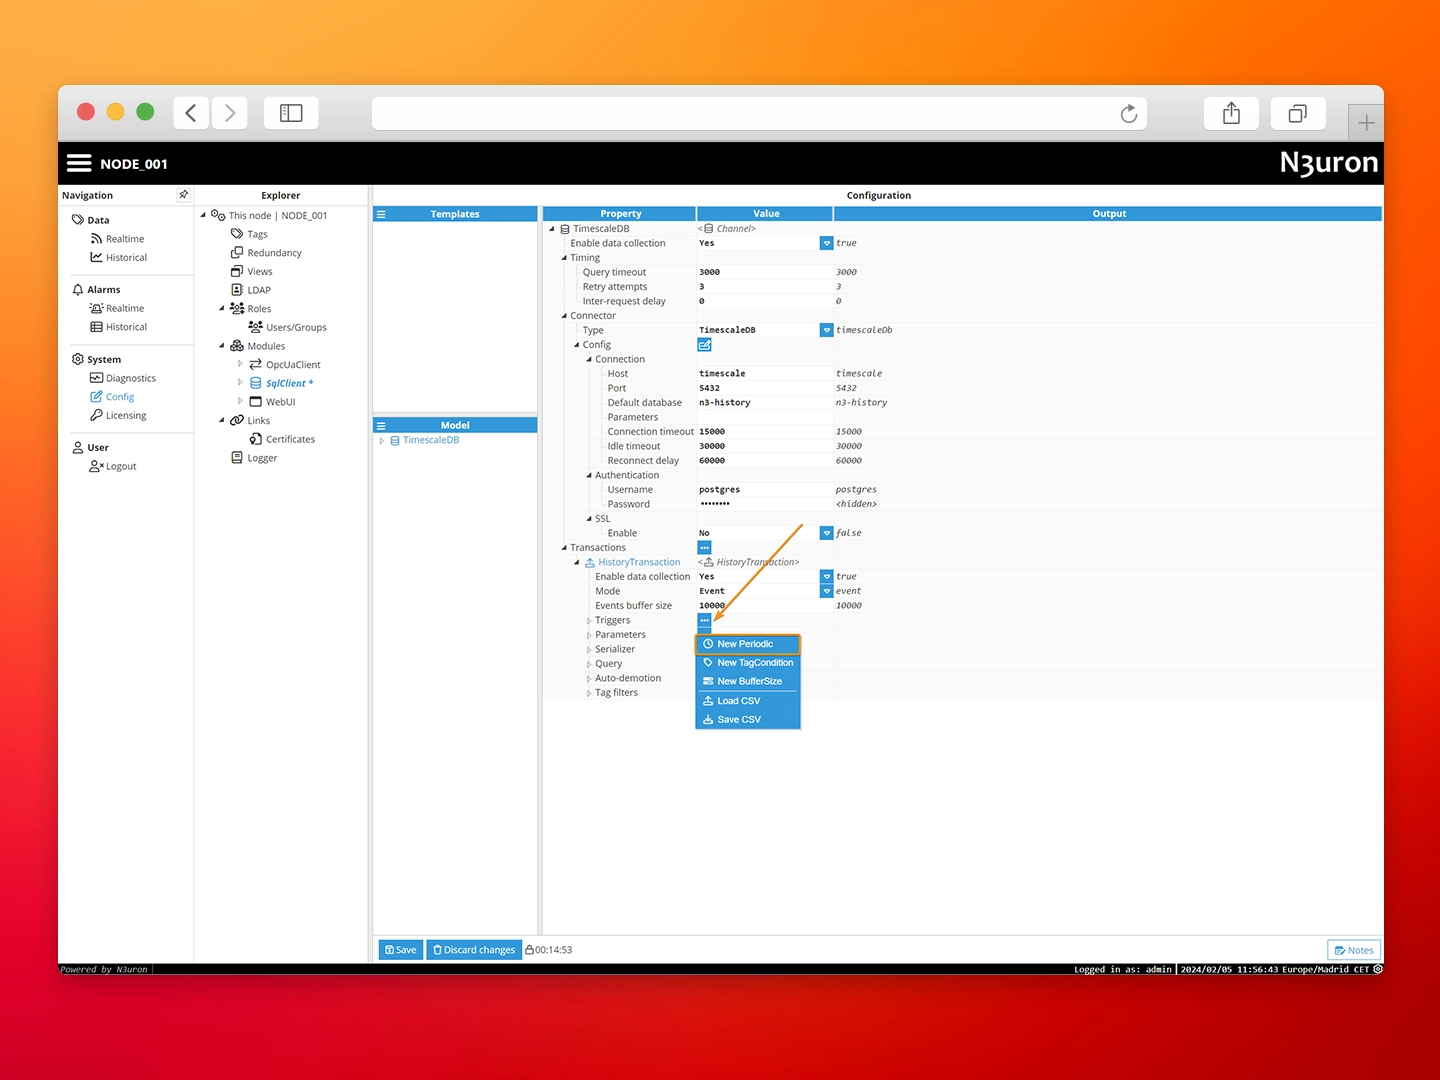
Step 7: Configure a new trigger of type Periodic, this trigger tells the SqlClient when to insert the buffered events into the database.
-
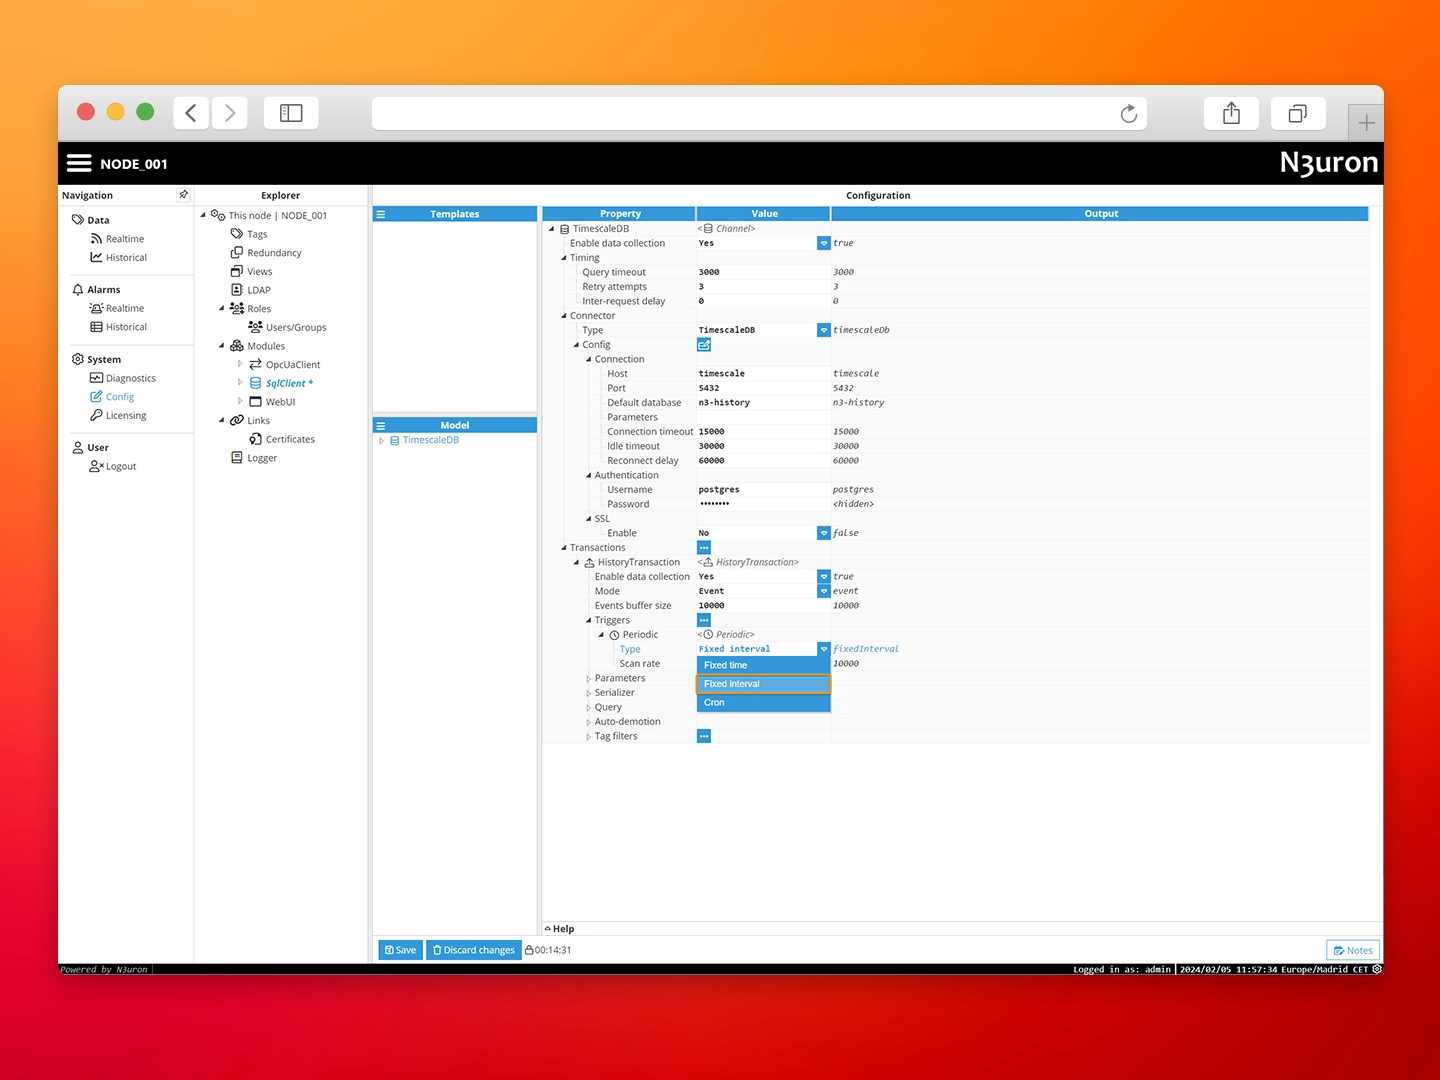
Step 8: For this demo, we’ll use a Periodic trigger of type Fixed interval and keep the default values.
-
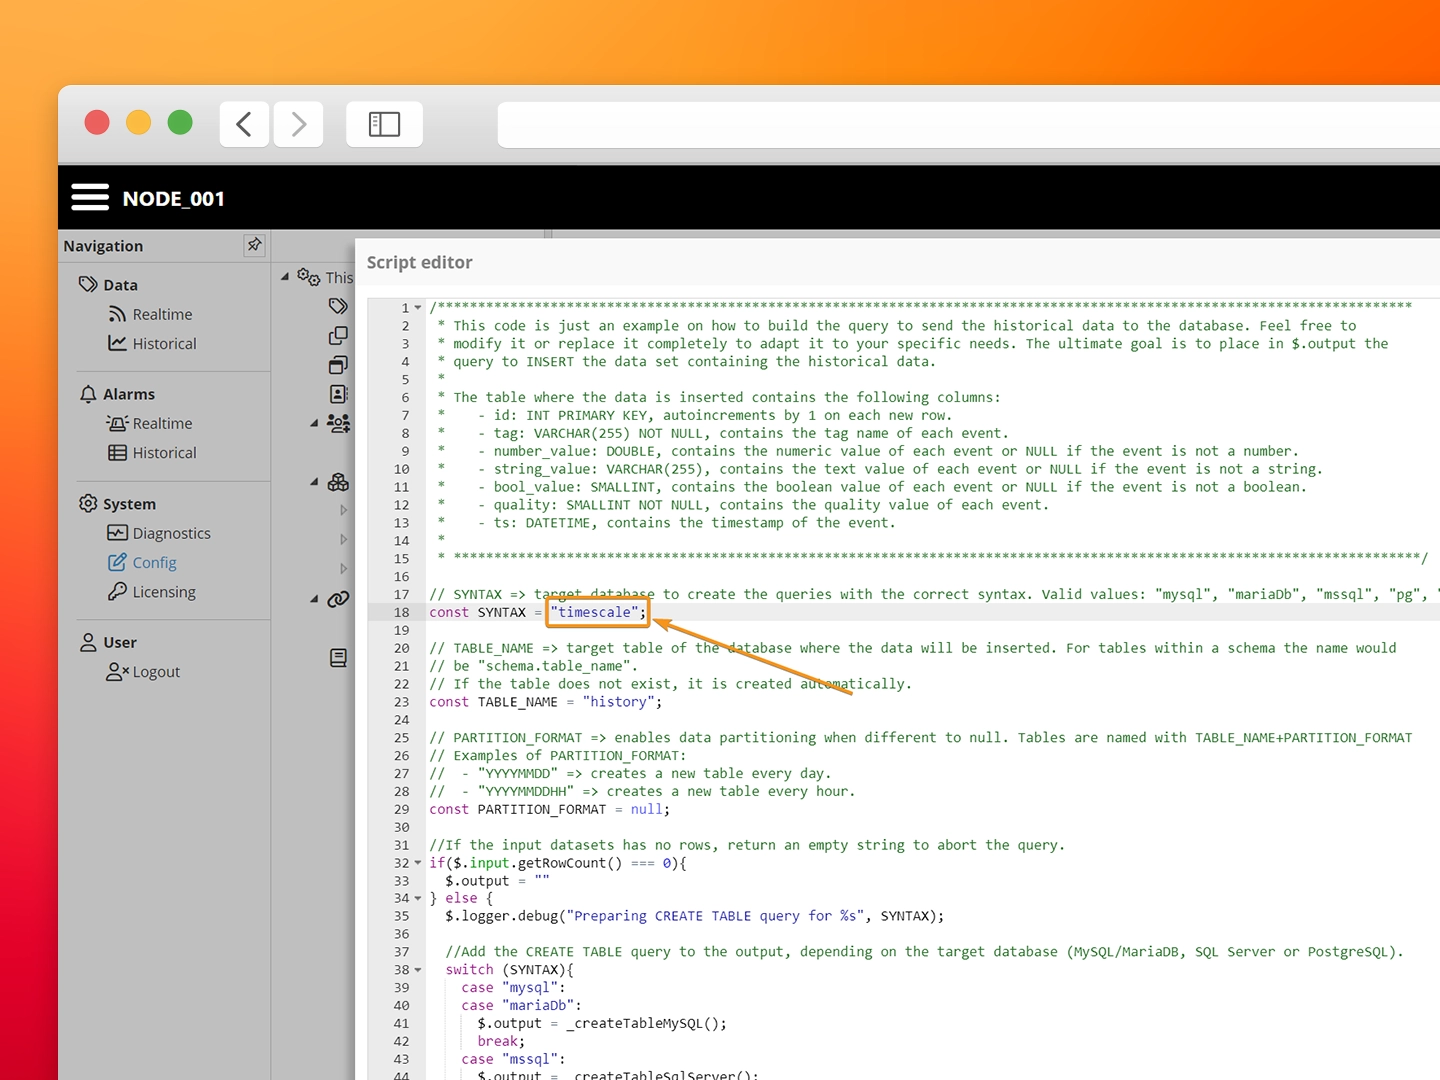
Step 9: Edit the query builder script at Query->Options->Script to select “timescale” as the query syntax.
-
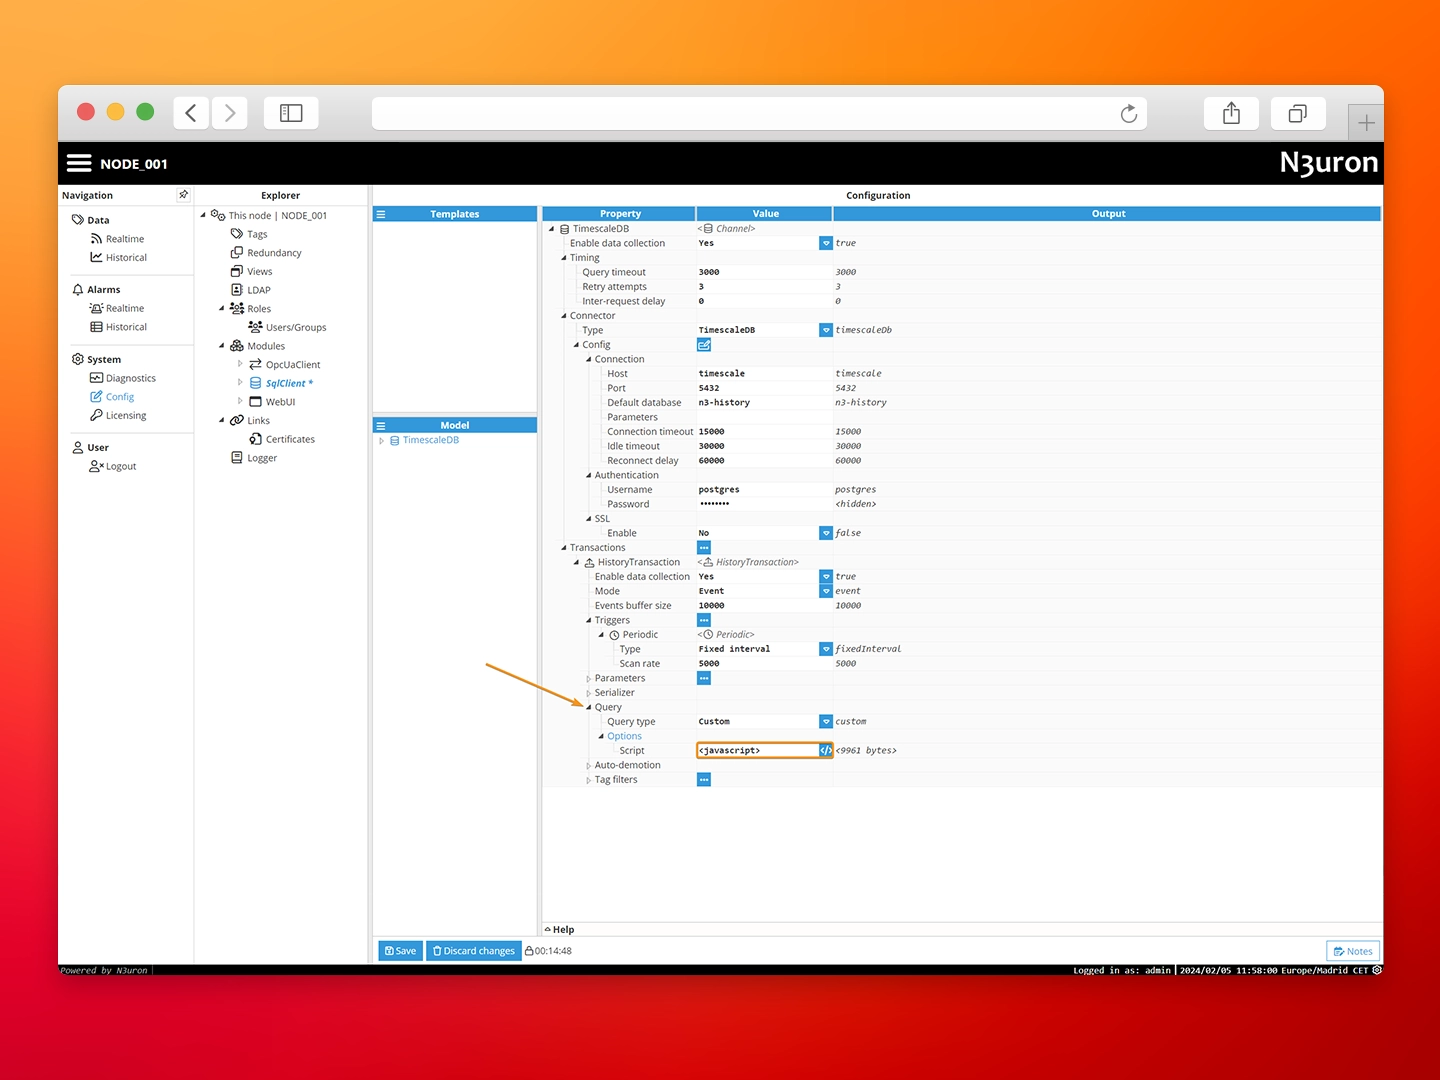
Step 10: As the final step in the SqlClient configuration, we need to create a New TagFilterPath, a tag filter is used to select which tags from the data model will be historized.
-
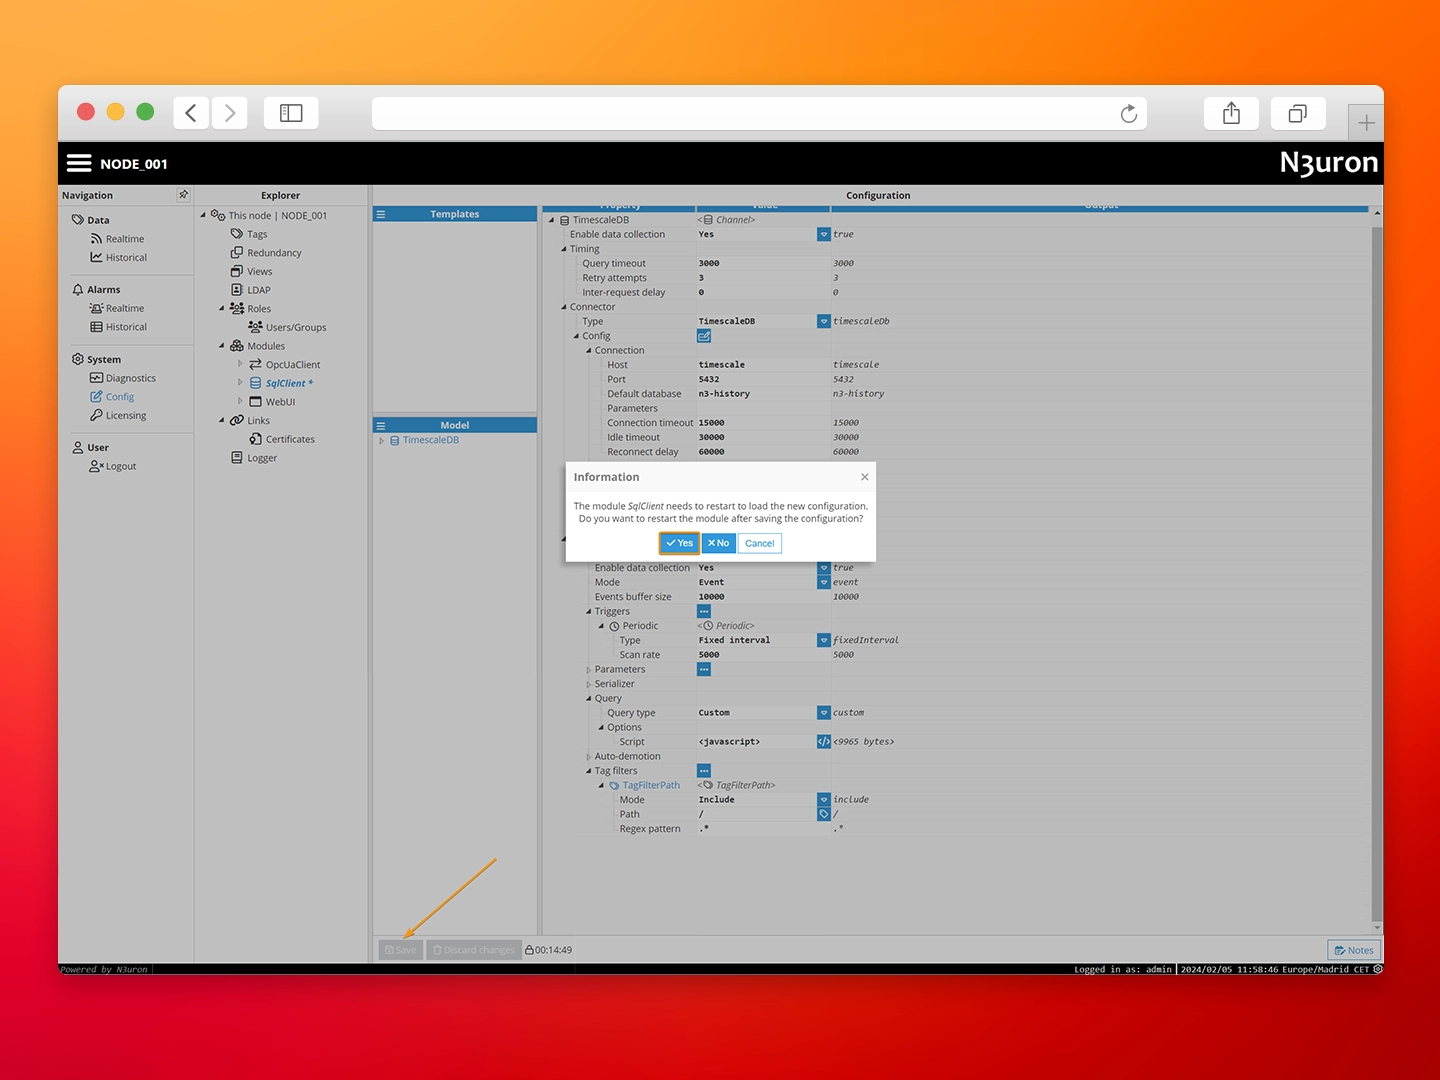
Step 11: Click on Save and reload the module to apply the new configuration.
-
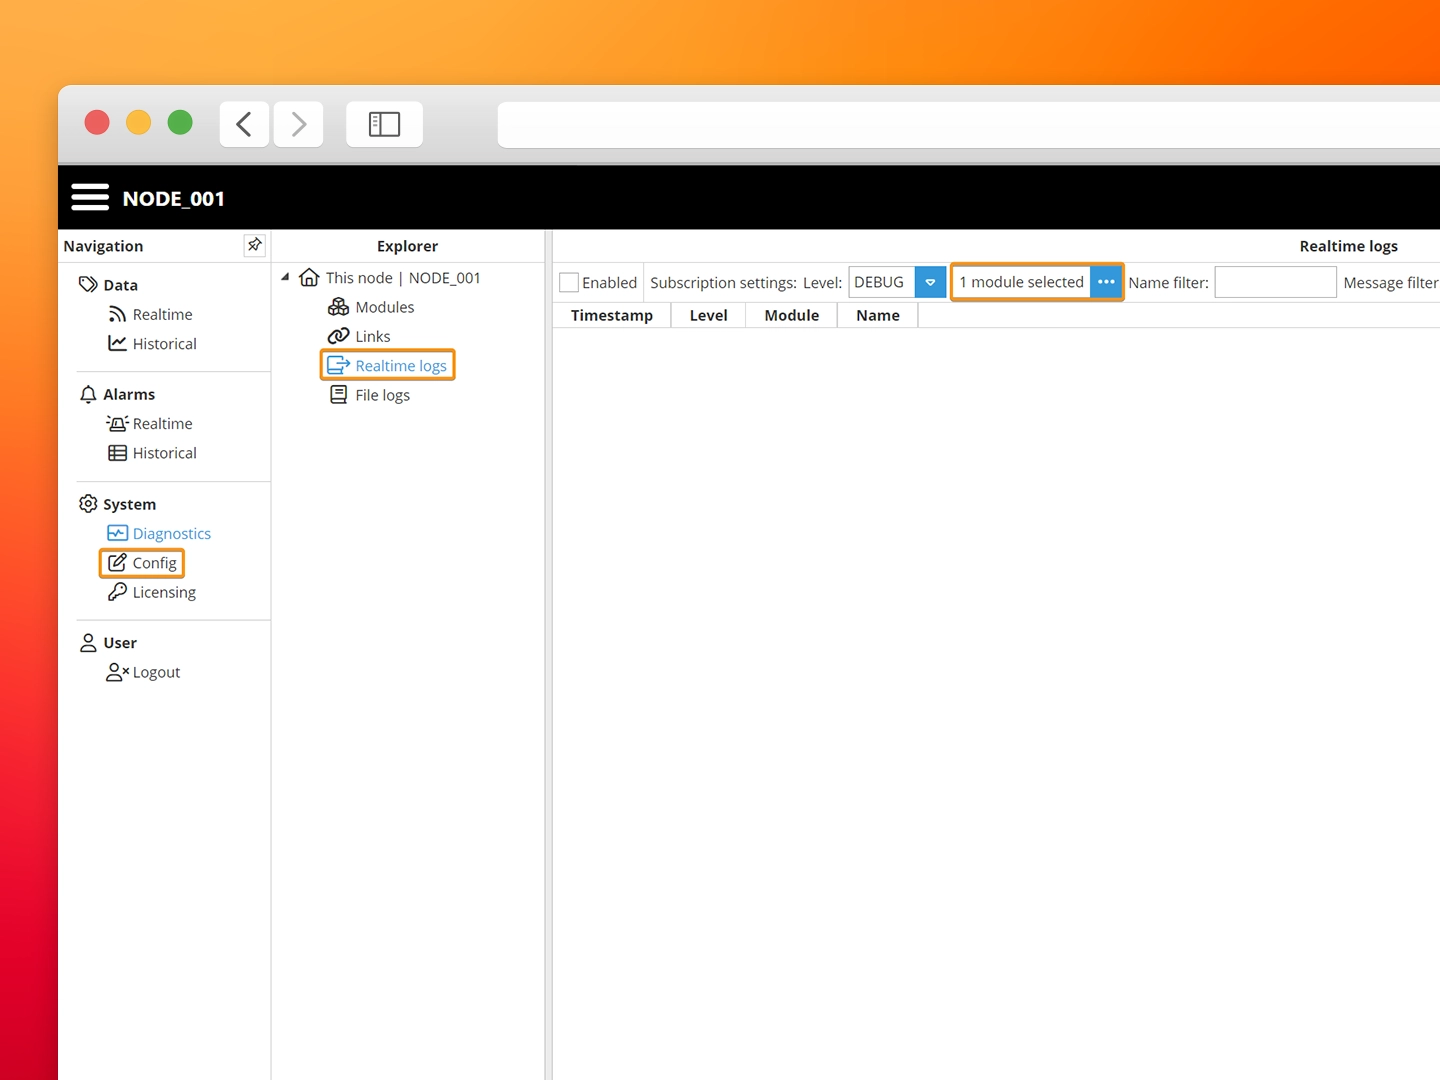
To verify the module is working as expected and transactions are being executed against the database we can use the built-in Diagnostics feature of N3uron to subscribe and watch the logs emitted by the module in real-time.
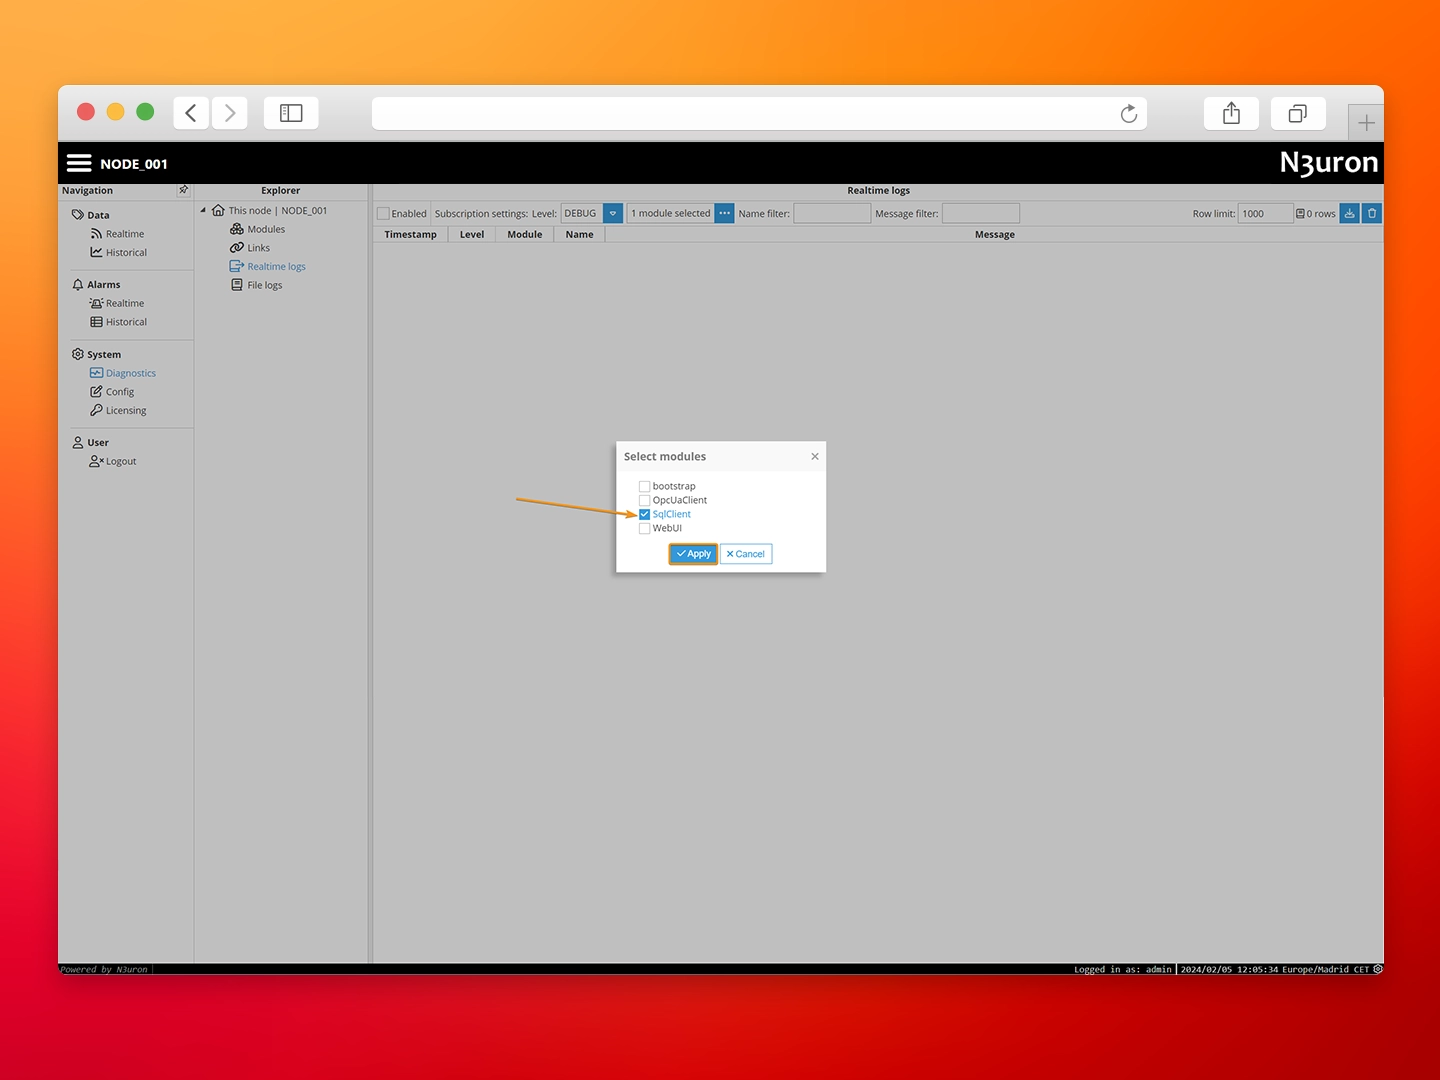
Step 1: Go to Diagnostics->Realtime logs and select the SqlClient module.
-
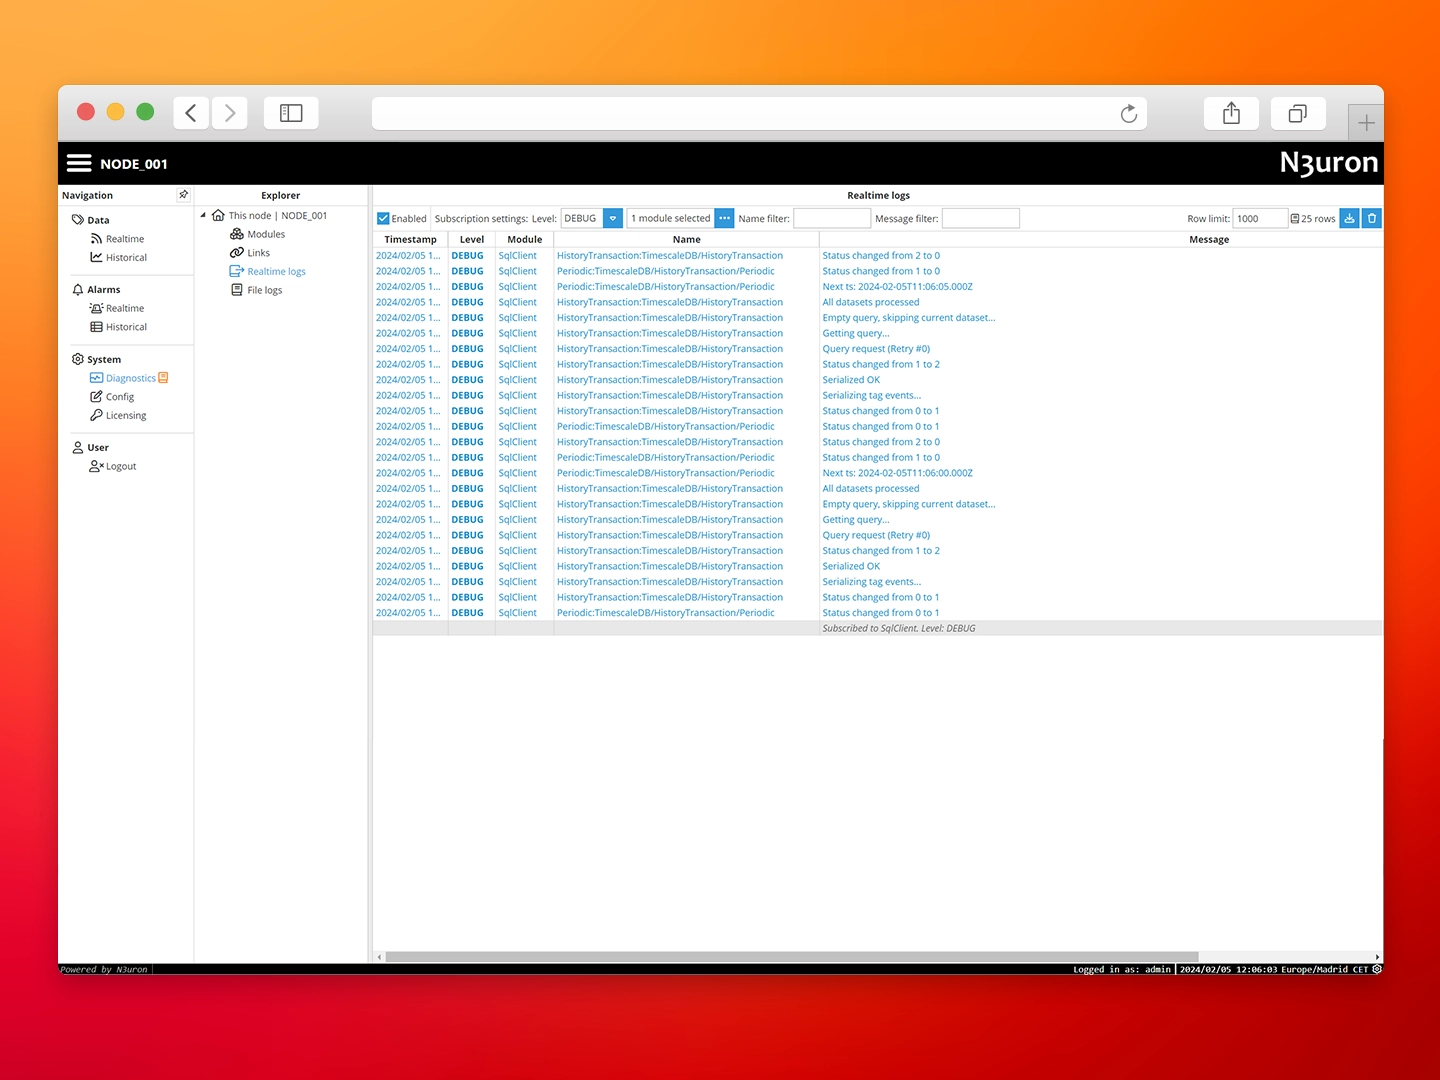
Step 2: Mark the Enabled checkbox and wait a few seconds for the logs to appear. Make sure the log level is set to DEBUG.
Create a GraphQL API with Hasura
Hasura is an open-source project that simplifies and accelerates the process of building scalable and real-time applications by automatically generating a GraphQL API from the existing databases. Thus, allowing to decouple databases from client applications.
We’ll configure Hasura in two simple steps to generate a GraphQL API to access the historical data inside TimescaleDB.
Open http://localhost:8080 to access the Hasura container.
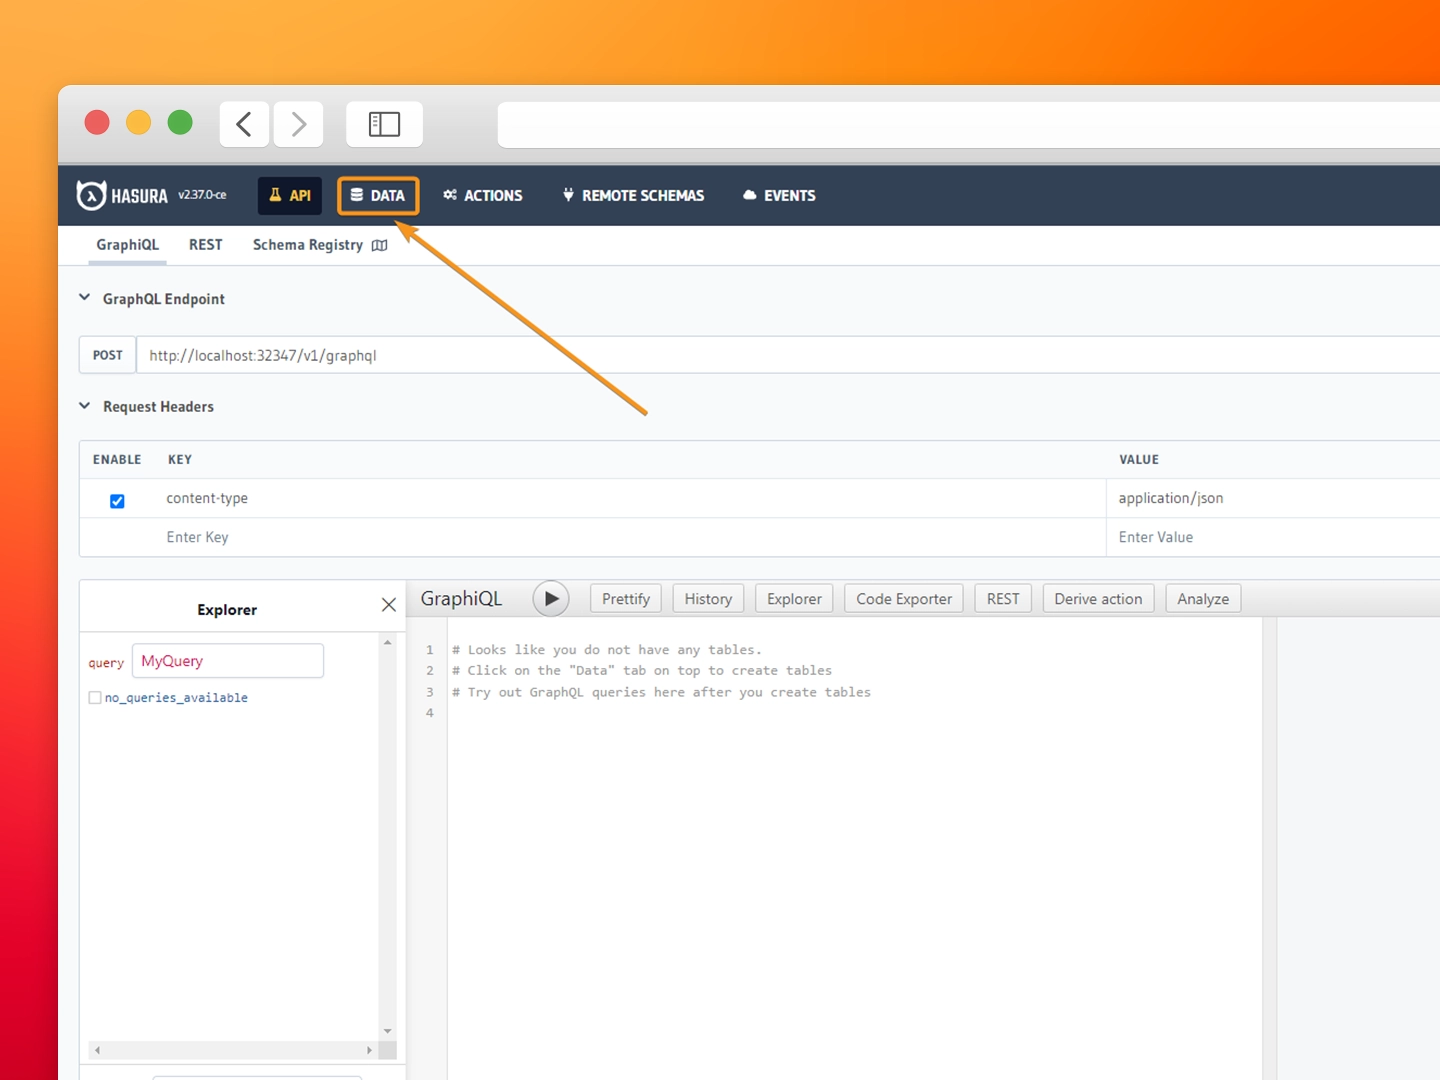
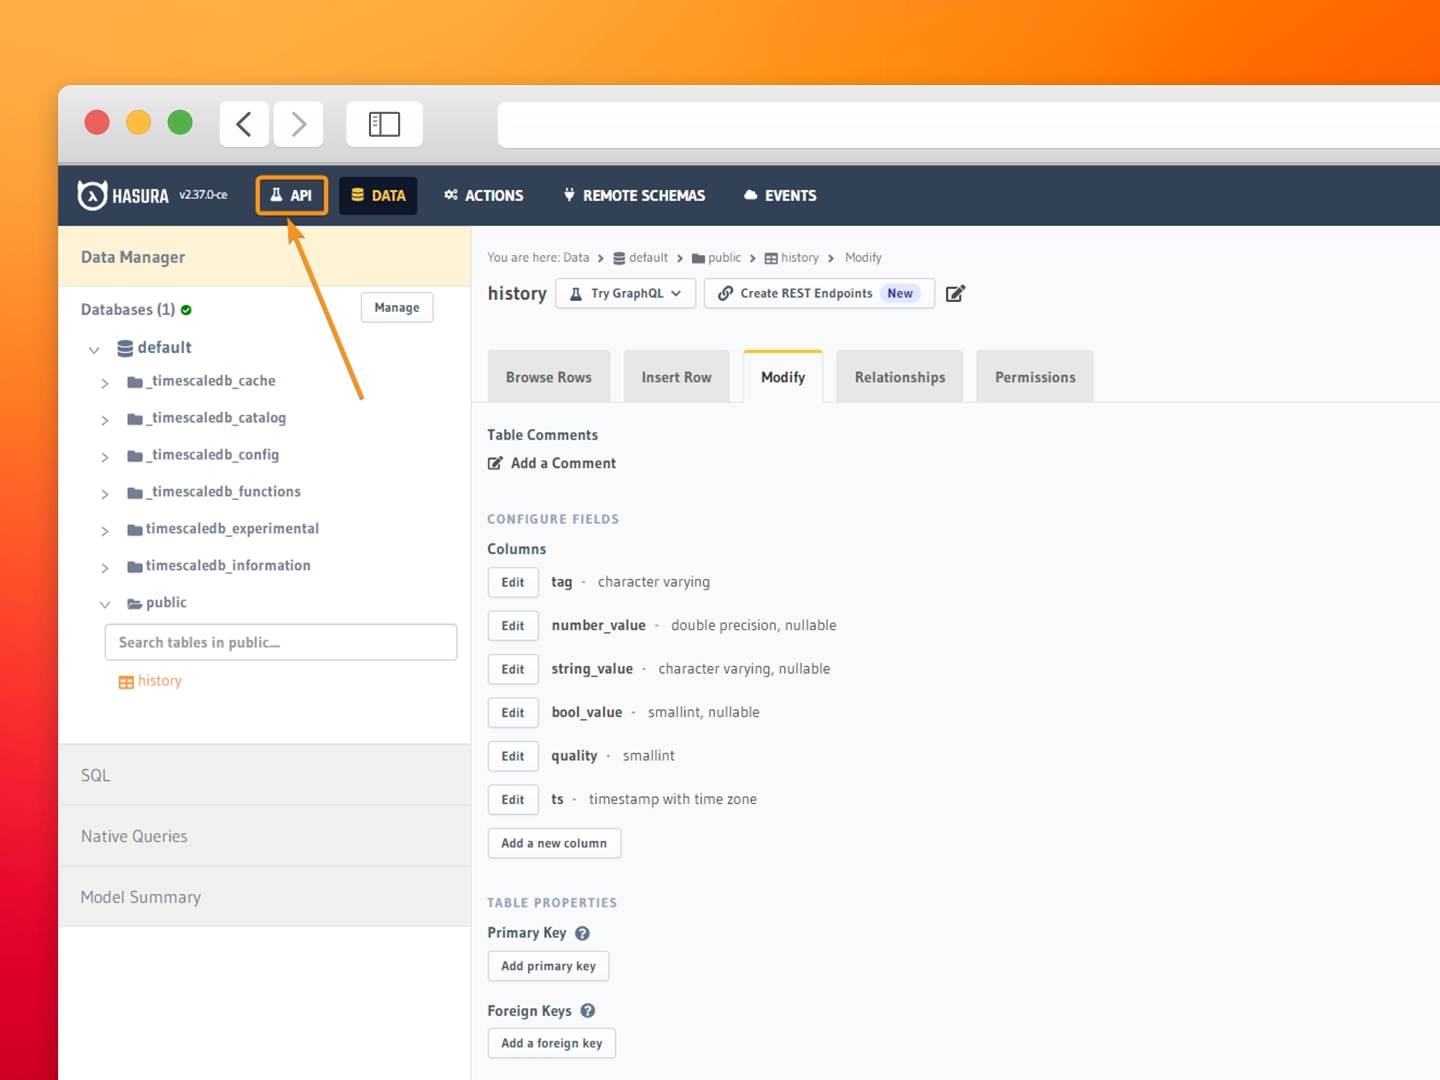
- Step 1: Navigate to the Data page.
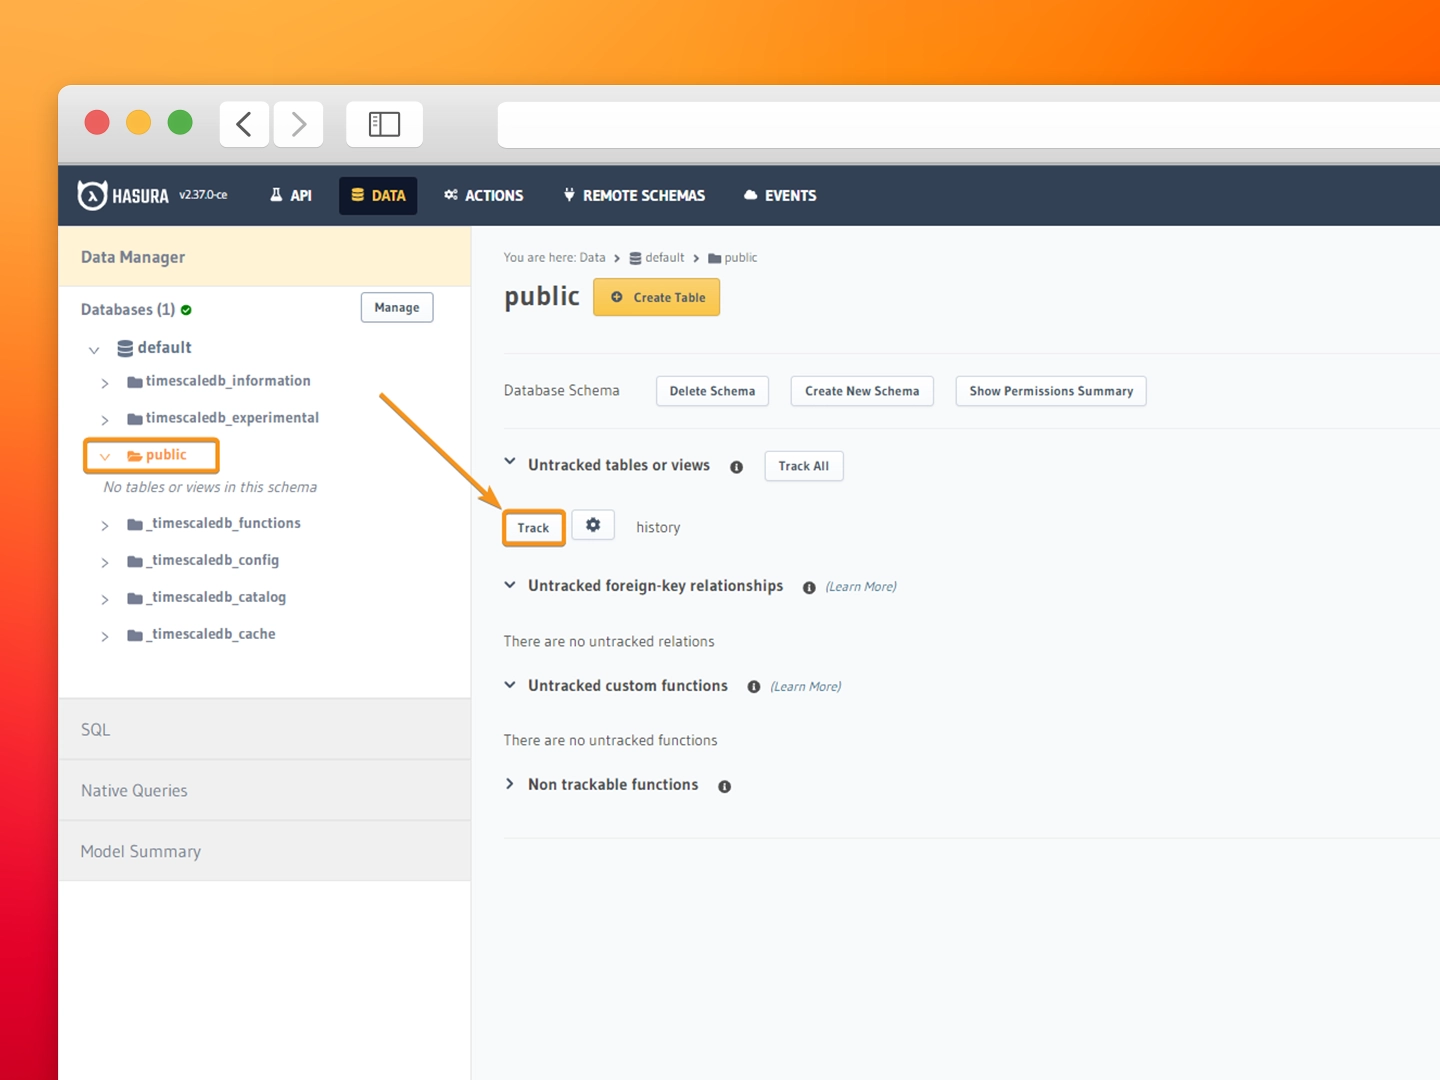
- Step 2: Open public inside the default database and click Track on the history table. This tells Hasura to auto-generate the GraphQL schema for the table.
-
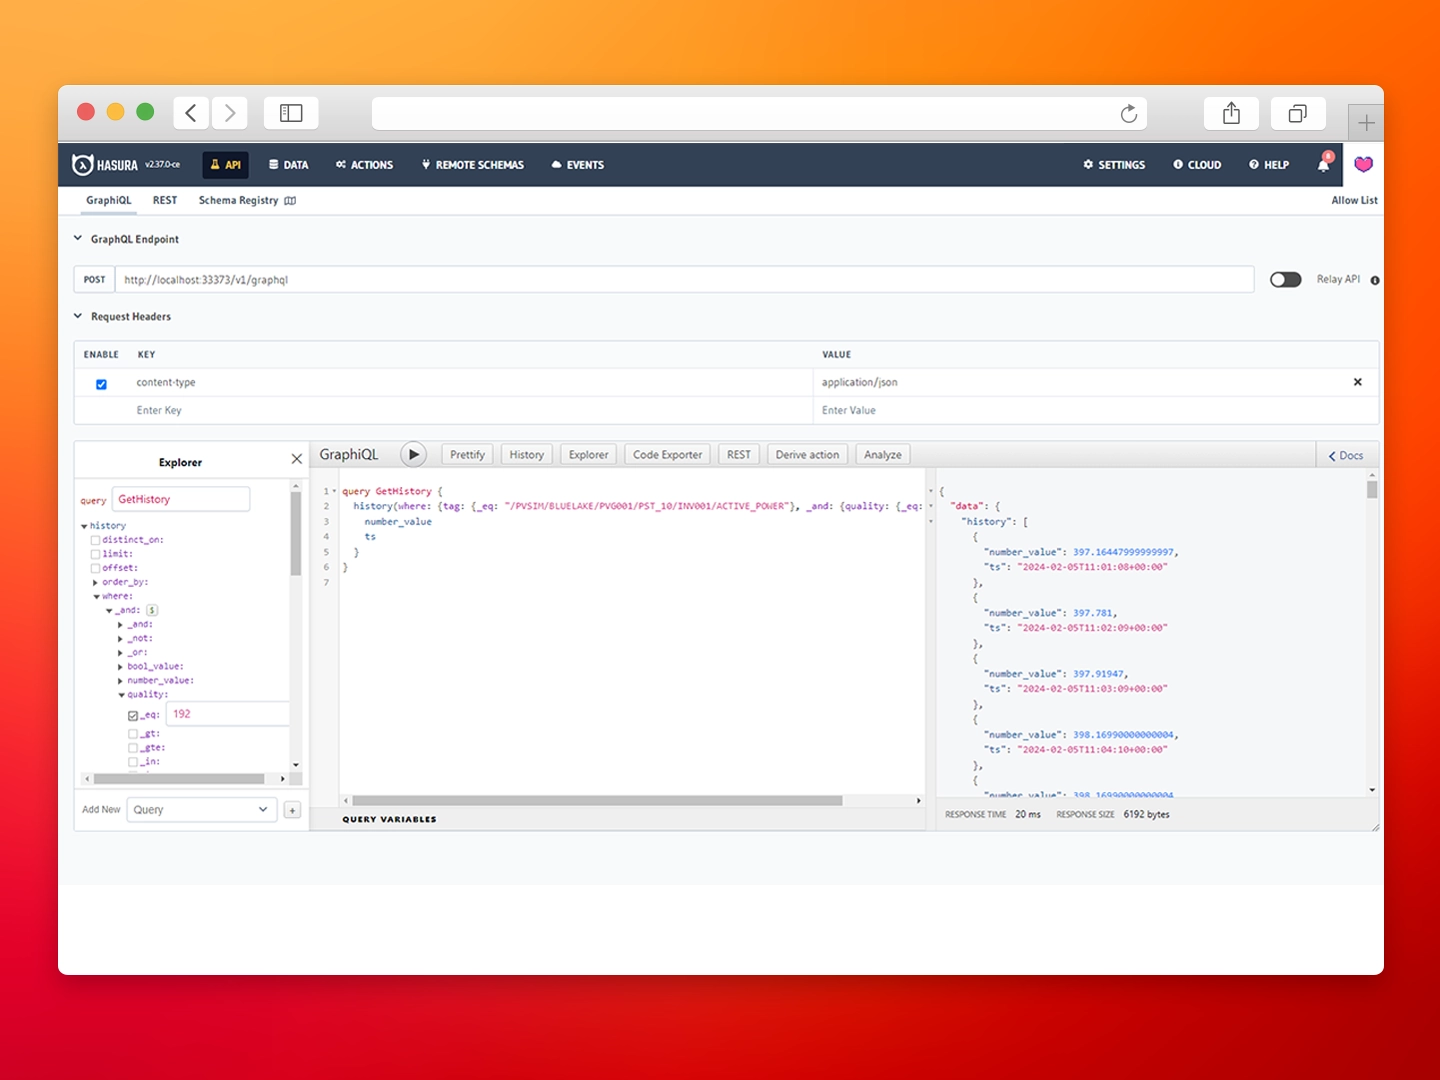
Step 3: Navigate back to the API page.
-
Step 4: Use the built-in query tool to build, generate and run GraphQL queries against your API.
Here is an example query:
query GetHistory {
history(where: {tag: {_eq: “/PVSIM/BLUELAKE/PVG001/PST_10/INV001/ACTIVE_POWER”}, _and: {quality: {_eq: “192”}}}) {
number_value
ts
}
}
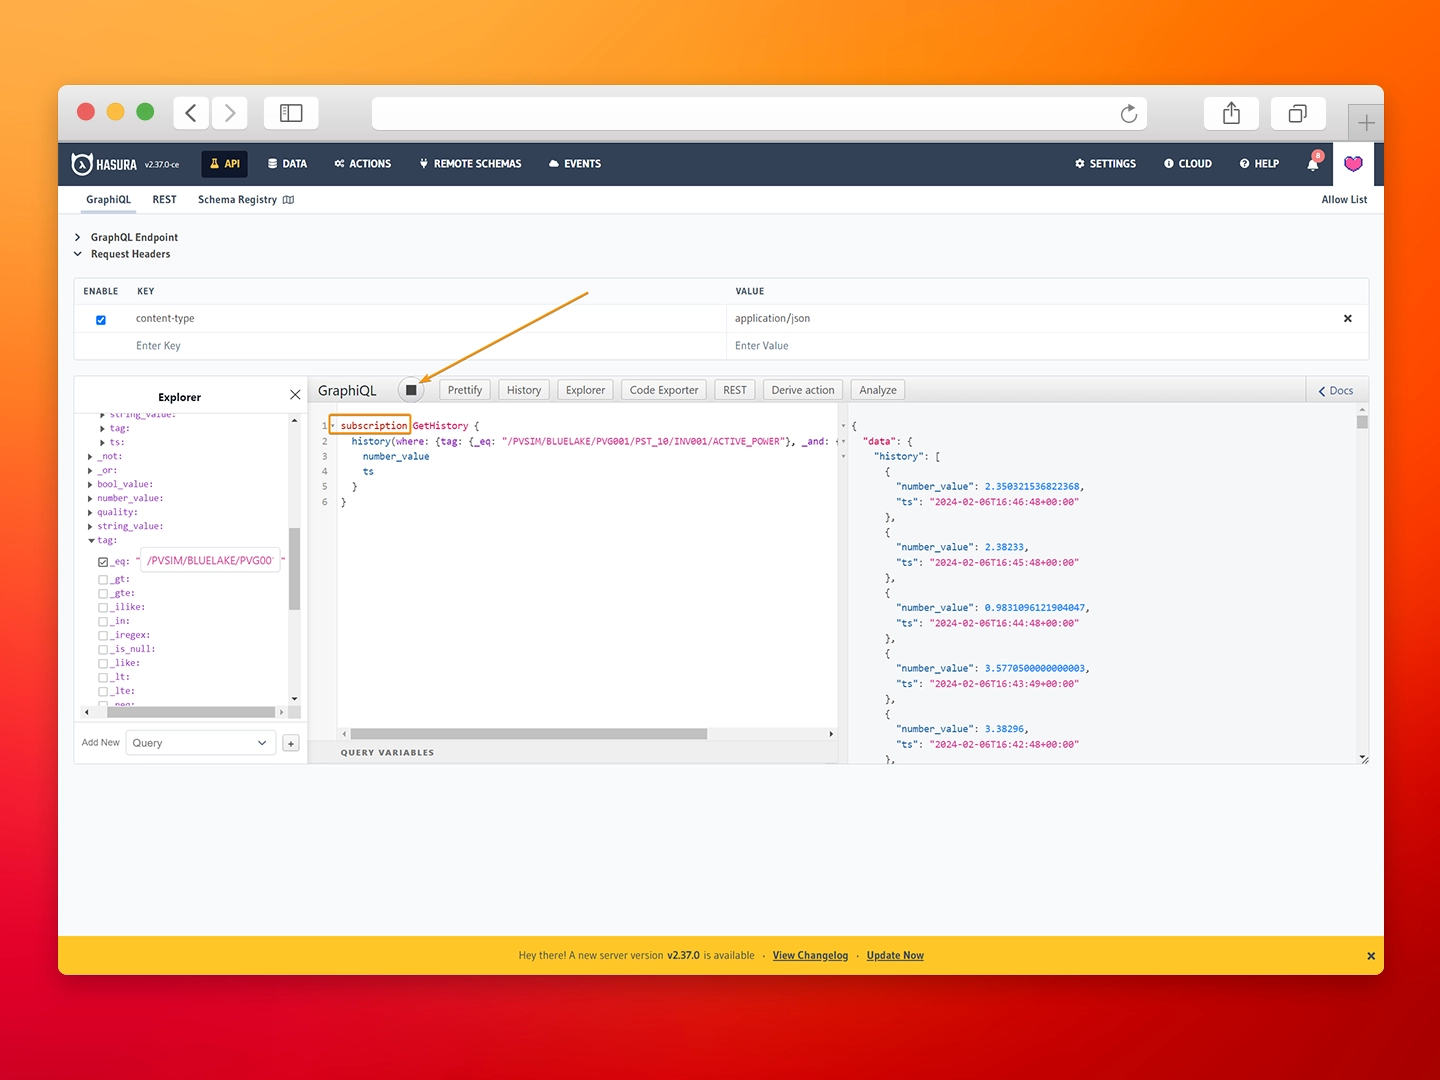
The following query uses the real-time subscription feature of GraphQL to receive changes from the server instead of constantly polling.
subscription GetHistory {
history(where: {tag: {_eq: “/PVSIM/BLUELAKE/PVG001/PST_10/INV001/ACTIVE_POWER”}, _and: {quality: {_eq: “192”}}}) {
number_value
ts
}
}
Conclusion
In summary, we have demonstrated the potential of GraphQL to integrate Hasura, and TimescaleDB with the N3uron IIoT and DataOps platform to create a powerful, scalable, and efficient industrial data management solution.
By leveraging N3uron’s capabilities for data collection and standardization, TimescaleDB’s robust time-series storage, and Hasura’s instant GraphQL API generation, organizations can transform their data management and analytics capabilities
This solution enables real-time and historical data access in a standardized and scalable manner, paving the way for advanced analytics, machine learning, and other data-driven applications.
Go ahead and try it yourself! Download N3uron today and accelerate your digital transformation.
